Lexus RX (RX 350L, RX450h) 2016-2026 Repair Manual: Disassembly
DISASSEMBLY
CAUTION / NOTICE / HINT
CAUTION:
Wear protective gloves. Sharp areas on the seat frame may injure your hands.
HINT:
- Use the same procedure for the RH side and LH side.
- The following procedure is for the LH side.
PROCEDURE
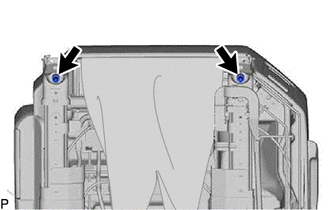
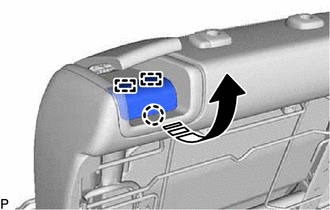
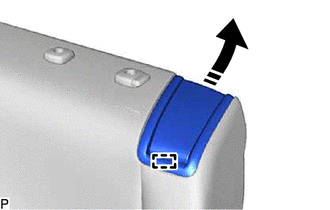
1. REMOVE SEAT ADJUSTER COVER CAP
| (a) Remove the 2 seat adjuster cover caps. |
|
2. REMOVE REAR SEAT COVER CAP LH
(a) Using a screwdriver with its tip wrapped with protective tape, disengage the 2 claws and 2 guides to remove the rear seat cover cap LH as shown in the illustration.
.png)
| *a | Protective Tape |
.png) | Insert Screwdriver Here |
.png) | Remove in this Direction |
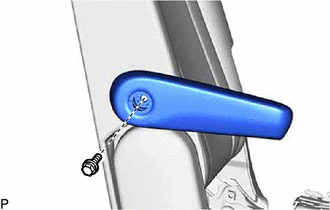
3. REMOVE NO. 1 RECLINING ADJUSTER RELEASE HANDLE LH
| (a) Remove the 3 screws and No. 1 reclining adjuster release handle LH. |
|
.png)
4. REMOVE REAR SEAT LOCK CONTROL LEVER SUB-ASSEMBLY LH
| (a) Disengage the 3 hooks. |
|
| (b) Disengage the clamp to disconnect the rear seat reclining control cable. |
|
.png)
| (c) Disengage the hook. |
|
.png)
| (d) Remove the 2 screws. |
|
.png)
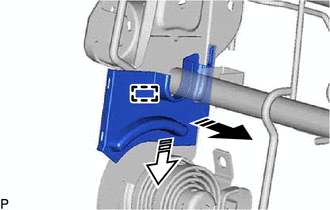
(e) Disengage the guide as shown in the illustration.
| | Remove in this Direction |
| (f) Disconnect the rear seat reclining control cable to remove the rear seat lock control lever sub-assembly LH. |
|
.png)
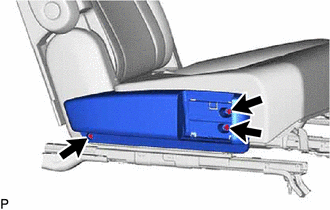
5. REMOVE CUP HOLDER ASSEMBLY
(a) Disengage the claw and 2 guides as indicated by the arrows, in the order shown in the illustration to remove the cup holder assembly.
| | Remove in this Direction (1) | .png) | Remove in this Direction (2) |
6. REMOVE REAR SEAT INNER RECLINING COVER LH
| (a) Remove the 3 screws. |
|
| (b) Disengage the 2 clips and 4 claws to remove the rear seat inner reclining cover LH. |
|
7. REMOVE SEPARATE TYPE REAR SEAT CUSHION COVER WITH PAD
| (a) Disengage the 4 hooks. |
|
(b) w/ Seat Heater System:
| (1) Disconnect the 2 connectors. |
|

(2) Disengage the 3 clamps.
| (c) Disengage the 2 clamps. |
|
| (d) Disengage the hook. |
|
| (e) Disengage the 3 hooks. |
|
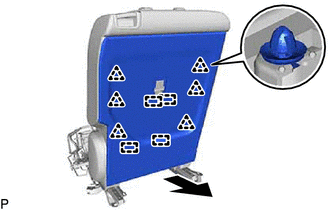
(f) Disengage the 8 hooks and remove the separate type rear seat cushion cover with pad.
8. REMOVE SEPARATE TYPE REAR SEAT CUSHION COVER
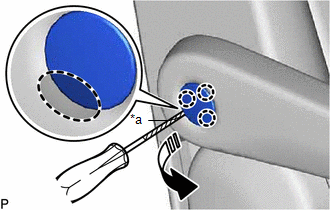
(a) Disengage the fastener.
.png) | Fastener |
| (b) Remove the 5 hog rings. |
|
| (c) Remove the 20 hog rings and separate type rear seat cushion cover from the rear seat cushion pad LH. |
|
.png)
9. REMOVE SEAT COVER WIRE
| (a) Remove the 6 seat cover wires. |
|
.png)
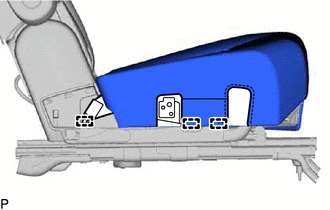
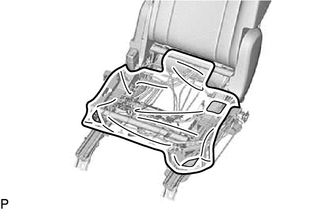
10. REMOVE SEAT HEATER ASSEMBLY (w/ Seat Heater System)
Click here .gif)
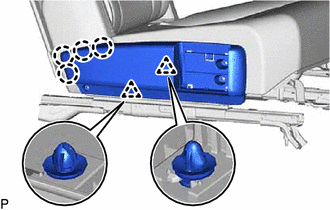
11. REMOVE REAR SEAT CUSHION EDGE PROTECTOR
| (a) Remove the rear seat cushion edge protector. |
|
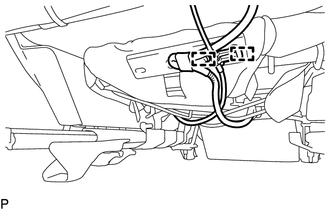
12. REMOVE SEAT HEATER CONTROL SUB-ASSEMBLY LH (w/ Seat Heater System)
| (a) Disconnect the connector. |
|
.png)
(b) Disengage the 2 clamps to remove the seat heater control sub-assembly LH.
13. REMOVE REAR NO. 1 SEAT RECLINING ADJUSTER INSIDE COVER
(a) Disengage the clip and 3 claws to remove the rear No. 1 seat reclining adjuster inside cover as shown in the illustration.
| | Remove in this Direction |
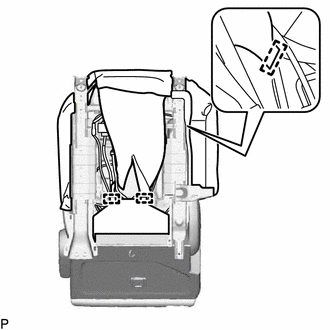
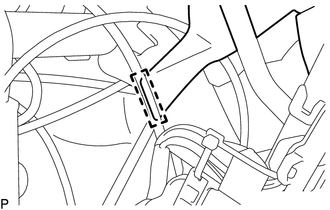
14. REMOVE REAR SEAT INNER BELT ASSEMBLY LH
Click here
15. REMOVE REAR SEATBACK COVER LH
| (a) Disengage the 2 claws as shown in the illustration. |
|
.png)
(b) Disengage the 6 claws to remove the rear seatback cover LH as shown in the illustration.
| | Remove in this Direction |
16. REMOVE REAR SEATBACK BOARD CARPET ASSEMBLY LH
| (a) Disengage the 6 clips and 4 guides as shown in the illustration. |
|
(b) Disengage the 3 guides to remove the rear seatback board carpet assembly LH as shown in the illustration.
| | Remove in this Direction |
17. REMOVE NO. 2 SEAT CUSHION COVER SUB-ASSEMBLY LH
| (a) Disengage the 2 guides to disconnect the rubber band and remove the No. 2 seat cushion cover sub-assembly LH. |
|
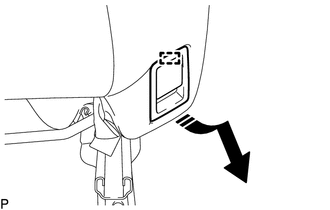
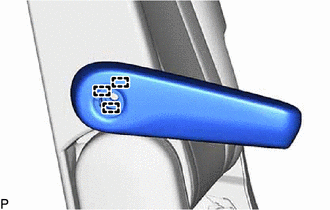
18. REMOVE NO. 1 SEAT ARMREST CAP
(a) Using a screwdriver with its tip wrapped with protective tape, disengage the 3 claws and remove the No. 1 seat armrest cap as shown in the illustration.
| *a | Protective Tape |
| | Place Hand Here |
| | Remove in this Direction |
19. REMOVE REAR SEAT ARMREST ASSEMBLY LH
| (a) Remove the bolt. |
|
| (b) Disengage the 3 guides and remove the rear seat armrest assembly LH. |
|
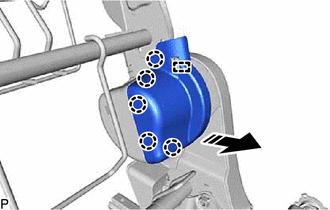
20. REMOVE REAR SEAT UPPER RECLINING COVER LH
(a) Disengage the claw and 2 guides to remove the rear seat upper reclining cover LH as shown in the illustration.
| | Remove in this Direction |
21. REMOVE RECLINING REMOTE CONTROL LEVER SUB-ASSEMBLY LH
| (a) Remove the 2 screws. |
|

(b) Disengage the guide as shown in the illustration.
| | Remove in this Direction |
| (c) Disconnect the reclining adjusting cable assembly to remove the reclining remote control lever sub-assembly LH. |
|
.png)
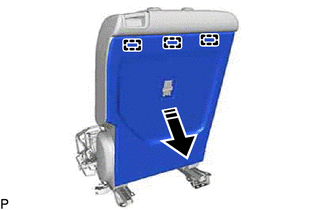
22. REMOVE SEPARATE TYPE REAR SEATBACK COVER WITH PAD
| (a) Disengage the 12 hooks. |
|
(b) Disengage the 4 claws and remove the 2 rear No. 1 seat headrest support assemblies as shown in the illustration.
.png)
| | Remove in this Direction |
| (c) Remove the nut and disconnect the 2 rear seatback cover brackets. |
|
.png)
(d) Remove the separate type rear seatback cover with pad.
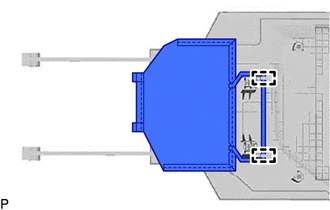
23. REMOVE SEPARATE TYPE REAR SEATBACK COVER
(a) Disengage the 2 fasteners.

| | Fastener |
| (b) Remove the 2 hog rings. |
|
.png)
| (c) Remove the 11 hog rings and separate type rear seatback cover from the separate type rear seatback pad. |
|
.png)
24. REMOVE RECLINING REMOTE CONTROL BEZEL LH
| (a) Remove the reclining remote control bezel LH. |
|
.png)
25. REMOVE SEAT COVER WIRE
| (a) Remove the 5 seat cover wires. |
|
.png)
26. REMOVE SEAT HEATER ASSEMBLY (w/ Seat Heater System)
Click here
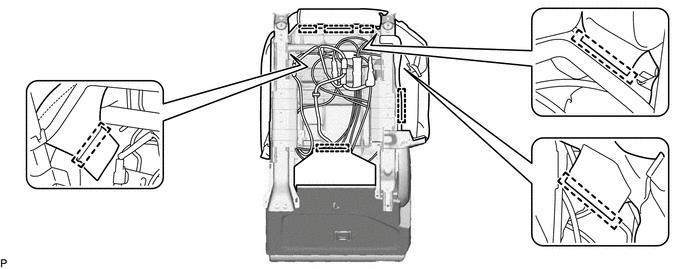
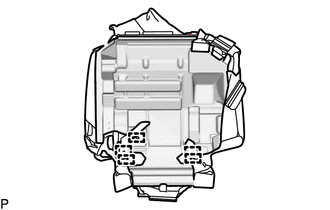
27. REMOVE REAR SEAT AIRBAG ASSEMBLY LH
Click here
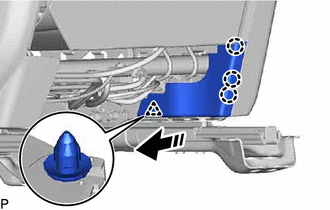
28. REMOVE REAR SEATBACK EDGE PROTECTOR
| (a) Remove the rear seatback edge protector. |
|
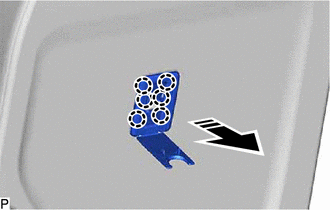
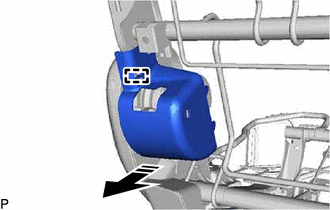
29. REMOVE NO. 1 RECLINING LINK COVER LH
(a) Disengage the 5 claws and guide to remove the No. 1 reclining link cover LH as shown in the illustration.
| | Remove in this Direction |
30. REMOVE NO. 2 RECLINING LINK COVER LH
(a) Disengage the guide to remove the No. 2 reclining link cover LH as shown in the illustration.
| | Remove in this Direction |
31. REMOVE REAR NO. 1 SEAT RECLINING COVER LH
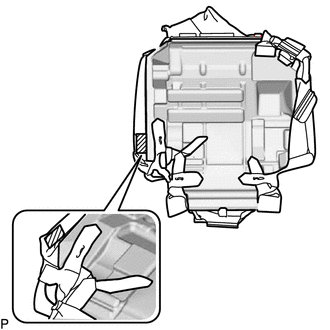
(a) Disengage the 10 claws and 6 guides as indicated by the arrows, in the order shown in the illustration to remove the rear No. 1 seat reclining cover LH.
| | Remove in this Direction (1) |
| | Remove in this Direction (2) |
32. REMOVE REAR NO. 1 SEAT RECLINING ADJUSTER INSIDE COVER
(a) Disengage the 2 claws and guide as indicated by the arrows, in the order shown in the illustration to remove the rear No. 1 seat reclining adjuster inside cover.
.png)
| | Remove in this Direction (1) |
| | Remove in this Direction (2) |
33. REMOVE REAR NO. 1 SEAT RECLINING ADJUSTER INSIDE COVER
(a) Disengage the 2 claws, clip and guide to remove the rear No. 1 seat reclining adjuster inside cover as shown in the illustration.
.png)
| | Remove in this Direction |
34. REMOVE REAR NO. 1 SEAT RECLINING ADJUSTER INSIDE COVER
(a) Disengage the 6 claws and 2 guides as indicated by the arrows, in the order shown in the illustration to remove the rear No. 1 seat reclining adjuster inside cover.
| | Remove in this Direction (1) |
| | Remove in this Direction (2) |
35. REMOVE REAR NO. 1 SEAT RECLINING ADJUSTER INSIDE COVER
(a) Disengage the 2 claws and guide as indicated by the arrows, in the order shown in the illustration to remove the rear No. 1 seat reclining adjuster inside cover.
.png)
| | Remove in this Direction (1) |
| | Remove in this Direction (2) |
36. REMOVE REAR SEAT INNER RECLINING COVER LH
(a) Disengage the claw and guide as indicated by the arrows, in the order shown in the illustration to remove the rear seat inner reclining cover LH.
| | Remove in this Direction (1) |
| | Remove in this Direction (2) |
37. REMOVE REAR SEAT RECLINING SEAT COVER LH
(a) Disengage the 5 claws and guide to remove the rear seat reclining seat cover LH as shown in the illustration.
| | Remove in this Direction |
38. REMOVE REAR SEAT RECLINING SEAT COVER LH
(a) Disengage the guide and remove the rear seat reclining seat cover LH as shown in the illustration.
| | Remove in this Direction (1) |
| | Remove in this Direction (2) |
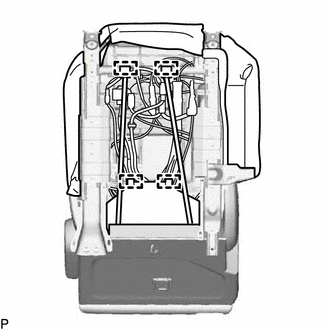
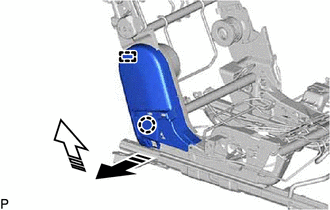
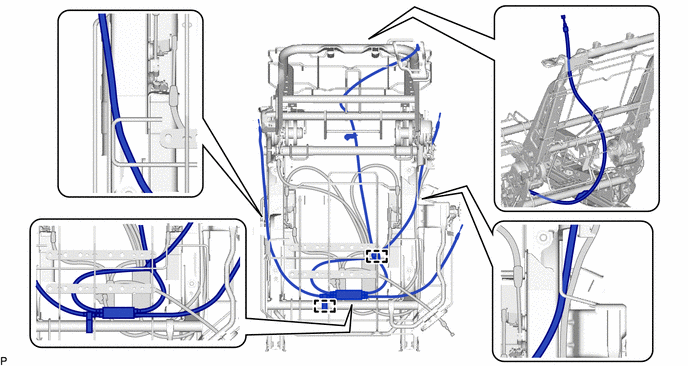
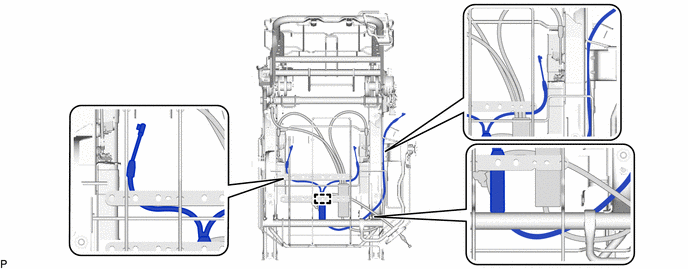
39. REMOVE REAR SEAT WIRE LH
| (a) Disengage the 2 claws and 5 clamps, and remove the rear seat wire LH. |
|

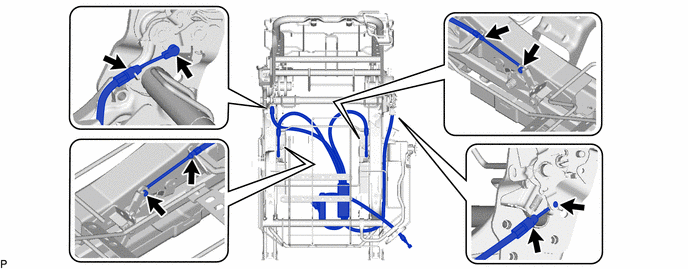
40. REMOVE RECLINING ADJUSTING CABLE ASSEMBLY
(a) Disengage the 6 clamps.
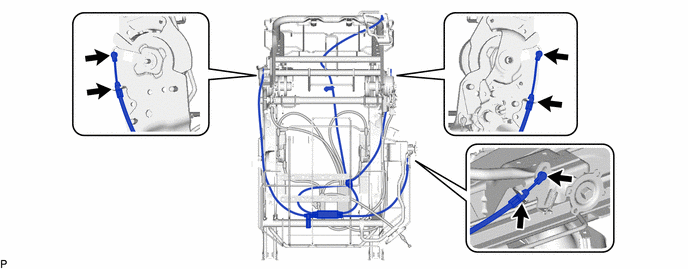
(b) Disengage the 2 clamps and remove the reclining adjusting cable assembly.
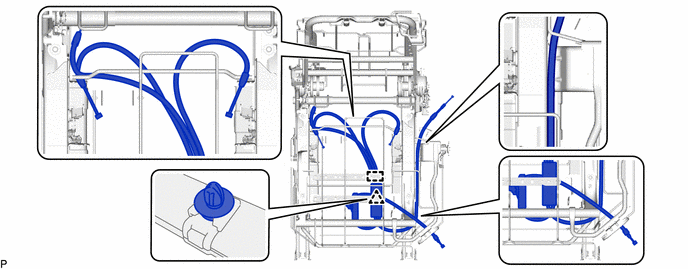
41. REMOVE REAR NO. 1 SEAT TRACK CONTROL CABLE ASSEMBLY LH
(a) Disengage the 6 clamps.
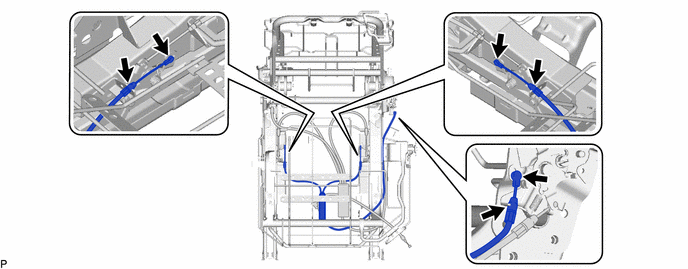
(b) Disengage the clamp and remove the rear No. 1 seat track control cable assembly LH.
42. REMOVE REAR SEAT RECLINING CONTROL CABLE
(a) Disengage the 8 clamps.
(b) Disengage the clip and clamp, and remove the rear seat reclining control cable.
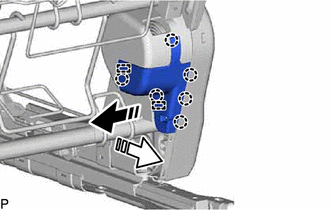
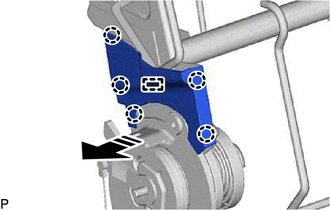
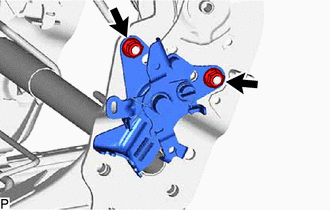
43. REMOVE RECLINING CONTROL LINK SUB-ASSEMBLY LH
| (a) Remove the 2 nuts and reclining control link sub-assembly LH. |
|
44. REMOVE RECLINING CONTROL LINK SUB-ASSEMBLY LH
| (a) Remove the 2 nuts and reclining control link sub-assembly LH. |
|
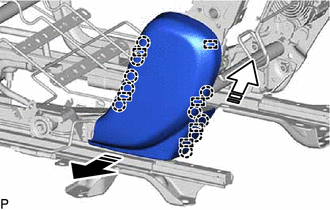
45. REMOVE REAR SEATBACK FRAME SUB-ASSEMBLY LH
(a) Using a T40 "TORX" socket wrench, remove the 6 bolts.
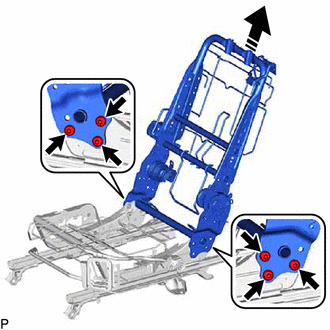
| | Remove in this Direction |
(b) Remove the rear seatback frame sub-assembly LH from the No. 1 seat cushion frame sub-assembly LH as shown in the illustration.
 Installation
...
 Reassembly
REASSEMBLY CAUTION / NOTICE / HINT CAUTION: Wear protective gloves. Sharp areas on the seat frame may injure your hands. HINT:
Use the same procedure for the RH side and LH side.
The following pr ...
Other materials:
Lexus RX (RX 350L, RX450h) 2016-2026 Repair Manual > Sfi System: Crankshaft Position - Camshaft Position Correlation Bank 1 Sensor A (P001600,P001800)
DESCRIPTION In the VVT (Variable Valve Timing) system, the appropriate intake valve open and close timing is controlled by the ECM. The ECM performs intake valve control by performing the following: 1) controlling the intake camshaft, cam timing oil control solenoid assembly, camshaft timing gear bo ...
Lexus RX (RX 350L, RX450h) 2016-2026 Repair Manual > 4wd Control Switch: Inspection
INSPECTION PROCEDURE 1. INSPECT AWD LOCK SWITCH (COMBINATION SWITCH ASSEMBLY) (a) Inspect the AWD lock switch: (1) Measure the resistance according to the value(s) in the table below. Standard Resistance: Tester Connection Condition Specified Condition 5 (B) - 1 (GND) AWD lock switc ...
Lexus RX (RX 350L, RX450h) 2016-{YEAR} Owners Manual
- For your information
- Pictorial index
- For safety and security
- Instrument cluster
- Operation of each component
- Driving
- Lexus Display Audio system
- Interior features
- Maintenance and care
- When trouble arises
- Vehicle specifications
- For owners
Lexus RX (RX 350L, RX450h) 2016-{YEAR} Repair Manual

0.0091