Lexus RX (RX 350L, RX450h) 2016-2026 Repair Manual: Reassembly
REASSEMBLY
CAUTION / NOTICE / HINT
HINT:
- Use the same procedure for the RH side and LH side.
- The following procedure is for the LH side.
PROCEDURE
1. PRECAUTION
NOTICE:
After turning the engine switch off, waiting time may be required before disconnecting the cable from the negative (-) battery terminal. Therefore, make sure to read the disconnecting the cable from the negative (-) battery terminal notices before proceeding with work.
Click here .gif)
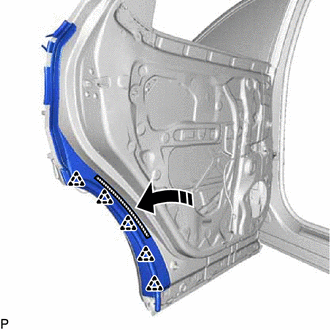
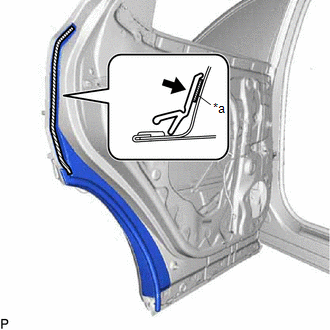
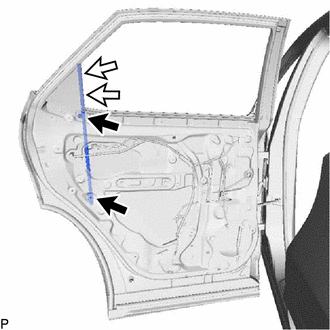
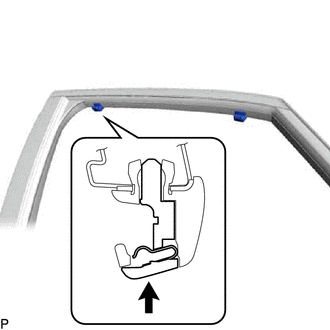
2. INSTALL REAR DOOR NO. 3 WEATHERSTRIP
(a) Clean the rear door panel.
(b) Remove the release paper from a new rear door No. 3 weatherstrip.
HINT:
After removing the release paper, keep the exposed adhesive free from foreign matter.
(c) Engage the claw and install the rear door No. 3 weatherstrip.
.png)
.png) | Double-sided Tape |
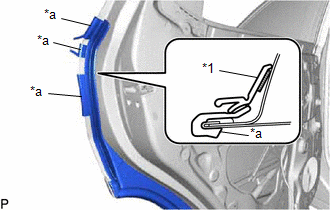
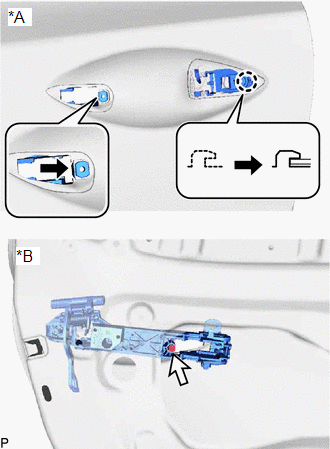
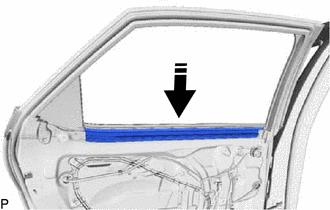
3. INSTALL REAR DOOR PANEL PROTECTOR
(a) Clean the surface of the rear door panel.
(1) Remove any remaining double-sided tape from the rear door panel.
(2) Wipe off any adhesive residue with cleaner.
(b) Remove the release paper from a new rear door panel protector.
HINT:
After removing the release paper, keep the exposed adhesive free from foreign matter.
(c) Engage the 5 clips and attach the double-sided tape as shown in the illustration.
.png) | Install in this Direction |
| | Double-sided Tape |
NOTICE:
Make sure to firmly press the double-sided tape portion of the rear door panel protector to securely attach it.
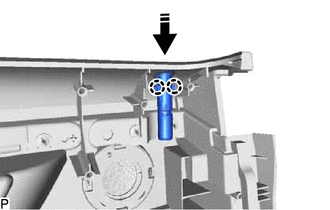
| (d) Temporarily install the rear door panel protector as shown in the illustration. |
|
(e) Remove the release paper from the rear door panel protector.
NOTICE:
Make sure that each positioning tab is not moved out of place when removing the release paper.
(f) While holding each positioning tab so that the rear door panel protector does not move, press the double-sided tape portion of the rear door panel protector to attach it.
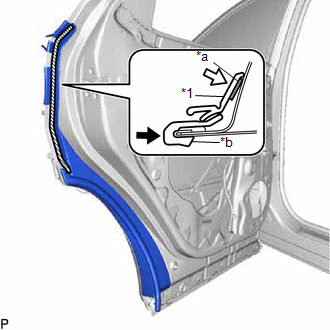
| *a | Double-sided Tape |
| *b | Positioning Tab |
| *1 | Rear Door Panel Protector |
.png) | Press |
.png) | Attach |
(g) While pressing the rear door panel protector as shown in the illustration, remove each positioning tab from the rear door panel protector.
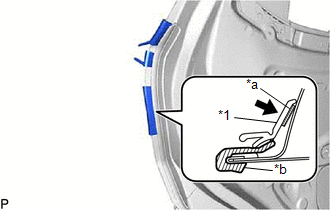
| *a | Double-sided Tape |
| *b | Positioning Tab |
| *1 | Rear Door Panel Protector |
| | Press |
(h) Firmly press the double-sided tape to securely attach it and install the rear door panel protector as shown in the illustration.
| *a | Double-sided Tape |
| | Press |
4. INSTALL REAR DOOR LOWER OUTSIDE MOULDING SUB-ASSEMBLY
Click here
5. INSTALL REAR DOOR OUTSIDE MOULDING SUB-ASSEMBLY
Click here
6. REPAIR INSTRUCTION
Click here
7. INSTALL REAR INNER BLACK OUT TAPE
Click here
8. INSTALL REAR DOOR OUTSIDE STRIPE
Click here
9. INSTALL REAR DOOR LOWER OUTSIDE STRIPE
Click here
10. INSTALL REAR DOOR REAR WINDOW FRAME MOULDING
Click here
11. INSTALL REAR DOOR UPPER WINDOW FRAME MOULDING
Click here
12. INSTALL REAR DOOR WINDOW FRAME MOULDING SUB-ASSEMBLY
Click here
13. INSTALL REAR DOOR BELT MOULDING ASSEMBLY
Click here
14. INSTALL REAR DOOR PANEL CUSHION
| (a) Engage the claw to install the rear door panel cushion. |
|
.png)
15. INSTALL REAR DOOR OUTSIDE HANDLE FRAME SUB-ASSEMBLY
(a) Apply MP grease to the sliding parts of the rear door outside handle frame sub-assembly.
| (b) Engage the claw as shown in the illustration. |
|
(c) Using a T30 "TORX" socket wrench, install the rear door outside handle frame sub-assembly with the screw.
Torque:
4.0 N·m {41 kgf·cm, 35 in·lbf}
16. INSTALL REAR DOOR REAR OUTSIDE HANDLE PAD
(a) Engage the 3 guides as shown in the illustration.
| | Install in this Direction (1) |
.png) | Install in this Direction (2) |
| (b) Engage the claw to install the rear door rear outside handle pad. |
|
.png)
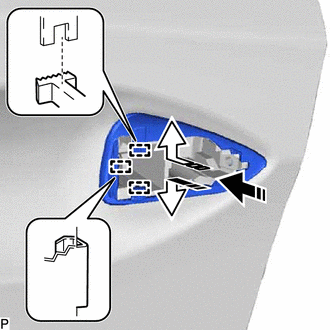
17. INSTALL REAR DOOR FRONT OUTSIDE HANDLE PAD
| (a) Engage the 3 claws to install the rear door front outside handle pad. |
|
.png)
18. INSTALL REAR DOOR OUTSIDE HANDLE COVER
| (a) Engage the claw. |
|
.png)
(b) Using a T30 "TORX" socket wrench, install the rear door outside handle cover with the screw.
Torque:
4.0 N·m {41 kgf·cm, 35 in·lbf}
19. INSTALL REAR DOOR OUTSIDE HANDLE ASSEMBLY
(a) Insert the front end of the rear door outside handle assembly into the rear door outside handle frame sub-assembly.
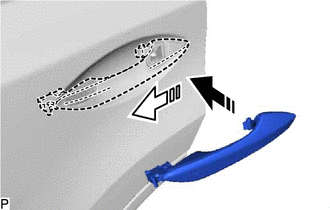
| | Install in this Direction (1) |
| | Install in this Direction (2) |
(b) Insert the rear end of the rear door outside handle assembly into the rear door outside handle frame sub-assembly, then slide the rear door outside handle assembly toward the front of the vehicle to install it.
(c) Move the lever as shown in the illustration and engage the 2 claws to lock the rear door outside handle assembly.
| | Engage in this Direction |
| (d) Connect the connector. |
|
(e) Engage the 2 claws.
20. INSTALL REAR DOOR LOCK ASSEMBLY
Click here
21. INSTALL REAR DOOR WINDOW REGULATOR ASSEMBLY
(a) Apply MP grease to the sliding parts of the rear door window regulator assembly.
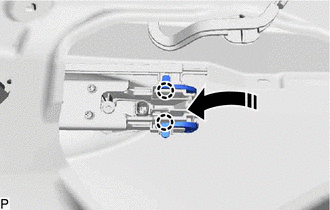
(b) Temporarily install the temporary bolt to the rear door window regulator assembly.
| (c) Temporarily install the rear door window regulator assembly with the 5 bolts. |
|
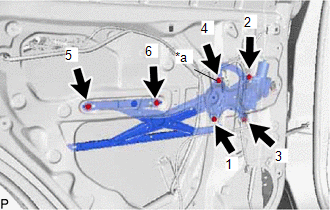
(d) Tighten the temporary bolt and 5 bolts to install the rear door window regulator assembly.
HINT:
Tighten the bolts in the order shown in the illustration.
Torque:
8.0 N·m {82 kgf·cm, 71 in·lbf}
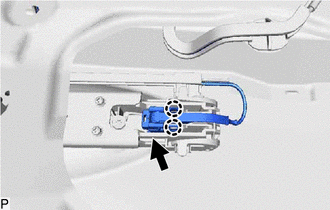
| (e) Engage the 2 claws to install the rear door No. 2 service hole cover. |
|
.png)
22. INSTALL REAR DOOR FRAME GARNISH
| (a) Engage the 3 claws to install the rear door frame garnish. |
|
.png)
23. INSTALL REAR DOOR GLASS SUB-ASSEMBLY
(a) Connect the rear power window regulator switch assembly.
(b) Connect the cable to the negative (-) battery terminal.
(c) Turn the engine switch on (IG).
(d) Move the rear door window regulator assembly so that the door glass bolt holes can be seen.
(e) Turn the engine switch off.
(f) Disconnect the cable from the negative (-) battery terminal.
(g) Disconnect the rear power window regulator switch assembly.
(h) Insert the rear door glass sub-assembly into the rear door panel as shown in the illustration.
| | Install in this Direction (1) |
| | Install in this Direction (2) |
| (i) Install the rear door glass sub-assembly with the 2 bolts. Torque: 8.0 N·m {82 kgf·cm, 71 in·lbf} |
|
.png)
| (j) Install the hole plug. |
|
.png)
24. INSTALL REAR DOOR REAR GUIDE SEAL
| (a) Install the rear door rear guide seal with the 2 screws. |
|
.png)
25. INSTALL REAR DOOR WINDOW DIVISION BAR SUB-ASSEMBLY
(a) Install the rear door window division bar sub-assembly with the 2 bolts and 2 screws.
| | Bolt |
| | Nut |
Torque:
Bolt :
6.2 N·m {63 kgf·cm, 55 in·lbf}
26. INSTALL REAR DOOR GLASS RUN
| (a) Install the rear door glass run. |
|
.png)
27. INSTALL REAR DOOR FRONT BELT SEAL
| (a) Install a new rear door front belt seal. |
|
.png)
28. INSTALL REAR DOOR WEATHERSTRIP
(a) Clean the front door panel sub-assembly.
(b) Remove the release paper from a new front door weatherstrip.
HINT:
After removing the release paper, keep the exposed adhesive free from foreign matter.
| (c) Engage the 25 clips to install the rear door weatherstrip. |
|
.png)
29. INSTALL CURTAIN HOOK (w/ Rear Door Sunshade)
HINT:
Use the same procedure for both curtain hooks.
| (a) Engage the 2 claws to install the curtain hook. |
|
.png)
| (b) Engage the pin as shown in the illustration. |
|
30. INSTALL REAR DOOR CHECK ASSEMBLY
(a) Apply MP grease to the sliding parts of the rear door check assembly.
(b) Clean the bolt hole in the vehicle body.
(c) Clean the threads of the bolt.
(d) Apply adhesive to the threads of the bolt.
Adhesive:
Toyota Genuine Adhesive 1324, Three Bond 1324 or equivalent
(e) Install the rear door check assembly with the 2 nuts and bolt.
.png)
| | Nut |
| | Bolt |
Torque:
Bolt :
29 N·m {296 kgf·cm, 21 ft·lbf}
Nut :
8.0 N·m {82 kgf·cm, 71 in·lbf}
31. INSTALL REAR DOOR SERVICE HOLE COVER
| (a) Engage the 9 clips to install the rear door service hole cover. |
|
.png)
(b) Engage the clamp.
(c) Connect the connector.
32. INSTALL REAR DOOR NO. 2 TRIM BRACKET
| (a) Install the rear door No. 2 trim bracket with the 2 screws. |
|
.png)
33. INSTALL REAR NO. 2 SPEAKER ASSEMBLY
Click here
34. INSTALL REAR SPEAKER ASSEMBLY
Click here
35. INSTALL REAR DOOR INNER GLASS WEATHERSTRIP
(a) Install the rear door inner glass weatherstrip as shown in the illustration.
| | Install in this Direction |
36. INSTALL REAR DOOR LOCK CONTROL KNOB BEZEL
(a) Engage the 2 claws to install the rear door lock control knob bezel as shown in the illustration.
| | Install in this Direction |
37. INSTALL REAR DOOR TRIM BOARD SUB-ASSEMBLY
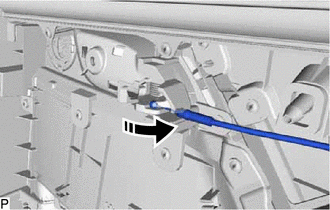
(a) Engage the 2 claws as shown in the illustration to connect the rear door inside locking cable assembly to the rear door trim board sub-assembly.
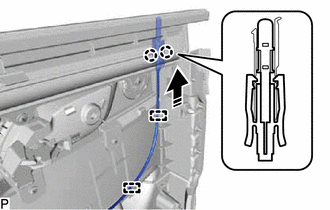
| | Install in this Direction |
(b) Engage the 2 clamps.
(c) Connect the rear door lock remote control cable assembly to the rear door inside handle sub-assembly as shown in the illustration.
| | Install in this Direction |
(d) Connect each connector.
(e) w/o Rear Door Sunshade:
| (1) Engage the 4 claws and guide. |
|
.png)
(f) w/ Rear Door Sunshade:
| (1) Engage the 2 claws and guide. |
|
.png)
| (g) Engage the 10 clips to install the rear door trim board sub-assembly. |
|
.png)
| (h) Install the 3 screws. |
|
.png)
38. INSTALL COURTESY LIGHT ASSEMBLY
Click here
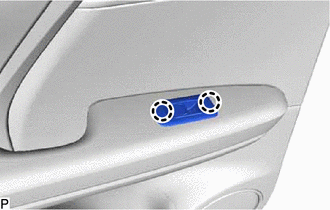
39. INSTALL REAR DOOR ARMREST COVER
| (a) Install the rear door armrest cover. |
|
.png)
40. INSTALL REAR POWER WINDOW REGULATOR SWITCH ASSEMBLY WITH REAR DOOR UPPER ARMREST BASE PANEL
(a) Connect the connector.
| (b) Engage the 2 claws to install the rear power window regulator switch assembly with rear door upper armrest base panel. |
|
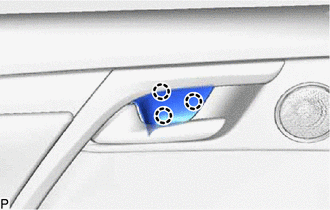
41. INSTALL REAR DOOR INSIDE HANDLE BEZEL PLUG
| (a) Engage the 3 claws to install the rear door inside handle bezel plug. |
|
42. CONNECT CABLE TO NEGATIVE BATTERY TERMINAL
NOTICE:
When disconnecting the cable, some systems need to be initialized after the cable is reconnected.
Click here
43. INITIALIZE POWER WINDOW CONTROL SYSTEM
Click here
44. INSPECT POWER WINDOW OPERATION
Click here
 Adjustment
ADJUSTMENT CAUTION / NOTICE / HINT *a Centering Bolt *b Standard Bolt HINT:
Use the same procedure for the RH side and LH side.
The following procedure is for the LH side.
Center ...

Other materials:
Lexus RX (RX 350L, RX450h) 2016-2026 Repair Manual > Air Conditioning System: Diagnosis System
DIAGNOSIS SYSTEM DESCRIPTION Air conditioning system data and Diagnostic Trouble Codes (DTCs) can be read through the Data Link Connector 3 (DLC3) of the vehicle. When the system seems to be malfunctioning, use the Techstream to check for malfunctions and perform troubleshooting. CHECK DLC3 Check th ...
Lexus RX (RX 350L, RX450h) 2016-2026 Repair Manual > Wireless Charging System: Wireless Charger Illumination Circuit
DESCRIPTION When the light control switch is turned to the tail or head position, this circuit sends an illumination signal to the mobile wireless charger cradle assembly. WIRING DIAGRAM CAUTION / NOTICE / HINT NOTICE: Inspect the fuses for circuits related to this system before performing the foll ...
Lexus RX (RX 350L, RX450h) 2016-{YEAR} Owners Manual
- For your information
- Pictorial index
- For safety and security
- Instrument cluster
- Operation of each component
- Driving
- Lexus Display Audio system
- Interior features
- Maintenance and care
- When trouble arises
- Vehicle specifications
- For owners
Lexus RX (RX 350L, RX450h) 2016-{YEAR} Repair Manual

0.0103