Lexus RX (RX 350L, RX450h) 2016-2026 Repair Manual: Components
COMPONENTS
ILLUSTRATION
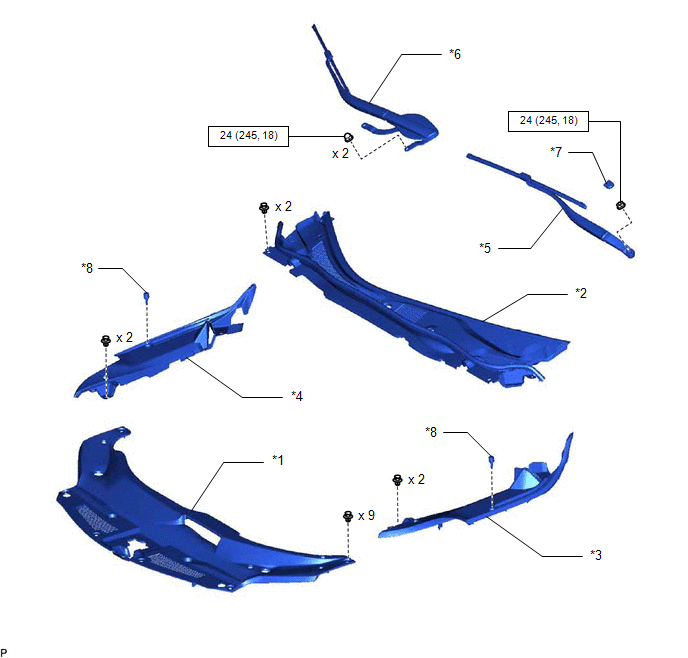
| *1 | COOL AIR INTAKE DUCT SEAL | *2 | COWL TOP VENTILATOR LOUVER SUB-ASSEMBLY |
| *3 | FRONT FENDER REINFORCEMENT SUB-ASSEMBLY TOP LH | *4 | FRONT FENDER REINFORCEMENT SUB-ASSEMBLY TOP RH |
| *5 | FRONT WIPER ARM AND BLADE ASSEMBLY LH | *6 | FRONT WIPER ARM AND BLADE ASSEMBLY RH |
| *7 | FRONT WIPER ARM HEAD CAP | *8 | CENTER HOOD CUSHION |
.png) | N*m (kgf*cm, ft.*lbf): Specified torque | - | - |
ILLUSTRATION

| *1 | FRONT PILLAR GARNISH LH | *2 | FRONT PILLAR GARNISH RH |
| *3 | CLIP | *4 | FRONT PILLAR GARNISH CLIP |
| ● | Non-reusable part | - | - |
ILLUSTRATION
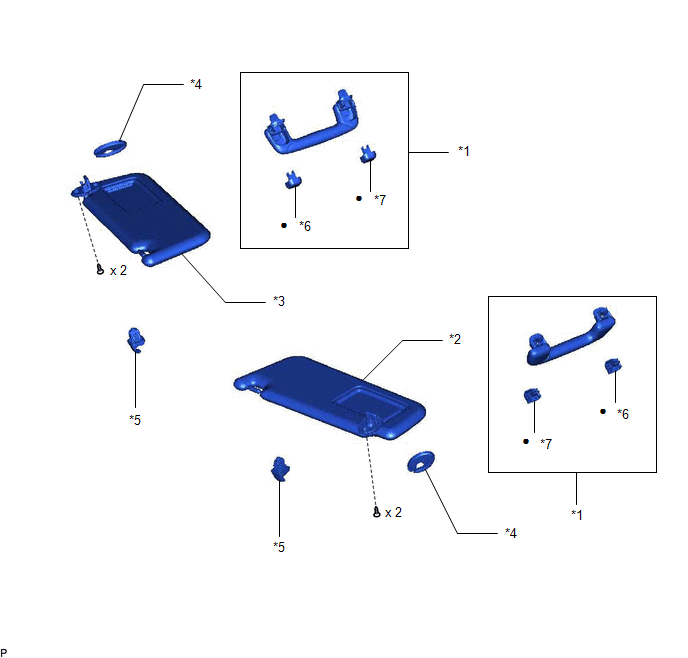
| *1 | ASSIST GRIP ASSEMBLY | *2 | VISOR ASSEMBLY LH |
| *3 | VISOR ASSEMBLY RH | *4 | VISOR BRACKET COVER |
| *5 | VISOR HOLDER | *6 | ASSIST GRIP COVER LH |
| *7 | ASSIST GRIP COVER RH | - | - |
| ● | Non-reusable part | - | - |
ILLUSTRATION
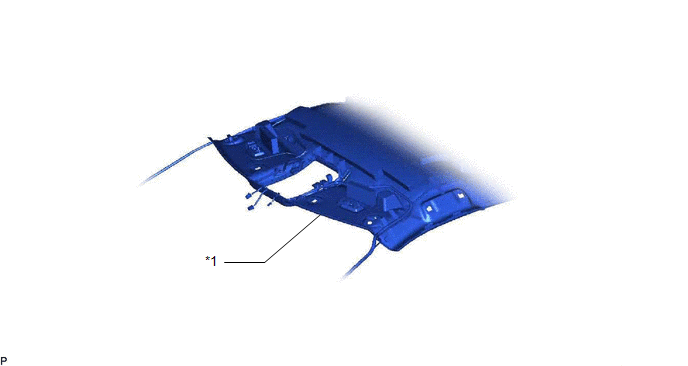
| *1 | ROOF HEADLINING ASSEMBLY | - | - |
ILLUSTRATION
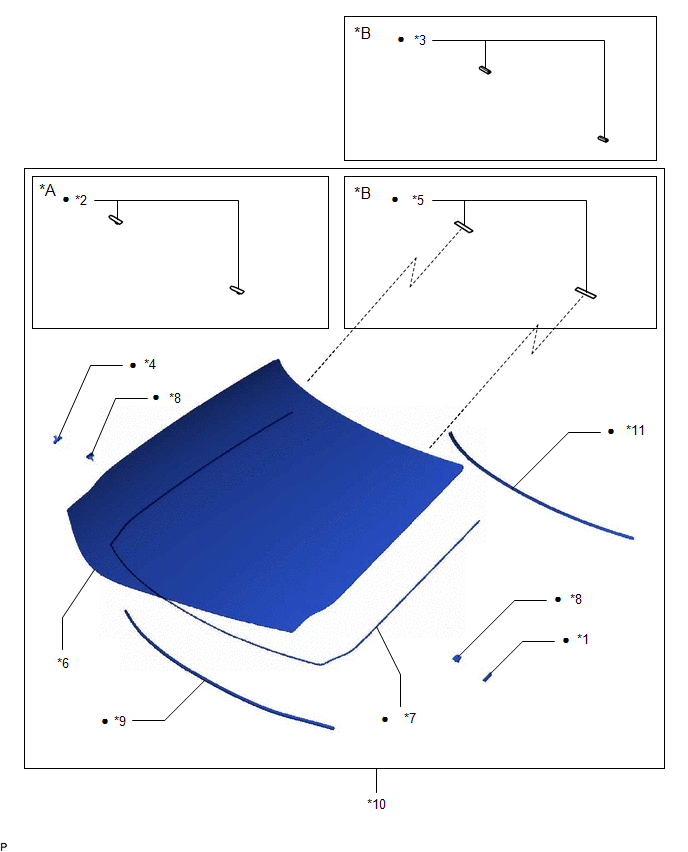
| *A | for 1-piece Type | *B | for 2-piece Type |
| *1 | NO. 1 WINDSHIELD GLASS SPACER | *2 | NO. 1 WINDSHIELD GLASS STOPPER |
| *3 | NO. 1 WINDSHIELD GLASS STOPPER | *4 | NO. 2 WINDSHIELD GLASS SPACER |
| *5 | NO. 2 WINDSHIELD GLASS STOPPER | *6 | WINDSHIELD GLASS |
| *7 | WINDSHIELD GLASS ADHESIVE DAM | *8 | WINDSHIELD GLASS RETAINER |
| *9 | WINDSHIELD GLASS SEAL | *10 | WINDSHIELD GLASS SUB-ASSEMBLY |
| *11 | WINDSHIELD OUTSIDE MOULDING | - | - |
| ● | Non-reusable part | - | - |
 Windshield Glass
...
 Installation
INSTALLATION CAUTION / NOTICE / HINT NOTICE: When replacing the windshield glass of a vehicle equipped with a forward recognition camera, make sure to use a Lexus genuine part. If a non-Lexus genuine ...
Other materials:
Lexus RX (RX 350L, RX450h) 2016-2026 Repair Manual > Sfi System: Fuel Rail / System Pressure - Too Low (P008700)
DESCRIPTION The high-pressure direct injection fuel system consists of a spill control valve, check valve, fuel relief valve, fuel pressure sensor, fuel pump assembly (for high pressure side) and fuel injector assemblies (for direct injection). The spill control valve adjusts the return volume of hi ...
Lexus RX (RX 350L, RX450h) 2016-2026 Repair Manual > Back Door: Disassembly
DISASSEMBLY CAUTION / NOTICE / HINT The necessary procedures (adjustment, calibration, initialization, or registration) that must be performed after parts are removed and installed, or replaced during back door disassembly/reassembly are shown below. Necessary Procedure After Parts Removed/Installed ...
Lexus RX (RX 350L, RX450h) 2016-{YEAR} Owners Manual
- For your information
- Pictorial index
- For safety and security
- Instrument cluster
- Operation of each component
- Driving
- Lexus Display Audio system
- Interior features
- Maintenance and care
- When trouble arises
- Vehicle specifications
- For owners
Lexus RX (RX 350L, RX450h) 2016-{YEAR} Repair Manual

0.0099