Lexus RX (RX 350L, RX450h) 2016-2026 Repair Manual: Removal
REMOVAL
PROCEDURE
1. REMOVE GLOVE COMPARTMENT DOOR ASSEMBLY
| (a) Disengage the claw to disconnect the glove compartment door stopper sub-assembly. |
|
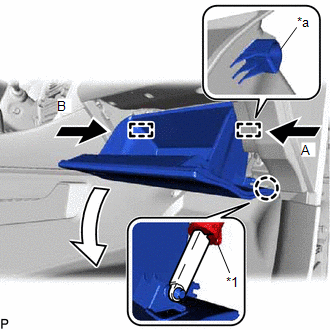
(b) Slightly bend stoppers (A) and (B) in the directions indicated by the arrows shown in the illustration and open the glove compartment door assembly until the stoppers are released.
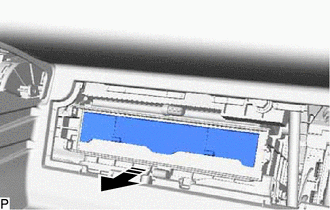
(c) Open the glove compartment door assembly to approximately 52.5° from its closed position. Pull it horizontally in the direction indicated by the arrow shown in the illustration to disengage the 2 hinges and remove the glove compartment door assembly.
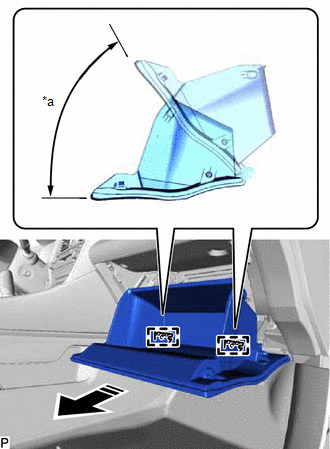
| *a | 52.5° |
.png) | Remove in this Direction |
NOTICE:
Pulling the glove compartment door assembly upward when removing it will cause the hinges to deform. Be sure to pull out the glove compartment door assembly horizontally.
2. REMOVE INSTRUMENT LOWER COVER
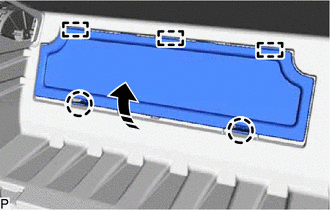
(a) Disengage the 2 claws and 3 guides to remove the instrument lower cover as shown in the illustration.
| | Remove in this Direction |
3. REMOVE AIR FILTER COVER PLATE
(a) Disengage the claw and 2 guides as indicated by the arrows, in the order shown in the illustration to remove the air filter cover plate.
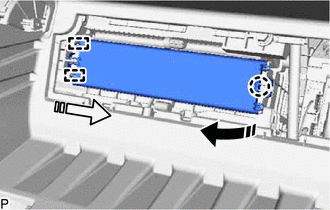
| | Remove in this Direction (1) |
 | Remove in this Direction (2) |
4. REMOVE CLEAN AIR FILTER
(a) Remove the air filter sub-assembly as shown in the illustration.
| | Remove in this Direction |
| (b) Disengage the 4 guides to remove the clean air filter from the air filter case. |
|
 Components
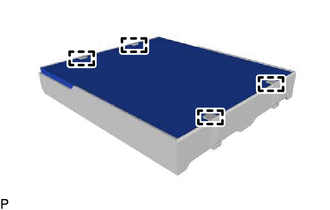
COMPONENTS ILLUSTRATION *1 AIR FILTER COVER PLATE *2 CLEAN AIR FILTER *3 GLOVE COMPARTMENT DOOR ASSEMBLY *4 INSTRUMENT LOWER COVER *5 AIR FILTER SUB-ASSEMBLY *6 AIR FILTE ...
 Installation
INSTALLATION PROCEDURE 1. INSTALL CLEAN AIR FILTER (a) Engage the 4 guides as indicated by the arrows, in the order shown in the illustration to install the clean air filter to the air filter case. ...
Other materials:
Lexus RX (RX 350L, RX450h) 2016-2026 Repair Manual > Rear Seat Cushion Heater (for 60/40 Split Seat Type Rh Side): Installation
INSTALLATION CAUTION / NOTICE / HINT CAUTION: Wear protective gloves. Sharp areas on the seat frame may injure your hands. PROCEDURE 1. INSTALL SEAT HEATER ASSEMBLY (w/o Rear No. 2 Seat) (a) Install the seat heater assembly to the separate type rear seat cushion cover with 14 new tag pins. 2. INSTAL ...
Lexus RX (RX 350L, RX450h) 2016-2026 Repair Manual > Power Steering System: Torque Sensor Zero Point Adjustment Undone (C1515)
DESCRIPTION This DTC does not indicate a malfunction. The power steering ECU assembly stores this DTC when it determines that torque sensor zero point calibration has not been performed. DTC No. Detection Item DTC Detection Condition Trouble Area Warning Indicate Return-to-normal Condit ...
Lexus RX (RX 350L, RX450h) 2016-{YEAR} Owners Manual
- For your information
- Pictorial index
- For safety and security
- Instrument cluster
- Operation of each component
- Driving
- Lexus Display Audio system
- Interior features
- Maintenance and care
- When trouble arises
- Vehicle specifications
- For owners
Lexus RX (RX 350L, RX450h) 2016-{YEAR} Repair Manual

0.0099