Lexus RX (RX 350L, RX450h) 2016-2026 Repair Manual: Disassembly
DISASSEMBLY
PROCEDURE
1. REMOVE NO. 2 ANTENNA CORD SUB-ASSEMBLY
Click here .gif)
.gif)
2. REMOVE WASHER HOSE ASSEMBLY
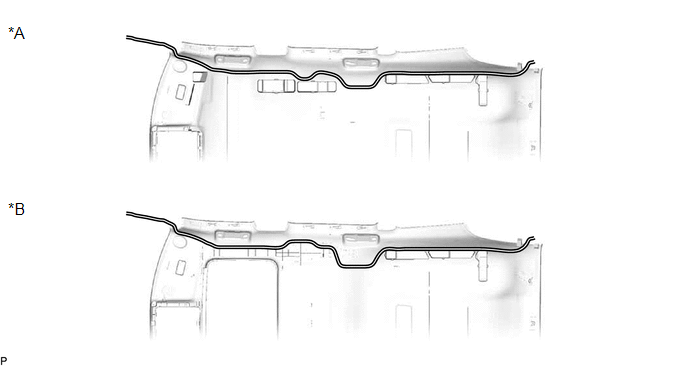
(a) Remove the washer hose assembly.

| *A | for Standard Roof | *B | for Sliding Roof |
3. REMOVE VANITY LIGHT ASSEMBLY
Click here .gif)
4. REMOVE TELEPHONE MICROPHONE ASSEMBLY
Click here .gif)
.gif)
5. REMOVE NO. 1 ROOF WIRE
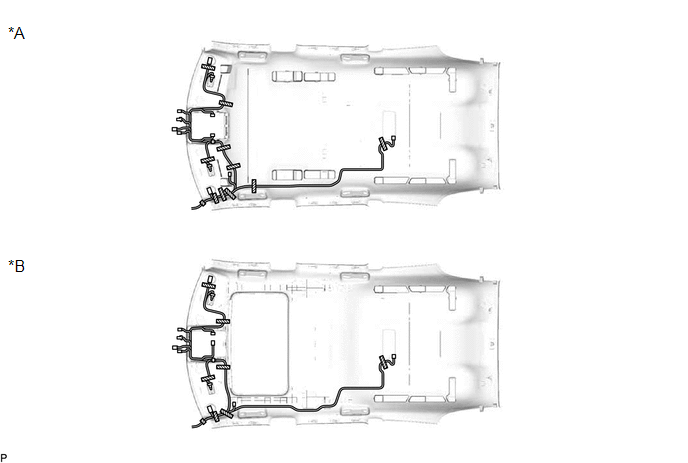
(a) Remove the adhesive tape from the roof headlining assembly.

| *A | for Standard Roof | *B | for Sliding Roof |
.png) | Adhesive Tape | - | - |
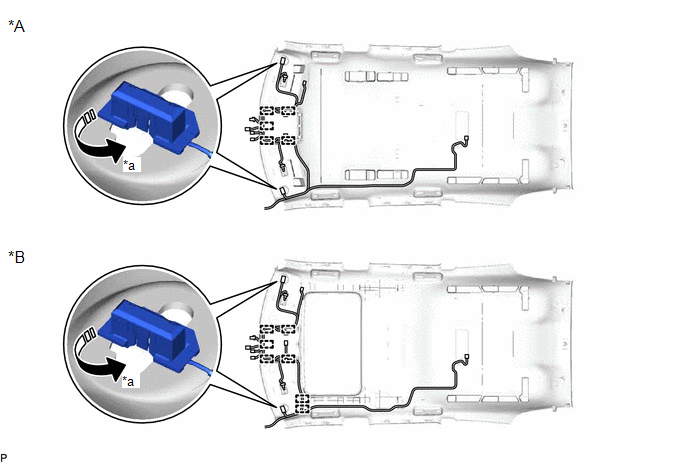
(b) Turn the 2 visor connectors counterclockwise approximately 90° and remove them from the roof headlining assembly.

| *A | for Standard Roof | *B | for Sliding Roof |
| *a | 90° | - | - |
.png) | Rotation Direction | - | - |
(c) Disengage each clamp and remove the No. 1 roof wire from the roof headlining assembly.
 Components
COMPONENTS ILLUSTRATION *1 DECK BOARD ASSEMBLY *2 NO. 1 DECK BOARD *3 REAR NO. 4 FLOOR BOARD *4 TONNEAU COVER ASSEMBLY ILLUSTRATION *A w/o Woofer *B w/ Woofer *1 ...
 Installation
INSTALLATION PROCEDURE 1. INSTALL ROOF HEADLINING ASSEMBLY (a) Put the roof headlining assembly into the vehicle through the back door as shown in the illustration. NOTICE: Do not damage the roof head ...
Other materials:
Lexus RX (RX 350L, RX450h) 2016-2026 Repair Manual > Audio And Visual System (for 8 Inch Display): Mute Signal Circuit between Radio Receiver and Stereo Component Amplifier
DESCRIPTION This circuit sends a signal to the stereo component amplifier assembly to mute noise. Due to this, the noise produced by changing the sound source ceases. If there is an open in the circuit, noise can be heard from the speakers when changing the sound source. If there is a short in the c ...
Lexus RX (RX 350L, RX450h) 2016-2026 Owners Manual > Operating the lights and
wipers: Automatic High Beam
The Automatic High Beam uses a camera sensor located behind the upper
portion of the windshield to assess the brightness of the lights of vehicles
ahead, streetlights, etc., and automatically turns the high beams on or off as
necessary.
WARNING
■ Limitations of the Automatic High Beam
Do not ...
Lexus RX (RX 350L, RX450h) 2016-{YEAR} Owners Manual
- For your information
- Pictorial index
- For safety and security
- Instrument cluster
- Operation of each component
- Driving
- Lexus Display Audio system
- Interior features
- Maintenance and care
- When trouble arises
- Vehicle specifications
- For owners
Lexus RX (RX 350L, RX450h) 2016-{YEAR} Repair Manual
0.0104
