Lexus RX (RX 350L, RX450h) 2016-2026 Repair Manual: Rear Door Courtesy Switch
Components
COMPONENTS
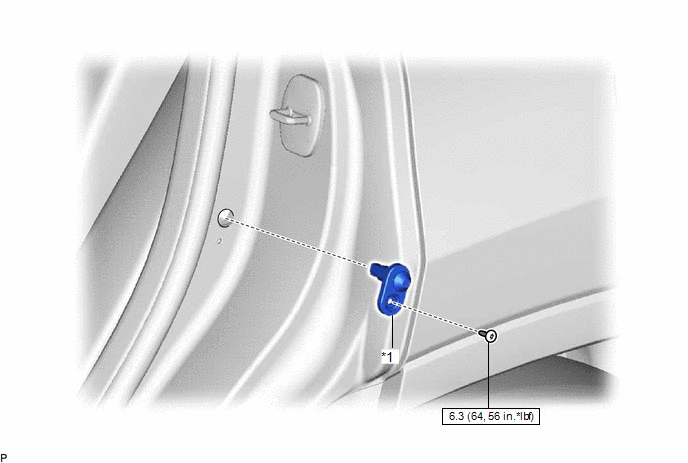
ILLUSTRATION

| *1 | REAR DOOR COURTESY LIGHT SWITCH ASSEMBLY | - | - |
.png) | N*m (kgf*cm, ft.*lbf): Specified torque | - | - |
Removal
REMOVAL
CAUTION / NOTICE / HINT
HINT:
- Use the same procedure for the RH side and LH side.
- The following procedure is for the LH side.
PROCEDURE
1. REMOVE REAR DOOR COURTESY LIGHT SWITCH ASSEMBLY
| (a) Using a T30 "TORX" socket wrench, remove the screw. |
|
(b) Disconnect the connector to remove the rear door courtesy light switch assembly.
Inspection
INSPECTION
PROCEDURE
1. INSPECT REAR DOOR COURTESY LIGHT SWITCH ASSEMBLY
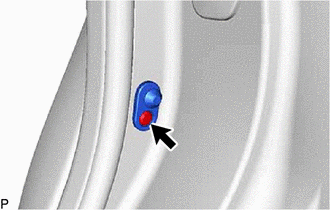
| (a) Measure the resistance according to the value(s) in the table below. Standard Resistance:
If the result is not as specified, replace the rear door courtesy light switch assembly. |
|
Installation
INSTALLATION
CAUTION / NOTICE / HINT
HINT:
- Use the same procedure for the RH side and LH side.
- The following procedure is for the LH side.
PROCEDURE
1. INSTALL REAR DOOR COURTESY LIGHT SWITCH ASSEMBLY
(a) Connect the connector.
(b) Using a T30 "TORX" socket wrench, install the rear door courtesy light switch assembly with the screw.
Torque:
6.3 N·m {64 kgf·cm, 56 in·lbf}
 Installation
INSTALLATION PROCEDURE 1. INSTALL MAP LIGHT ASSEMBLY (a) Connect each connector. (b) Engage the 2 guides and 4 clips to install the map light assembly. ...
 Room Light
ComponentsCOMPONENTS ILLUSTRATION *1 SPOT LIGHT ASSEMBLY - - InspectionINSPECTION PROCEDURE 1. INSPECT SPOT LIGHT ASSEMBLY (a) Inspect the rear dome light. (1) Apply battery voltage to ...
Other materials:
Lexus RX (RX 350L, RX450h) 2016-2026 Repair Manual > Amplifier Antenna (w/o Rear No. 2 Seat): Removal
REMOVAL PROCEDURE 1. REMOVE BACK WINDOW UPPER PANEL TRIM Click here 2. REMOVE BACK DOOR TRIM COVER LH Click here 3. REMOVE BACK DOOR TRIM COVER RH HINT: Use the same procedure as for the LH side. 4. REMOVE BACK DOOR LOCK COVER Click here 5. REMOVE BACK DOOR TRIM BASE Click here 6. RE ...
Lexus RX (RX 350L, RX450h) 2016-2026 Repair Manual > Power Mirror Control System (w/o Memory): Reverse Shift-linked Function of Power Mirrors does not Operate
DESCRIPTION The ECM sends the reverse signal to the main body ECU (multiplex network body ECU) via CAN communication. When receiving the reverse signal, the main body ECU (multiplex network body ECU) sends the reverse request signal to each outer mirror control ECU assembly. Based on the signal, eac ...
Lexus RX (RX 350L, RX450h) 2016-{YEAR} Owners Manual
- For your information
- Pictorial index
- For safety and security
- Instrument cluster
- Operation of each component
- Driving
- Lexus Display Audio system
- Interior features
- Maintenance and care
- When trouble arises
- Vehicle specifications
- For owners
Lexus RX (RX 350L, RX450h) 2016-{YEAR} Repair Manual
0.0128


.png)