Lexus RX (RX 350L, RX450h) 2016-2026 Repair Manual: Installation
INSTALLATION
PROCEDURE
1. INSTALL TRIP SWITCH
(a) Engage the 2 claws as shown in the illustration to install the trip switch.
.png) | Install in this Direction |
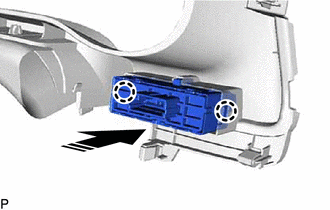
2. INSTALL INSTRUMENT CLUSTER FINISH PANEL SUB-ASSEMBLY
Click here .gif)
3. INSTALL LOWER INSTRUMENT FINISH PANEL SUB
Click here
4. INSTALL INSTRUMENT CLUSTER FINISH PANEL ORNAMENT
Click here
5. INSTALL LOWER NO. 1 INSTRUMENT PANEL FINISH PANEL
Click here
6. INSTALL LOWER NO. 2 INSTRUMENT PANEL FINISH PANEL
Click here
7. INSTALL LOWER INSTRUMENT PANEL FINISH PANEL SUB-ASSEMBLY
Click here
8. CONNECT HOOD LOCK CONTROL LEVER SUB-ASSEMBLY
Click here
9. INSTALL NO. 1 INSTRUMENT PANEL UNDER COVER SUB-ASSEMBLY
Click here
10. INSTALL COWL SIDE TRIM BOARD LH
Click here
11. INSTALL FRONT DOOR SCUFF PLATE LH
Click here
12. INSTALL INSTRUMENT PANEL GARNISH LH
Click here
13. CONNECT CABLE TO NEGATIVE BATTERY TERMINAL
NOTICE:
When disconnecting the cable, some systems need to be initialized after the cable is reconnected.
Click here
14. CUSTOMIZE POWER TILT AND POWER TELESCOPIC STEERING COLUMN SYSTEM
Click here
 Removal
REMOVAL CAUTION / NOTICE / HINT The necessary procedures (adjustment, calibration, initialization or registration) that must be performed after parts are removed and installed, or replaced during trip ...
 Mirror (int)
...
Other materials:
Lexus RX (RX 350L, RX450h) 2016-2026 Repair Manual > Can Communication System: Lost Communication with Gateway Module (Main Body ECU) (U1002)
DESCRIPTION
The main body ECU (multiplex network body ECU) will store this DTC when no signals can be received from the ECUs that have been memorized as those that are connected to sub bus 1.
When the main body ECU (multiplex network body ECU) receives a response signal from the ECUs connected ...
Lexus RX (RX 350L, RX450h) 2016-2026 Repair Manual > Rear Seat Side Airbag Assembly (w/ Rear No. 2 Seat): Removal
REMOVAL CAUTION / NOTICE / HINT The necessary procedures (adjustment, calibration, initialization, or registration) that must be performed after parts are removed, installed, or replaced during the rear seat airbag assembly removal/installation are shown below. Necessary Procedure After Parts Remove ...
Lexus RX (RX 350L, RX450h) 2016-{YEAR} Owners Manual
- For your information
- Pictorial index
- For safety and security
- Instrument cluster
- Operation of each component
- Driving
- Lexus Display Audio system
- Interior features
- Maintenance and care
- When trouble arises
- Vehicle specifications
- For owners
Lexus RX (RX 350L, RX450h) 2016-{YEAR} Repair Manual

0.0088