Lexus RX (RX 350L, RX450h) 2016-2026 Repair Manual: Disassembly
DISASSEMBLY
CAUTION / NOTICE / HINT
CAUTION:
Wear protective gloves. Sharp areas on the seat frame may injure your hands.
PROCEDURE
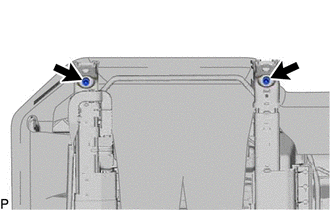
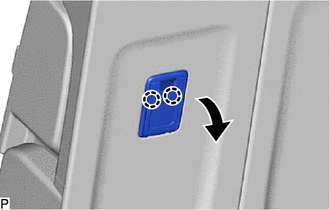
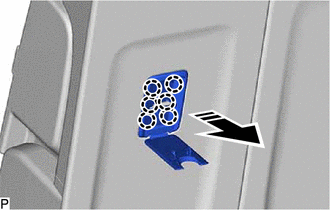
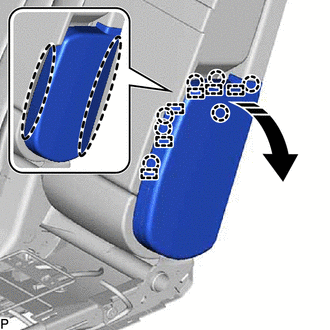
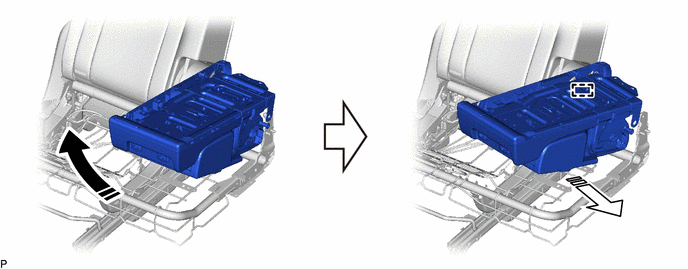
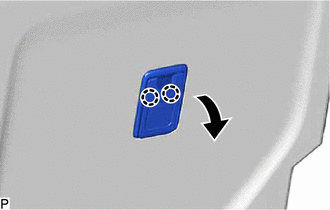
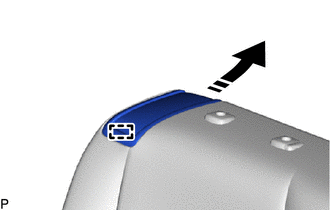
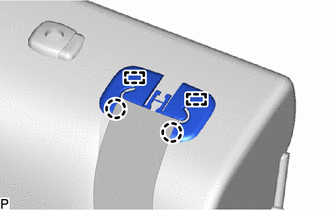
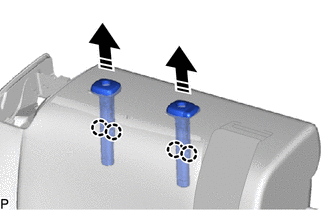
1. REMOVE SEAT ADJUSTER COVER CAP
| (a) Remove the 2 seat adjuster cover caps. |
|
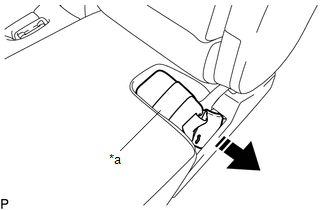
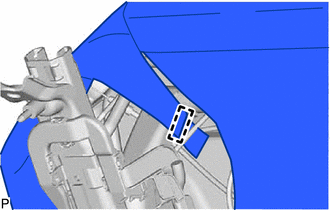
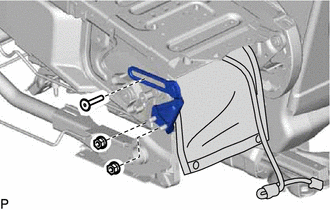
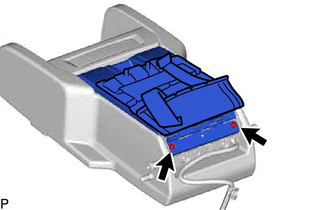
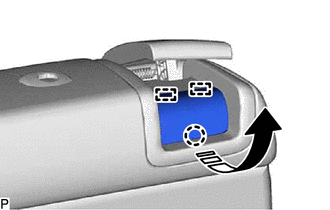
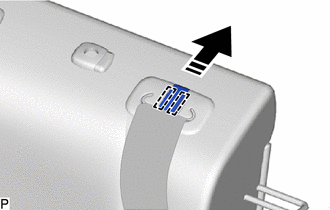
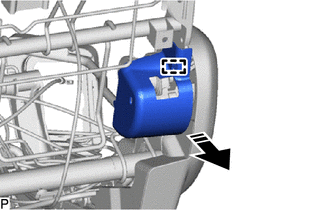
2. REMOVE REAR SEAT COVER CAP RH
(a) Using a screwdriver with its tip wrapped with protective tape, disengage the 2 claws and 2 guides to remove the rear seat cover cap RH as shown in the illustration.
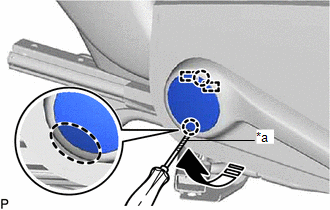
| *a | Protective Tape |
.png) | Insert Screwdriver Here |
.png) | Remove in this Direction |
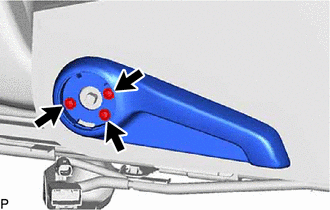
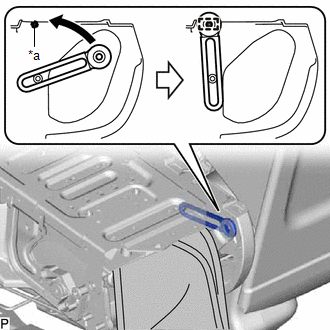
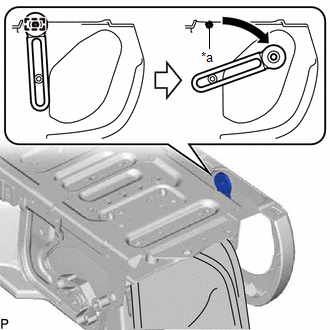
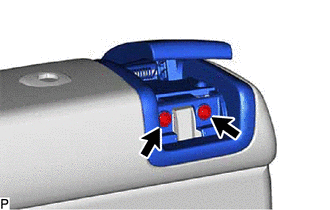
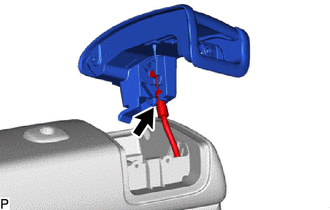
3. REMOVE NO. 1 RECLINING ADJUSTER RELEASE HANDLE RH
| (a) Remove the 3 screws and No. 1 reclining adjuster release handle RH. |
|
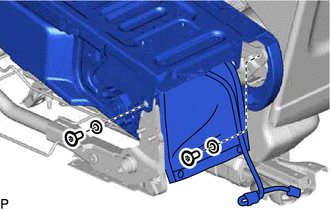
4. REMOVE REAR SEAT LOCK CONTROL LEVER SUB-ASSEMBLY RH
| (a) Disengage the 3 hooks. |
|
| (b) Disengage the clamp to disconnect the rear seat reclining control cable. |
|
| (c) Remove the 2 screws. |
|
(d) Disengage the guide as shown in the illustration.
| | Remove in this Direction |
| (e) Disconnect the rear seat reclining control cable to remove the rear seat lock control lever sub-assembly RH. |
|
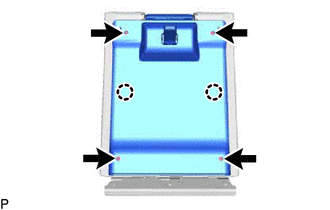
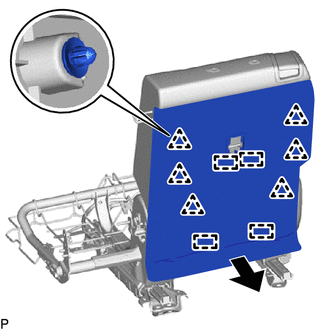
5. REMOVE SEPARATE TYPE REAR SEAT CUSHION COVER WITH PAD
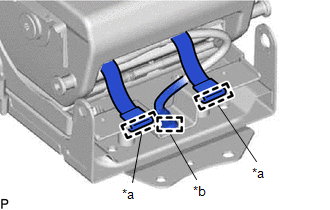
(a) Remove the rear center seat inner belt assembly from the rubber band of the separate type rear seat cushion cover as shown in the illustration.
| *a | Rubber Band |
| | Remove in this Direction |
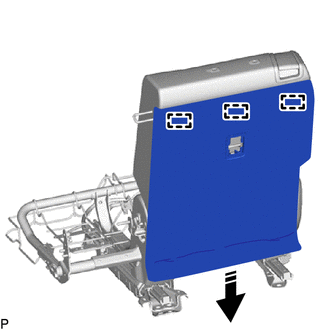
| (b) Disengage the 4 hooks. |
|
| (c) Disengage the 8 hooks. |
|

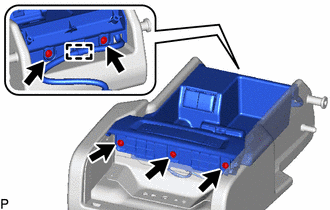
(d) w/ Seat Heater System:
| (1) Disconnect the 2 connectors. |
|
(2) Disengage the 3 clamps.
| (e) Disengage the 2 clamps. |
|
| (f) Disengage the hook. |
|
| (g) Disengage the 6 hooks. |
|
| (h) Disengage the 11 hooks and remove the separate type rear seat cushion cover with pad. |
|
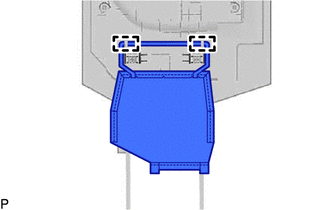
6. REMOVE SEPARATE TYPE REAR SEAT CUSHION COVER
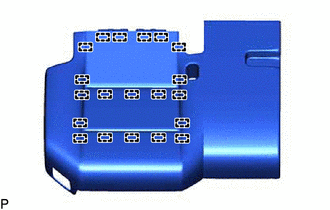
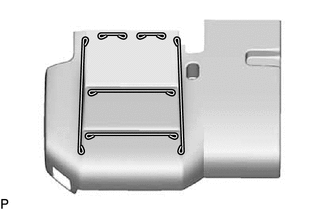
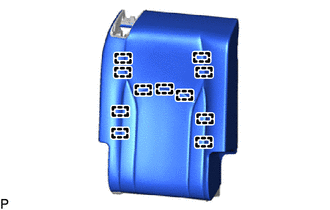
| (a) Remove the 10 hog rings. |
|
| (b) Remove the 20 hog rings and separate type rear seat cushion cover from the rear seat cushion pad RH. |
|
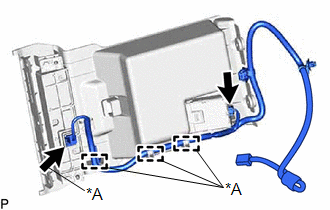
7. REMOVE SEAT COVER WIRE
| (a) Remove the 6 seat cover wires. |
|
8. REMOVE SEAT HEATER ASSEMBLY (w/ Seat Heater System)
Click here .gif)
9. REMOVE REAR SEAT CUSHION EDGE PROTECTOR
| (a) Remove the rear seat cushion edge protector. |
|
10. REMOVE SEAT HEATER CONTROL SUB-ASSEMBLY RH (w/ Seat Heater System)
| (a) Disconnect the connector. |
|

(b) Disengage the 2 clamps to remove the seat heater control sub-assembly RH.
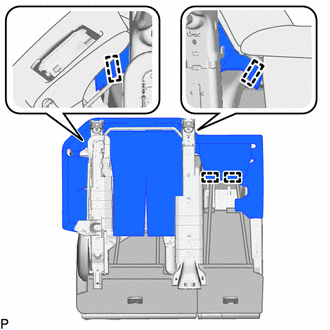
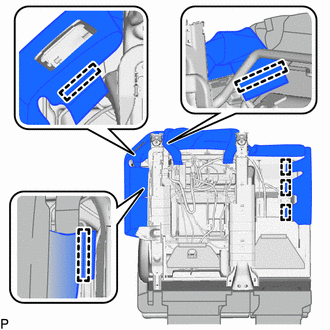
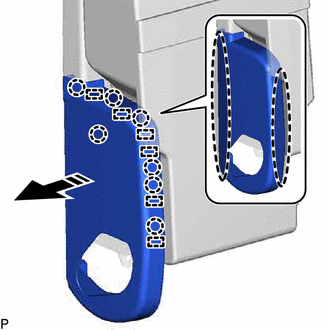
11. REMOVE CENTER SEAT HINGE COVER LH
(a) Disengage the clip, 5 claws and guide to remove the center seat hinge cover LH as shown in the illustration.
| | Remove in this Direction |
12. REMOVE REAR CENTER SEAT INNER BELT ASSEMBLY
Click here
13. REMOVE REAR NO. 1 SEAT RECLINING ADJUSTER INSIDE COVER
(a) Disengage the clip and 3 claws to remove the rear No. 1 seat reclining adjuster inside cover as shown in the illustration.

| | Remove in this Direction |
14. REMOVE REAR SEAT 3 POINT TYPE BELT ASSEMBLY RH
Click here
15. DISCONNECT REAR CENTER SEAT OUTER BELT ASSEMBLY
Click here
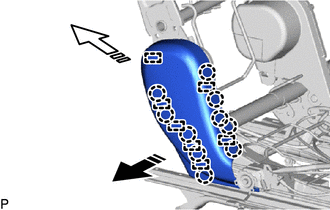
16. REMOVE REAR SEATBACK COVER
| (a) Disengage the 2 claws as shown in the illustration. |
|
(b) Disengage the 6 claws to remove the rear seatback cover as shown in the illustration.
| | Remove in this Direction |
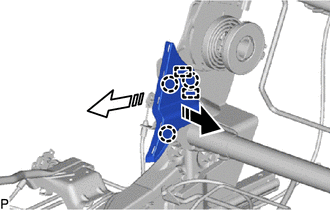
17. REMOVE REAR SEATBACK BOARD SUB-ASSEMBLY
(a) Disengage the 10 claws and 5 clips to remove the rear seatback board sub-assembly as shown in the illustration.
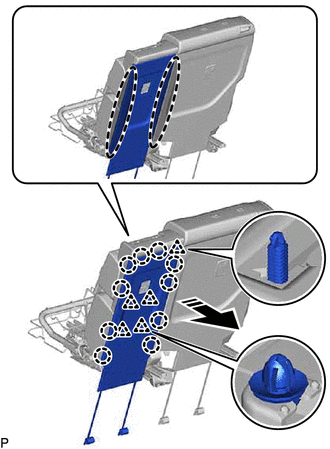
| | Place Hand Here |
| | Remove in this Direction |
18. REMOVE REAR CENTER SEAT CUSHION COVER SUB-ASSEMBLY
| (a) Disengage the 2 guides to disconnect the rubber band and remove the rear center seat cushion cover sub-assembly. |
|
19. REMOVE CENTER ARMREST HINGE COVER LH
(a) Disengage the 7 claws and 6 guides to remove the center armrest hinge cover LH as shown in the illustration.
| | Place Hand Here |
| | Remove in this Direction |
20. REMOVE NO. 1 SEAT ARMREST ASSEMBLY
| (a) Disconnect the connector. |
|
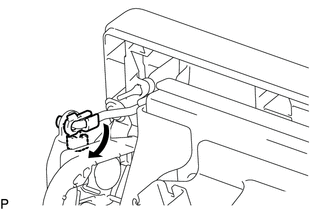
(b) Disengage the clamp.
| (c) Remove the 2 bolts. |
|
| (d) Using a clip remover, disengage the 2 clips to remove the No. 1 seat armrest assembly. |
|
21. REMOVE ARMREST ASSEMBLY
| (a) Using a T30 "TORX" socket wrench, remove the bolt. |
|
(b) Remove the 2 nuts and rear seatback center hinge sub-assembly.
| (c) Using a T45 "TORX" socket wrench, remove the 2 bolts and 2 No. 2 rear seat reclining spacers. |
|
| (d) Engage the rear seatback hinge to the pin of the center armrest hinge cover RH as shown in the illustration. NOTICE: If the rear seatback hinge is not engaged to the pin of the center armrest hinge cover RH, the armrest assembly cannot be removed as it will interfere with the rear seatback frame sub-assembly RH. |
|
(e) Disengage the pin and remove the armrest assembly as shown in the illustration.
| | Remove in this Direction (1) | .png) | Remove in this Direction (2) |
| (f) Disengage the rear seatback hinge from the pin of the center armrest hinge cover RH as shown in the illustration. |
|
22. REMOVE CENTER ARMREST HINGE COVER RH
(a) Disengage the 7 claws and 6 guides to remove the center armrest hinge cover RH as shown in the illustration.
| | Place Hand Here |
| | Remove in this Direction |
23. REMOVE REAR SEAT CENTER ARMREST ASSEMBLY
| (a) Using a T30 "TORX" socket wrench, remove the bolt and rear seatback hinge. |
|

(b) Remove the rear No. 1 seat center armrest plate as shown in the illustration.
| | Remove in this Direction |
| (c) Using a clip remover, disengage the 2 clips to remove the rear seat center armrest cover sub-assembly. |
|
| (d) Disengage the 2 hooks and clamp. |
|
(e) Lower the rear seat center armrest assembly as shown in the illustration.
| (f) Using a clip remover, disengage the 3 clips. |
|

| (g) Using a T45 "TORX" socket wrench, remove the 2 bolts and 2 No. 1 rear seat reclining spacers. |
|

(h) Disengage the guide and remove the rear seat center armrest assembly as shown in the illustration.
| | Remove in this Direction (1) | | Remove in this Direction (2) |
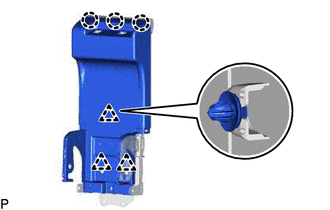
24. REMOVE REAR SEAT CENTER ARMREST COVER
| (a) Remove the 2 rear seat center armrest covers. |
|

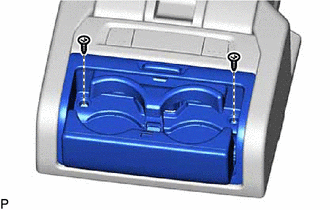
25. REMOVE CUP HOLDER ASSEMBLY
| (a) Remove the 2 screws and cup holder assembly. |
|
26. REMOVE REAR SEAT CENTER ARMREST DOOR SUB-ASSEMBLY
| (a) Remove the 2 screws and rear seat center armrest door sub-assembly. |
|
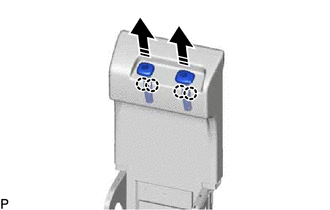
27. REMOVE CENTER ARMREST LOCK SUB-ASSEMBLY
| (a) Remove the 4 screws. |
|
(b) Disengage the 2 claws and remove the rear seat center armrest plate.
| (c) Remove the 4 screws and center armrest lock sub-assembly. |
|

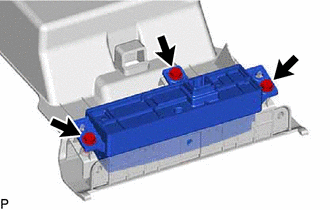
28. REMOVE NO. 2 REAR SEAT CENTER ARMREST BOX
| (a) Remove the 5 screws. |
|
(b) Disengage the clamp and remove the No. 2 rear seat center armrest box.
29. REMOVE REAR CONSOLE BOX WIRE
| (a) Disconnect each connector. |
|
(b) w/ Seat Heater System:
(1) Disengage each clamp.
(c) Remove the rear console box wire.
30. REMOVE REAR SEAT HEATER SWITCH (w/ Seat Heater System)
| (a) Remove the 3 screws and rear seat heater switch. |
|
31. REMOVE NO. 1 SEATBACK COVER
(a) Disengage the 4 claws and remove the 2 rear seat headrest support assemblies as shown in the illustration.
| | Remove in this Direction |
| (b) Disengage the 3 clips and 3 claws to remove the No. 1 seatback cover. |
|
32. REMOVE REAR SEATBACK LOCK LEVER
| (a) Disengage the retainer as shown in the illustration and separate the fold seatback wire. |
|
(b) Remove the fold seatback wire as shown in the illustration.
| | Remove in this Direction |
(c) Disengage the guide and claw to remove the rear seatback lock lever as shown in the illustration.
| | Remove in this Direction (1) | | Remove in this Direction (2) |
33. REMOVE NO. 2 CENTER SEATBACK COVER
| (a) Remove the 3 screws and No. 2 center seatback cover. |
|
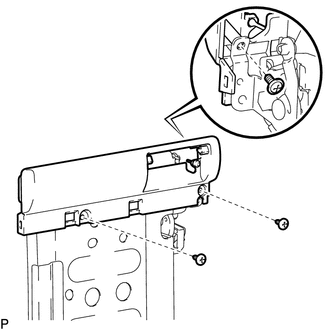
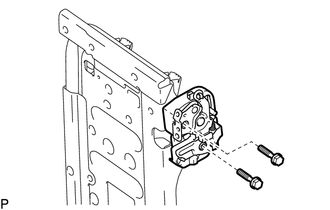
34. REMOVE REAR SEATBACK LOCK ASSEMBLY RH
| (a) Remove the 2 bolts and rear seatback lock assembly RH. |
|
35. REMOVE REAR SEATBACK COVER RH
| (a) Disengage the 2 claws as shown in the illustration. |
|
(b) Disengage the 6 claws to remove the rear seatback cover RH as shown in the illustration.

| | Remove in this Direction |
36. REMOVE REAR SEATBACK BOARD CARPET ASSEMBLY RH
| (a) Disengage the 6 clips and 4 guides as shown in the illustration. |
|
(b) Disengage the 3 guides to remove the rear seatback board carpet assembly RH as shown in the illustration.
| | Remove in this Direction |
37. REMOVE NO. 2 SEAT CUSHION COVER SUB-ASSEMBLY RH
| (a) Disengage the 2 guides to disconnect the rubber band and remove the No. 2 seat cushion cover sub-assembly RH. |
|
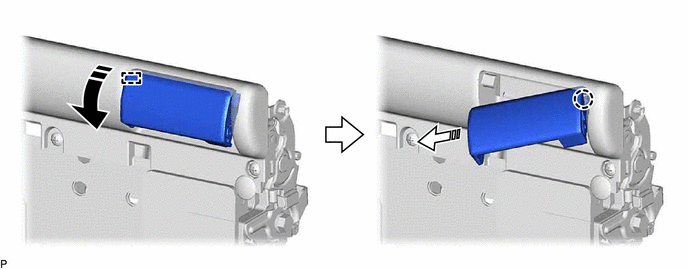
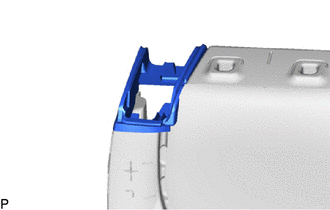
38. REMOVE REAR SEAT UPPER RECLINING COVER RH
(a) Disengage the claw and 2 guides to remove the rear seat upper reclining cover RH as shown in the illustration.
 | Remove in this Direction |
39. REMOVE RECLINING REMOTE CONTROL LEVER SUB-ASSEMBLY RH
| (a) Remove the 2 screws. |
|
(b) Disengage the guide as shown in the illustration.
| | Remove in this Direction |
| (c) Disconnect the reclining adjusting cable assembly to remove the reclining remote control lever sub-assembly RH. |
|
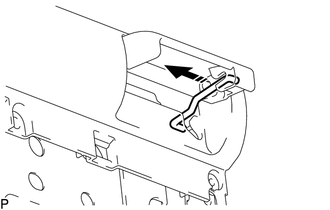
40. REMOVE SEAT BELT ANCHOR COVER CAP
(a) Disengage the 2 guides to remove the seat belt anchor cap as shown in the illustration.
| | Remove in this Direction |
41. REMOVE REAR SEAT SHOULDER BELT COVER
| (a) Disengage the 2 claws and 2 guides and pass the rear center seat outer belt assembly through the rear seat shoulder belt cover to remove the rear seat shoulder belt cover. |
|
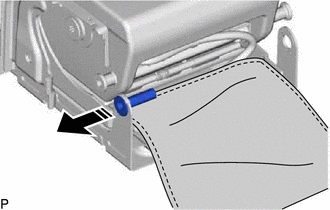
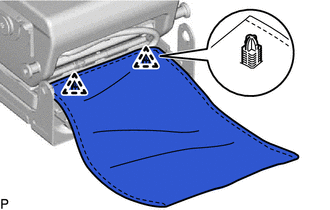
42. REMOVE SEPARATE TYPE REAR SEATBACK COVER WITH PAD
| (a) Disengage the 12 hooks. |
|
(b) Disengage the fastener and hook.
.png) | Fastener |
(c) Disengage the 4 claws and remove the 2 rear No. 1 seat headrest support assemblies as shown in the illustration.
| | Remove in this Direction |
| (d) Remove the nut and disconnect the 2 rear seatback cover brackets. |
|
(e) Remove the separate type rear seatback cover with pad.
43. REMOVE SEPARATE TYPE REAR SEATBACK COVER
| (a) Remove the 2 hog rings. |
|

| (b) Remove the 11 hog rings and separate type rear seatback cover from the separate type rear seatback pad. |
|
44. REMOVE RECLINING REMOTE CONTROL BEZEL RH
| (a) Remove the reclining remote control bezel RH. |
|
45. REMOVE SEAT COVER WIRE
| (a) Remove the 5 seat cover wires. |
|
46. REMOVE SEAT HEATER ASSEMBLY (w/ Seat Heater System)
Click here
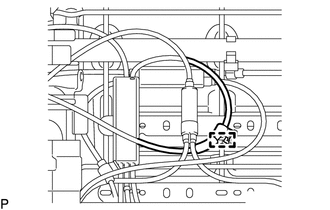
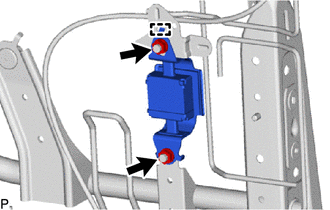
47. REMOVE REAR SEAT AIRBAG ASSEMBLY RH
HINT:
Use the same procedure as for the LH side.
Click here
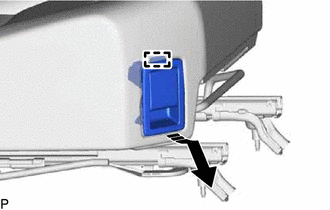
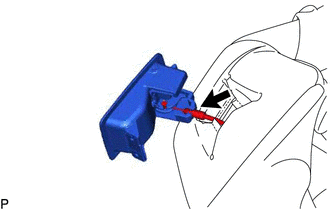
48. REMOVE REAR SEATBACK EDGE PROTECTOR
| (a) Remove the rear seatback edge protector. |
|

49. REMOVE REAR CENTER SEAT OUTER BELT ASSEMBLY
Click here
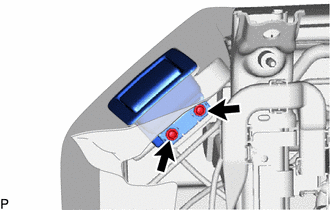
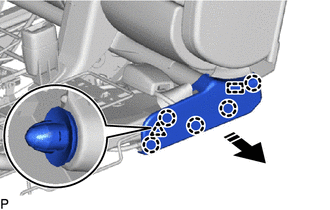
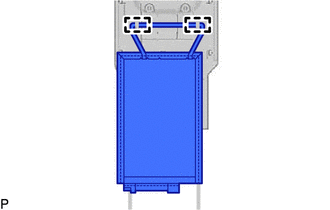
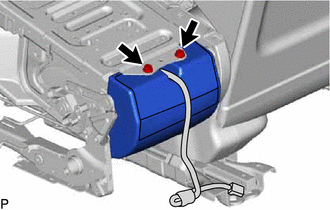
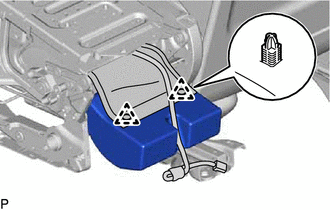
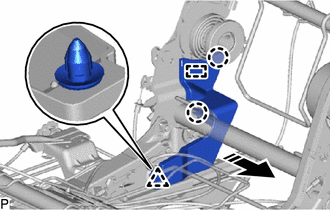
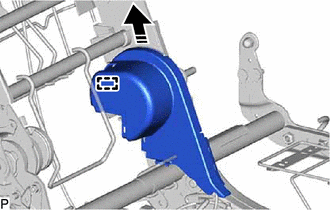
50. REMOVE REAR SEAT CUSHION SPRING DAMPER RH
| (a) Remove the 2 nuts. |
|
(b) Disengage the guide to remove the rear seat cushion spring damper RH.
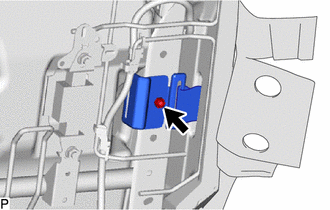
51. REMOVE CENTER SEAT HINGE COVER RH
(a) Disengage the 5 claws to remove the center seat hinge cover RH as shown in the illustration.
| | Remove in this Direction |
52. REMOVE NO. 1 RECLINING LINK COVER RH
(a) Disengage the 5 claws and guide to remove the No. 1 reclining link cover RH as shown in the illustration.
| | Remove in this Direction |
53. REMOVE NO. 2 RECLINING LINK COVER RH
(a) Disengage the guide to remove the No. 2 reclining link cover RH as shown in the illustration.
| | Remove in this Direction |
54. REMOVE REAR NO. 1 SEAT RECLINING COVER RH
(a) Disengage the 10 claws and 7 guides as indicated by the arrows, in the order shown in the illustration to remove the rear No. 1 seat reclining cover RH.
| | Remove in this Direction (1) |
| | Remove in this Direction (2) |
55. REMOVE REAR NO. 1 SEAT RECLINING ADJUSTER INSIDE COVER
(a) Disengage the 3 claws and 2 guides as indicated by the arrows, in the order shown in the illustration to remove the rear No. 1 seat reclining adjuster inside cover.
| | Remove in this Direction (1) |
| | Remove in this Direction (2) |
56. REMOVE REAR NO. 1 SEAT RECLINING ADJUSTER INSIDE COVER
(a) Disengage the 2 claws, clip and guide to remove the rear No. 1 seat reclining adjuster inside cover as shown in the illustration.
| | Remove in this Direction |
57. REMOVE REAR SEAT INNER RECLINING COVER RH
(a) Disengage the 9 claws and 9 guides as indicated by the arrows, in the order shown in the illustration to remove the rear seat inner reclining cover RH.
| | Remove in this Direction (1) |
| | Remove in this Direction (2) |
58. REMOVE REAR NO. 1 SEAT RECLINING ADJUSTER INSIDE COVER
(a) Disengage the 3 claws and 2 guides to remove the rear No. 1 seat reclining adjuster inside cover as shown in the illustration.
| | Remove in this Direction |
59. REMOVE REAR NO. 1 SEAT RECLINING ADJUSTER INSIDE COVER
(a) Disengage the guide to remove the rear No. 1 seat reclining adjuster inside cover as shown in the illustration.
| | Remove in this Direction |
60. REMOVE RH SEAT REAR SEAT RECLINING COVER
(a) Disengage the 5 claws and guide to remove the RH seat rear seat reclining cover as shown in the illustration.
| | Remove in this Direction |
61. REMOVE RH SEAT REAR SEAT RECLINING COVER
(a) Disengage the guide and remove the RH seat rear seat reclining cover as shown in the illustration.
| | Remove in this Direction (1) |
| | Remove in this Direction (2) |
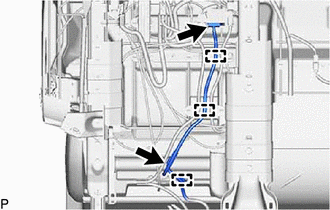
62. REMOVE REAR SEAT WIRE RH
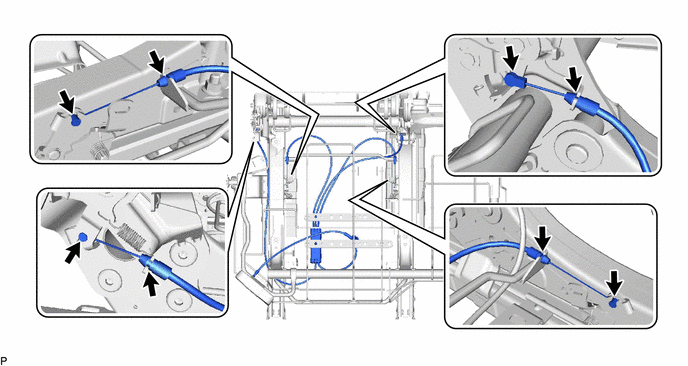
| (a) Disengage the 2 claws and 9 clamps and remove the rear seat wire RH. |
|
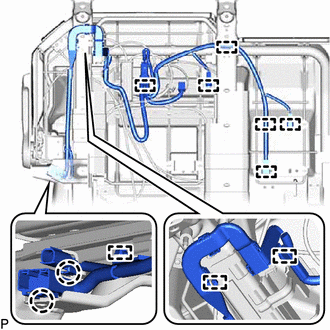
63. REMOVE RECLINING ADJUSTING CABLE ASSEMBLY
(a) Disengage the 6 clamps.
(b) Disengage the 2 clamps and remove the reclining adjusting cable assembly.
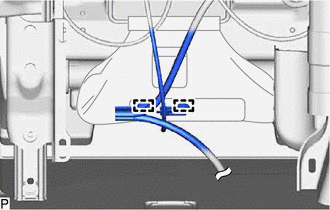
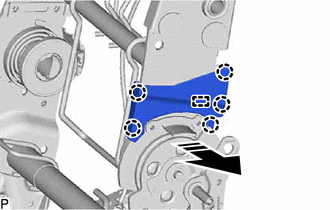
64. REMOVE REAR NO. 1 SEAT TRACK CONTROL CABLE ASSEMBLY RH
(a) Disengage the 6 clamps.
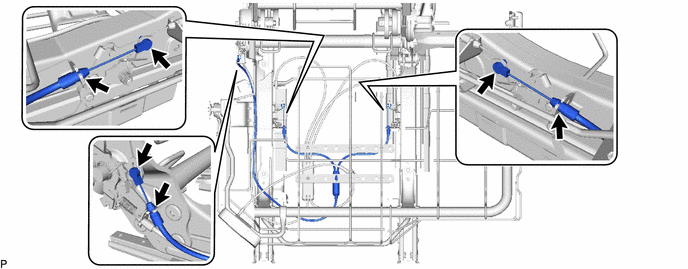
(b) Disengage the clamp and remove the rear No. 1 seat track control cable assembly RH.
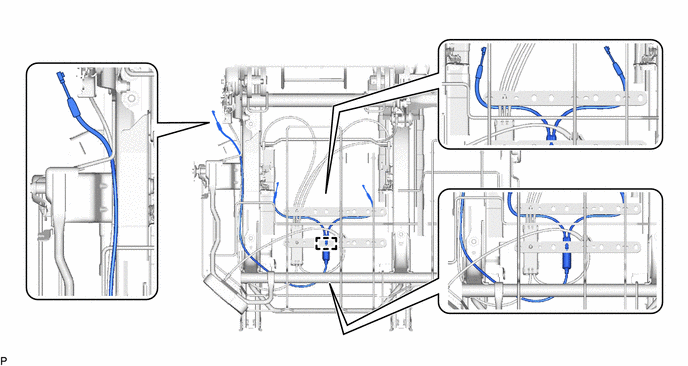
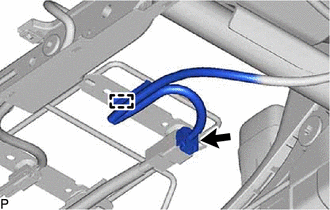
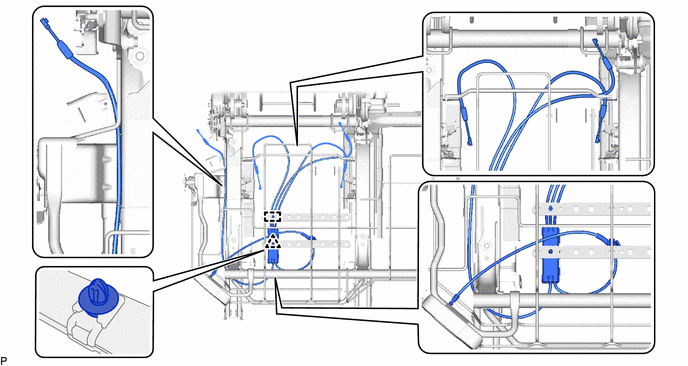
65. REMOVE REAR SEAT RECLINING CONTROL CABLE
(a) Disengage the 8 clamps.
(b) Disengage the clip and clamp, and remove the rear seat reclining control cable.
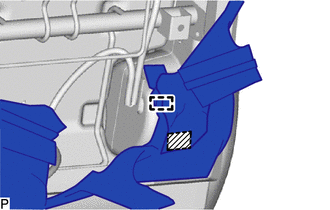
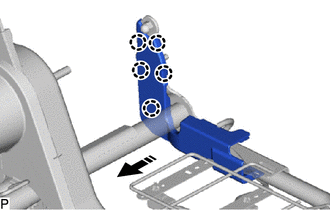
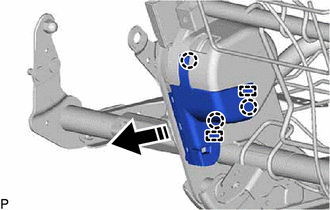
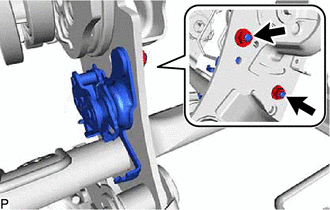
66. REMOVE RECLINING CONTROL LINK SUB-ASSEMBLY RH
| (a) Remove the 2 nuts and reclining control link sub-assembly RH. |
|
67. REMOVE RECLINING CONTROL LINK SUB-ASSEMBLY RH
| (a) Remove the 2 nuts and reclining control link sub-assembly RH. |
|
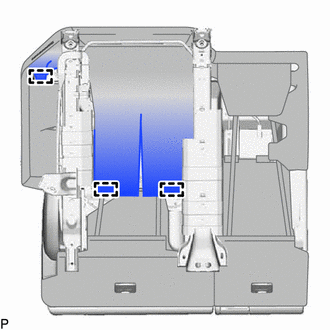
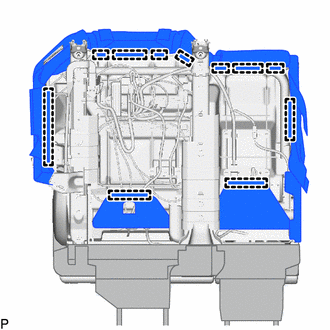
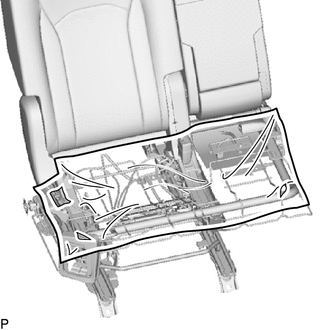
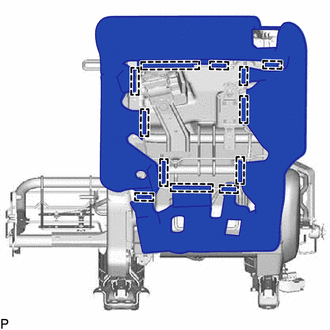
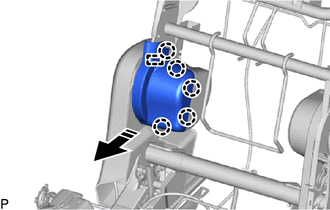
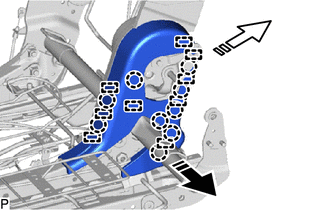
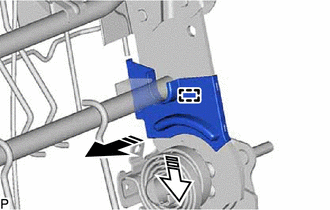
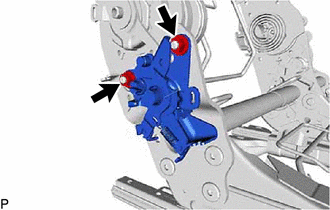
68. REMOVE REAR SEATBACK FRAME SUB-ASSEMBLY RH
(a) Using a T55 "TORX" socket wrench, remove the 2 bolts (A).
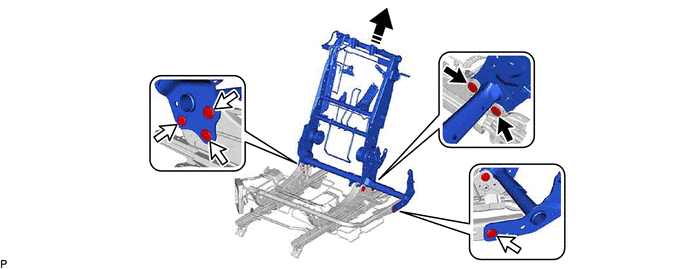
.png) | Bolt (A) | .png) | Bolt (B) |
| | Remove in this Direction | - | - |
(b) Using a T40 "TORX" socket wrench, remove the 4 bolts (B).
(c) Remove the rear seatback frame sub-assembly RH from the No. 1 seat cushion frame sub-assembly RH as shown in the illustration.
 Removal
REMOVAL CAUTION / NOTICE / HINT The necessary procedures (adjustment, calibration, initialization or registration) that must be performed after parts are removed and installed, or replaced during rear ...
 Reassembly
REASSEMBLY CAUTION / NOTICE / HINT CAUTION: Wear protective gloves. Sharp areas on the seat frame may injure your hands. PROCEDURE 1. INSTALL REAR SEATBACK FRAME SUB-ASSEMBLY RH (a) Temporarily instal ...
Other materials:
Lexus RX (RX 350L, RX450h) 2016-2026 Repair Manual > Automatic Transaxle System: Road Test
ROAD TEST PROBLEM SYMPTOM CONFIRMATION (a) Based on the result of the customer problem analysis, try to reproduce the symptoms. If the problem is that the transaxle does not shift up, shift down, or the shift point is too high or too low, conduct the following road test referring to the automatic sh ...
Lexus RX (RX 350L, RX450h) 2016-2026 Repair Manual > Wireless Charging System: Wireless Charger Illumination Circuit
DESCRIPTION When the light control switch is turned to the tail or head position, this circuit sends an illumination signal to the mobile wireless charger cradle assembly. WIRING DIAGRAM CAUTION / NOTICE / HINT NOTICE: Inspect the fuses for circuits related to this system before performing the foll ...
Lexus RX (RX 350L, RX450h) 2016-{YEAR} Owners Manual
- For your information
- Pictorial index
- For safety and security
- Instrument cluster
- Operation of each component
- Driving
- Lexus Display Audio system
- Interior features
- Maintenance and care
- When trouble arises
- Vehicle specifications
- For owners
Lexus RX (RX 350L, RX450h) 2016-{YEAR} Repair Manual

0.0112