Lexus RX (RX 350L, RX450h) 2016-2026 Repair Manual: Disassembly
DISASSEMBLY
CAUTION / NOTICE / HINT
CAUTION:
Wear protective gloves. Sharp areas on the seat frame may injure your hands.
PROCEDURE
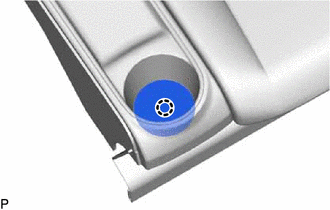
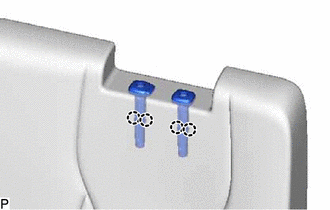
1. REMOVE SEAT ADJUSTER COVER CAP
| (a) Remove the 2 seat adjuster cover caps. |
|
2. REMOVE REAR SEAT HEADREST ASSEMBLY
(a) Remove the 2 rear seat headrest assemblies.
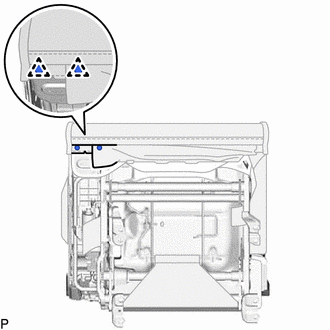
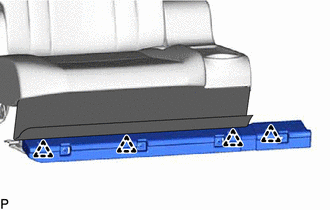
3. REMOVE NO. 3 SEAT NO. 2 LEG COVER (for LH Side)
(a) Disengage the 3 fasteners.
.png) | Fastener |
| (b) Disengage the 2 clips and remove the No. 3 seat No. 2 leg cover. |
|
4. REMOVE REAR NO. 2 SEAT WIRE LH
| (a) Disconnect the connector. |
|
(b) Disengage the 4 clamps and remove the rear No. 2 seat wire LH.
5. REMOVE REAR NO. 2 SEAT INNER BELT ASSEMBLY LH
Click here .gif)
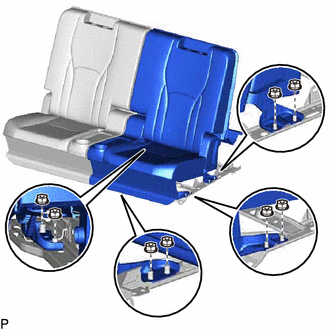
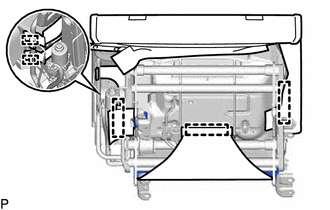
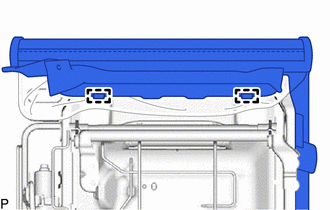
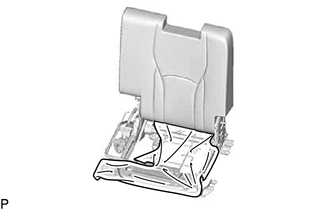
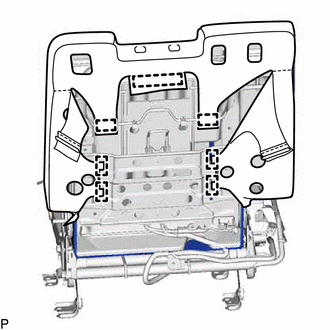
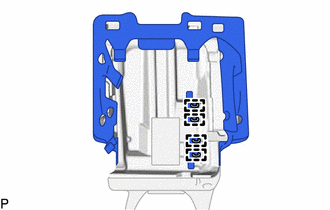
6. REMOVE REAR NO. 2 SEAT ASSEMBLY LH
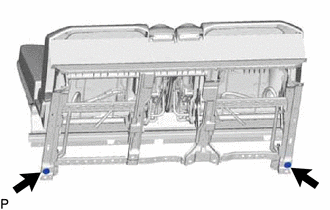
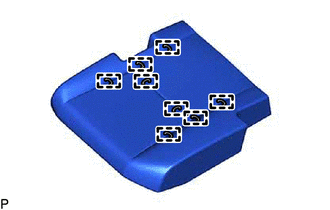
| (a) Remove the 8 nuts and rear No. 2 seat assembly LH. |
|
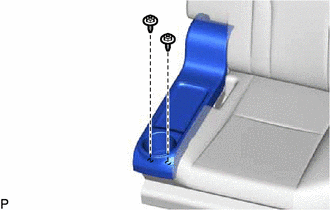
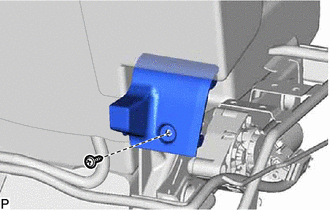
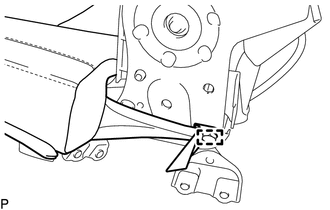
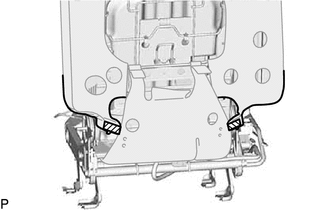
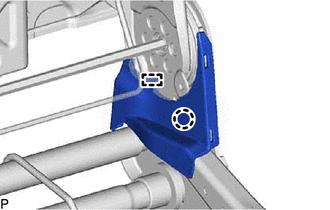
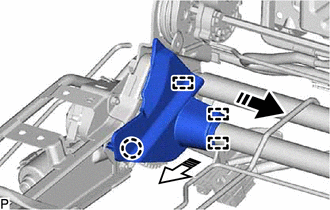
7. REMOVE ROPE HOOK ASSEMBLY (for LH Side)
| (a) Disengage the 2 claws as shown in the illustration. |
|
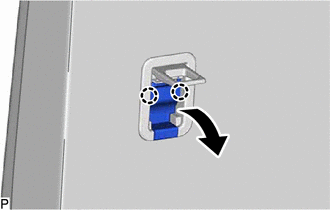
| (b) Remove the bolt and rope hook assembly. |
|

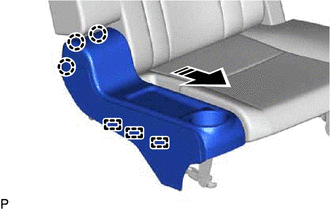
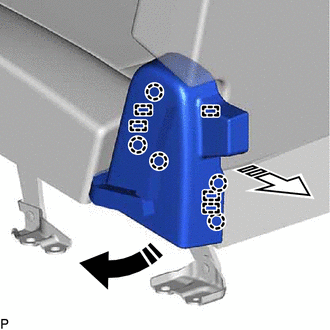
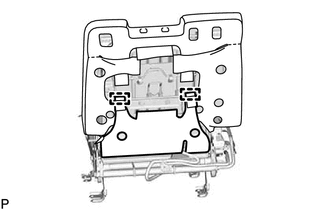
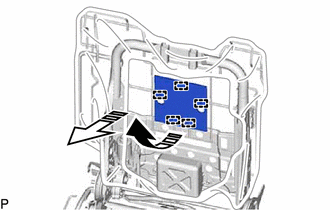
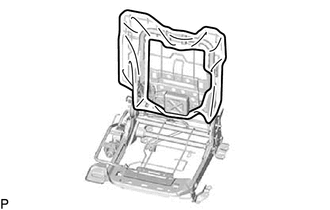
8. REMOVE NO. 2 SEATBACK BOARD SUB-ASSEMBLY LH
| (a) Disengage the 2 clips. |
|
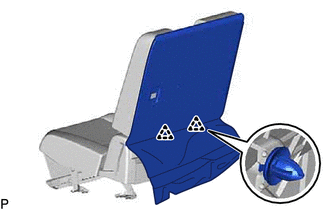
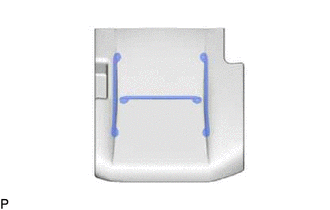
(b) Disengage the 6 claws and 3 guides as indicated by the arrows, in the order shown in the illustration to remove the No. 2 seatback board sub-assembly LH.
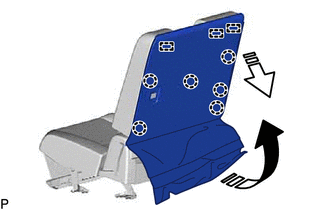
.png) | Remove in this Direction (1) |
.png) | Remove in this Direction (2) |
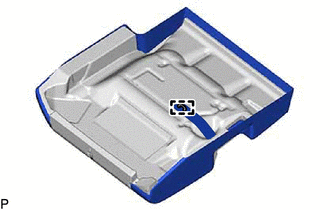
9. REMOVE REAR SEAT CUSHION CARPET (for LH Side)
| (a) Disengage the claw and remove the rear seat cushion carpet. |
|
10. REMOVE REAR NO. 2 SEAT RECLINING COVER LH
| (a) Disengage the 2 clips. |
|
| (b) Remove the 2 screws. |
|
(c) Disengage the 3 claws and 3 guides to remove the rear No. 2 seat reclining cover LH as shown in the illustration.
| | Remove in this Direction |
11. REMOVE NO. 2 REAR SEAT RECLINING COVER LH
| (a) Remove the screw and No. 2 rear seat reclining cover LH. |
|
12. REMOVE REAR NO. 2 SEAT OUTER RECLINING COVER LH
(a) Disengage the 5 claws and 5 guides as indicated by the arrows, in the order shown in the illustration to remove the rear No. 2 seat outer reclining cover LH.
| | Remove in this Direction (1) |
| | Remove in this Direction (2) |
13. REMOVE SEPARATE TYPE REAR SEAT CUSHION COVER WITH PAD LH
| (a) Disengage the guide to disconnect the rubber band. |
|
| (b) Disengage the clamp. |
|
| (c) Disengage the 5 hooks. |
|
| (d) Disengage the 2 hooks. |
|
| (e) Disengage the hook. |
|
| (f) Remove the clip and separate type rear seat cushion cover with pad LH. |
|

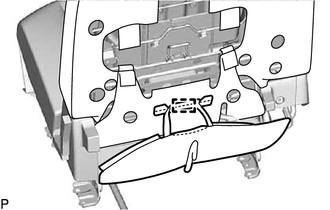
14. REMOVE NO. 2 SEAT CUSHION COVER SUB-ASSEMBLY LH
| (a) Remove the hog ring. |
|
| (b) Remove the 8 hog rings. |
|
(c) Remove the No. 2 seat cushion cover sub-assembly LH as shown in the illustration.
| | Remove in this Direction |
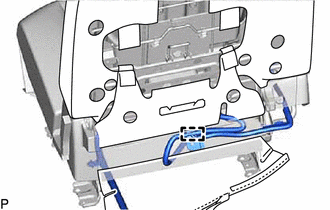
15. REMOVE SEAT COVER WIRE (for LH Side)
| (a) Remove the 3 seat cover wires. |
|
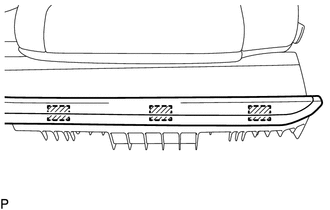
16. REMOVE OUTER REAR SEAT CUSHION EDGE PROTECTOR LH
| (a) Remove the outer rear seat cushion edge protector LH. |
|
17. REMOVE SEPARATE TYPE REAR SEATBACK COVER WITH PAD LH
(a) Disengage the 2 fasteners.
| | Fastener |
| (b) Disengage the 2 hooks. |
|
| (c) Disengage the 2 hooks. |
|
| (d) Disengage the 4 claws and remove the 2 rear No. 2 seat headrest support assemblies. |
|
| (e) Disengage the 7 hooks and remove the separate type rear seatback cover with pad LH. |
|
18. REMOVE NO. 2 SEATBACK COVER SUB-ASSEMBLY LH
| (a) Remove the 4 hog rings. |
|
| (b) Remove the 8 hog rings and No. 2 seatback cover sub-assembly LH from the No. 2 seatback pad LH. |
|
19. REMOVE SEAT COVER WIRE (for LH Side)
| (a) Remove the 4 seat cover wires. |
|
20. REMOVE SEATBACK FELT LH
(a) Disengage the 5 hooks as indicated by the arrows, in the order shown in the illustration to remove the seatback felt LH.
| | Remove in this Direction (1) |
| | Remove in this Direction (2) |
21. REMOVE NO. 3 REAR SEAT PROTECTOR LH
| (a) Remove the No. 3 rear seat protector LH. |
|
22. REMOVE REAR NO. 2 SEAT RECLINING ADJUSTER INSIDE COVER (for LH Side)
| (a) Disengage the claw and guide to remove the rear No. 2 seat reclining adjuster inside cover. |
|
23. REMOVE RECLINING ADJUSTER INSIDE COVER LH
(a) Disengage the claw and 3 guides as indicated by the arrows, in the order shown in the illustration to remove the reclining adjuster inside cover LH.
| | Remove in this Direction (1) |
| | Remove in this Direction (2) |
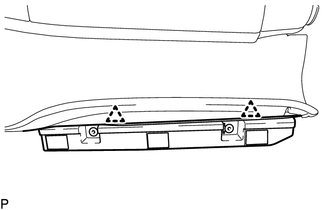
24. REMOVE REAR SEATBACK PROTECTOR (for LH Side)
| (a) Remove the 2 nuts and rear seatback protector. |
|
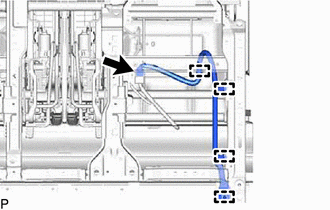
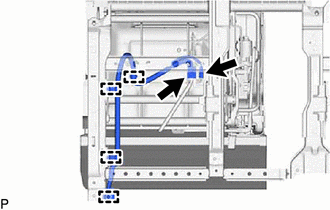
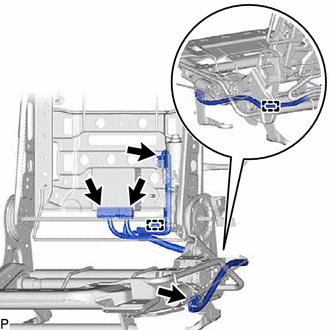
25. REMOVE REAR NO. 2 SEAT WIRE LH
| (a) Disconnect the 4 connectors. |
|
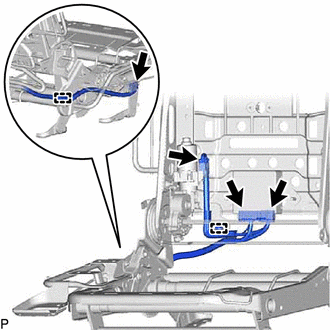
(b) Disengage the 2 clamps and remove the rear No. 2 seat wire LH.
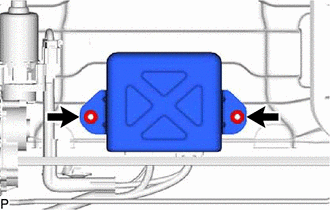
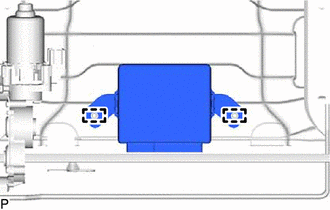
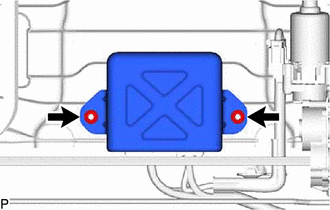
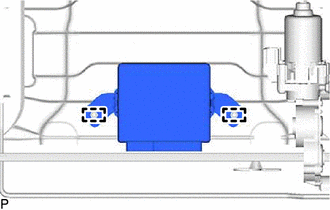
26. REMOVE FOLD SEAT CONTROL ECU (for LH Side)
| (a) Disengage the 2 guides to remove the fold seat control ECU. |
|
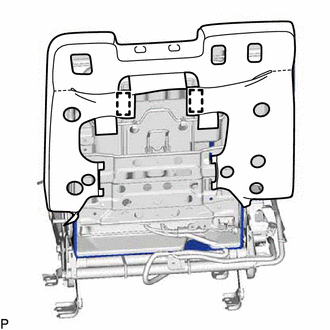
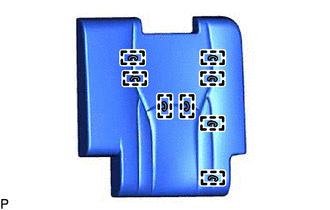
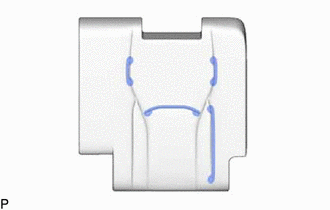
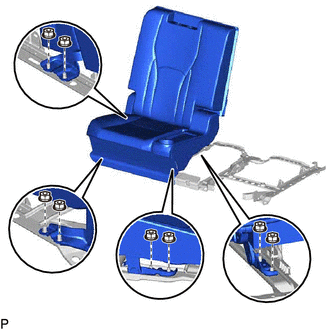
27. REMOVE NO. 2 SEATBACK FRAME SUB-ASSEMBLY LH
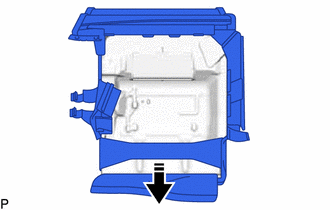
(a) Remove the 4 bolts and No. 2 seatback frame sub-assembly LH from the No. 2 seat cushion frame sub-assembly LH as shown in the illustration.
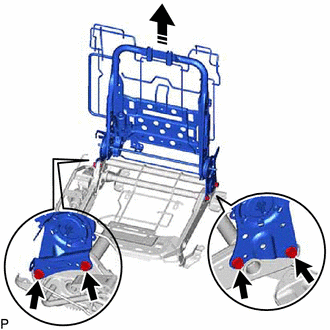
| | Remove in this Direction |
28. REMOVE NO. 3 SEAT NO. 1 LEG COVER (for RH Side)
(a) Disengage the 4 fasteners.
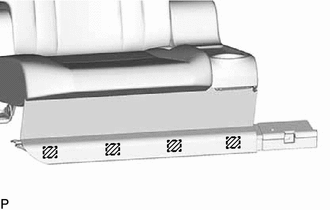
| | Fastener |
| (b) Disengage the 4 clips and remove the No. 3 seat No. 1 leg cover. |
|
29. REMOVE REAR NO. 2 SEAT WIRE RH
| (a) Disconnect the 2 connectors. |
|
(b) Disengage the 4 clamps and remove the rear No. 2 seat wire RH.
30. REMOVE REAR NO. 2 SEAT INNER BELT ASSEMBLY RH
Click here
31. REMOVE REAR NO. 2 SEAT ASSEMBLY RH
| (a) Remove the 8 nuts and rear No. 2 seat assembly RH. |
|
32. REMOVE ROPE HOOK ASSEMBLY (for RH Side)
HINT:
Use the same procedure as for the LH side.
33. REMOVE NO. 2 SEATBACK BOARD SUB-ASSEMBLY RH
HINT:
Use the same procedure as for the LH side.
34. REMOVE REAR SEAT CUSHION CARPET (for RH Side)
HINT:
Use the same procedure as for the LH side.
35. REMOVE REAR NO. 2 SEAT RECLINING COVER RH
HINT:
Use the same procedure as for the LH side.
36. REMOVE NO. 2 REAR SEAT RECLINING COVER RH
HINT:
Use the same procedure as for the LH side.
37. REMOVE REAR NO. 2 SEAT OUTER RECLINING COVER RH
HINT:
Use the same procedure as for the LH side.
38. REMOVE SEPARATE TYPE REAR SEAT CUSHION COVER WITH PAD RH
HINT:
Use the same procedure as for the LH side.
39. REMOVE NO. 2 SEAT CUSHION COVER SUB-ASSEMBLY RH
HINT:
Use the same procedure as for the LH side.
40. REMOVE SEAT COVER WIRE (for RH Side)
HINT:
Use the same procedure as for the LH side.
41. REMOVE OUTER REAR SEAT CUSHION EDGE PROTECTOR RH
HINT:
Use the same procedure as for the LH side.
42. REMOVE SEPARATE TYPE REAR SEATBACK COVER WITH PAD RH
HINT:
Use the same procedure as for the LH side.
43. REMOVE NO. 2 SEATBACK COVER SUB-ASSEMBLY RH
HINT:
Use the same procedure as for the LH side.
44. REMOVE SEAT COVER WIRE (for RH Side)
HINT:
Use the same procedure as for the LH side.
45. REMOVE NO. 3 REAR SEAT PROTECTOR RH
HINT:
Use the same procedure as for the LH side.
46. REMOVE REAR NO. 2 SEAT RECLINING ADJUSTER INSIDE COVER (for RH Side)
HINT:
Use the same procedure as for the LH side.
47. REMOVE RECLINING ADJUSTER INSIDE COVER RH
HINT:
Use the same procedure as for the LH side.
48. REMOVE REAR SEATBACK PROTECTOR (for RH Side)
| (a) Remove the 2 nuts and rear seatback protector. |
|
49. REMOVE REAR NO. 2 SEAT WIRE RH
| (a) Disconnect the 4 connectors. |
|
(b) Disengage the 2 clamps and remove the rear No. 2 seat wire RH.
50. REMOVE FOLD SEAT CONTROL ECU (for RH Side)
| (a) Disengage the 2 guides to remove the fold seat control ECU. |
|
51. REMOVE NO. 2 SEATBACK FRAME SUB-ASSEMBLY RH
HINT:
Use the same procedure as for the LH side.
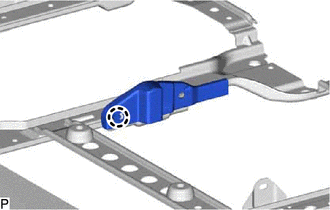
52. REMOVE REAR SEAT INNER BELT COVER LH
| (a) Remove the clip. |
|

| (b) Disengage the claw to remove the rear seat inner belt cover LH. |
|
53. REMOVE REAR SEAT INNER BELT COVER RH
HINT:
Use the same procedure as for the LH side.
 Installation
INSTALLATION CAUTION / NOTICE / HINT CAUTION: Wear protective gloves. Sharp areas on the seat frame may injure your hands. PROCEDURE 1. INSTALL REAR NO. 2 SEAT ASSEMBLY (a) Place the rear No. 2 seat a ...
 Reassembly
REASSEMBLY CAUTION / NOTICE / HINT CAUTION: Wear protective gloves. Sharp areas on the seat frame may injure your hands. PROCEDURE 1. INSTALL REAR SEAT INNER BELT COVER LH (a) Engage the claw. ...
Other materials:
Lexus RX (RX 350L, RX450h) 2016-2026 Repair Manual > Ecm: Installation
INSTALLATION PROCEDURE 1. INSTALL NO. 2 ECM BRACKET (a) Install the No. 2 ECM bracket to the ECM with the 2 bolts. Torque: 3.0 N·m {31 kgf·cm, 27 in·lbf} 2. INSTALL NO. 1 ECM BRACKET (a) Install the No. 1 ECM bracket to the ECM with the 2 bolts. Torque: 3.0 N·m {31 kgf·cm, 27 in·lbf} 3. INST ...
Lexus RX (RX 350L, RX450h) 2016-2026 Repair Manual > Occupant Classification System: Parts Location
PARTS LOCATION ILLUSTRATION *1 ENGINE ROOM RELAY BLOCK AND JUNCTION BLOCK ASSEMBLY - ECU-IG1 NO. 8 FUSE - - ILLUSTRATION *1 AIRBAG SENSOR ASSEMBLY *2 OCCUPANT DETECTION ECU *3 - PASSENGER SIDE BUCKLE SWITCH FRONT SEAT INNER BELT ASSEMBLY RH *4 RADIO RECEIVER ASSEMBLY ...
Lexus RX (RX 350L, RX450h) 2016-{YEAR} Owners Manual
- For your information
- Pictorial index
- For safety and security
- Instrument cluster
- Operation of each component
- Driving
- Lexus Display Audio system
- Interior features
- Maintenance and care
- When trouble arises
- Vehicle specifications
- For owners
Lexus RX (RX 350L, RX450h) 2016-{YEAR} Repair Manual

0.01