Lexus RX (RX 350L, RX450h) 2016-2026 Repair Manual: Removal
REMOVAL
CAUTION / NOTICE / HINT
HINT:
- Use the same procedure for the RH side and LH side.
- The following procedure is for the LH side.
PROCEDURE
1. PRECAUTION
Click here .gif)
.gif)
2. PERFORM REAR BRAKE PAD REPLACEMENT MODE
Click here .gif)
.gif)
3. REMOVE REAR WHEEL
Click here .gif)
4. DRAIN BRAKE FLUID
NOTICE:
If brake fluid leaks onto any painted surface, immediately wash it off.
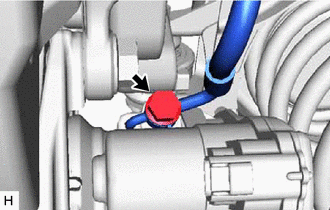
5. SEPARATE REAR FLEXIBLE HOSE
| (a) Remove the union bolt and gasket, and disconnect the rear flexible hose from the rear disc brake cylinder assembly. |
|
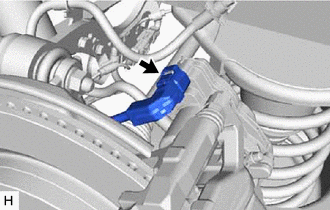
6. DISCONNECT NO. 2 PARKING BRAKE WIRE ASSEMBLY
| (a) Disconnect the No. 2 parking brake wire assembly connector from the parking brake actuator assembly. NOTICE:
|
|
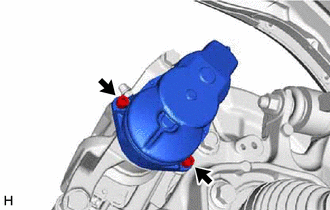
7. REMOVE PARKING BRAKE ACTUATOR ASSEMBLY
| (a) Using a 5 mm hexagon socket wrench, remove the 2 bolts and parking brake actuator assembly from the rear disc brake cylinder assembly. NOTICE:
|
|
(b) Remove the O-ring from the rear disc brake cylinder assembly.
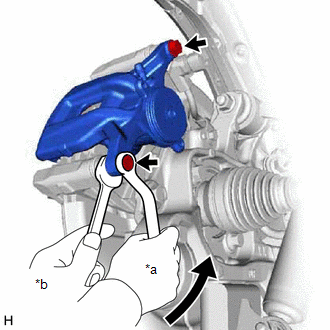
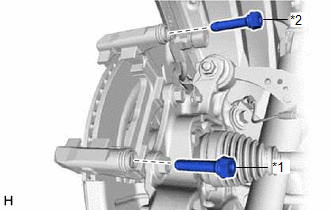
8. REMOVE REAR DISC BRAKE CYLINDER ASSEMBLY
| (a) Hold the 2 rear disc brake cylinder slide pins and remove the 2 bolts and rear disc brake cylinder assembly. |
|
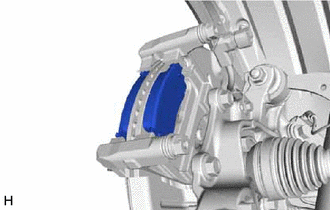
9. REMOVE REAR DISC BRAKE PAD
| (a) Remove the 2 rear disc brake pads from the rear disc brake cylinder mounting. |
|
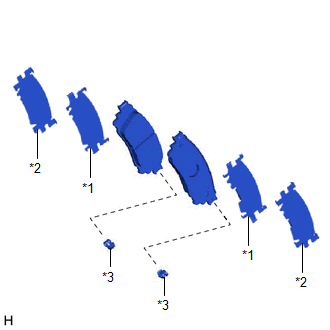
10. REMOVE REAR DISC BRAKE ANTI-SQUEAL SHIM
| (a) Remove the rear No. 2 disc brake anti-squeal shim from the rear disc brake pad (inside). |
|
(b) Remove the rear No. 1 disc brake anti-squeal shim from the rear disc brake pad (inside).
(c) Remove the rear No. 2 disc brake anti-squeal shim from the rear disc brake pad (outside).
(d) Remove the rear No. 1 disc brake anti-squeal shim from the rear disc brake pad (outside).
(e) Remove the rear disc brake pad wear indicator plate from each rear disc brake pad.
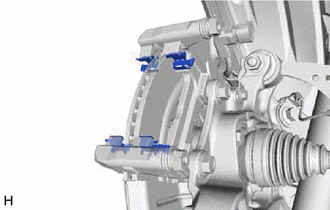
11. REMOVE REAR DISC BRAKE PAD SUPPORT PLATE
| (a) Remove the 4 rear disc brake pad support plates from the rear disc brake cylinder mounting. NOTICE: Each rear disc brake pad support plate has a different shape. Be sure to put an identification mark on each rear disc brake pad support plate so that it can be reinstalled to its original position. |
|
12. REMOVE REAR DISC BRAKE CYLINDER SLIDE PIN
| (a) Remove the rear No. 1 disc brake cylinder slide pin and rear No. 2 disc brake cylinder slide pin from the rear disc brake cylinder mounting. |
|
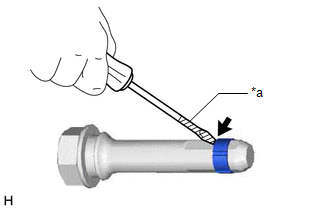
| (b) Using a screwdriver with its tip wrapped with protective tape, remove the rear disc brake cylinder slide bushing from the rear No. 2 disc brake cylinder slide pin. NOTICE: Do not damage the rear No. 2 disc brake cylinder slide pin. |
|
13. REMOVE REAR DISC BRAKE BUSHING DUST BOOT
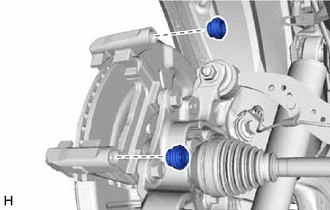
| (a) Remove the 2 rear disc brake bushing dust boots from the rear disc brake cylinder mounting. |
|
14. REMOVE REAR DISC BRAKE CYLINDER MOUNTING
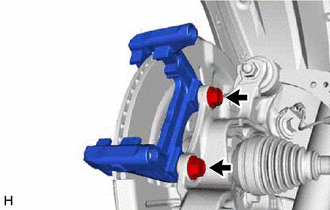
| (a) Remove the 2 bolts and rear disc brake cylinder mounting. |
|
15. REMOVE REAR DISC
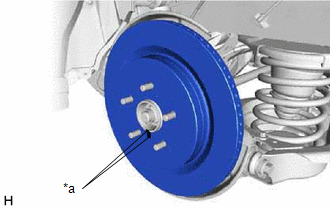
| (a) Put matchmarks on the rear disc and rear axle hub and bearing assembly. |
|
(b) Remove the rear disc.
 Disassembly
DISASSEMBLY CAUTION / NOTICE / HINT NOTICE:
If the rear disc brake cylinder assembly has been disassembled, perform air bleeding for the rear disc brake cylinder assembly.
Click here
Make sure ...
 Inspection
INSPECTION PROCEDURE 1. INSPECT PAD LINING THICKNESS (a) Using a ruler, measure the rear disc brake pad lining thickness. Standard Thickness: 9.5 mm (0.374 in.) Minimum Thickness: 1.0 mm (0.0394 ...
Other materials:
Lexus RX (RX 350L, RX450h) 2016-2026 Repair Manual > Vacuum Switching Valve (for Engine Mounting): Installation
INSTALLATION PROCEDURE 1. INSTALL NO. 2 VACUUM SWITCHING VALVE ASSEMBLY (a) Install the No. 2 vacuum switching valve assembly to the front engine mounting bracket with the bolt. Torque: 20 N·m {204 kgf·cm, 15 ft·lbf} (b) Connect the No. 2 vacuum switching valve assembly connector. (c) Connect th ...
Lexus RX (RX 350L, RX450h) 2016-2026 Repair Manual > Theft Deterrent System: Data List / Active Test
DATA LIST / ACTIVE TEST DATA LIST HINT: Using the Techstream to read the Data List allows the values or states of switches, sensors, actuators and other items to be read without removing any parts. This non-intrusive inspection can be very useful because intermittent conditions or signals may be dis ...
Lexus RX (RX 350L, RX450h) 2016-{YEAR} Owners Manual
- For your information
- Pictorial index
- For safety and security
- Instrument cluster
- Operation of each component
- Driving
- Lexus Display Audio system
- Interior features
- Maintenance and care
- When trouble arises
- Vehicle specifications
- For owners
Lexus RX (RX 350L, RX450h) 2016-{YEAR} Repair Manual
0.0159

