Lexus RX (RX 350L, RX450h) 2016-2026 Repair Manual: Removal
REMOVAL
PROCEDURE
1. SECURE VEHICLE
(a) Fully apply the parking brake and chock a wheel.
CAUTION:
- Make sure to apply the parking brake and chock a wheel before performing this procedure.
- If the vehicle is not secure and the shift lever is moved to N, the vehicle may suddenly move, possibly resulting in an accident or serious injury.
.png)
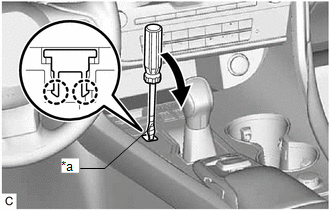
2. REMOVE SHIFT LOCK RELEASE BUTTON COVER
| (a) Using a screwdriver with its tip wrapped with protective tape, disengage the 2 claws to remove the shift lock release button cover from the shift position indicator. NOTICE: Be careful not to damage the shift lock release button cover and shift position indicator. |
|
3. REMOVE CONSOLE BOX ASSEMBLY
Click here .gif)
4. REMOVE FRONT NO. 1 CONSOLE BOX INSERT
Click here
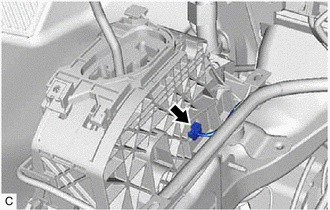
5. DISCONNECT WIRE HARNESS
| (a) Disconnect the transmission control switch connector. |
|

| (b) Disconnect the shift lock control ECU connector. |
|
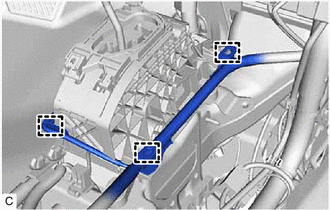
| (c) Disengage the 3 clamps and disconnect the wire harness from the transmission floor shift assembly. |
|
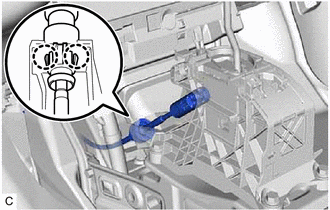
6. DISCONNECT TRANSMISSION CONTROL CABLE ASSEMBLY
| (a) Disconnect the transmission control cable assembly from the transmission floor shift assembly. |
|
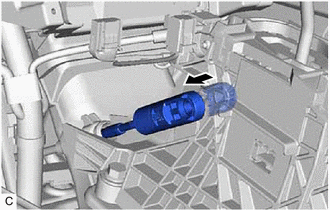
| (b) Disengage the 2 claws and disconnect the transmission control cable assembly from the transmission floor shift assembly. |
|
7. REMOVE TRANSMISSION FLOOR SHIFT ASSEMBLY
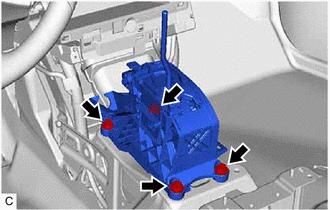
(a) Remove the 4 bolts and transmission floor shift assembly from the vehicle body.
 Disassembly
DISASSEMBLY PROCEDURE 1. REMOVE ELECTRIC PARKING BRAKE SWITCH ASSEMBLY Click here 2. REMOVE SHIFT POSITION INDICATOR (a) Remove the 2 screws, console box bracket and shift position indicator from ...
 Inspection
INSPECTION PROCEDURE 1. INSPECT SHIFT LOCK CONTROL ECU HINT: If the results of the following inspections are as specified but a malfunction has occurred, replace the transmission floor shift assembly. ...
Other materials:
Lexus RX (RX 350L, RX450h) 2016-2026 Repair Manual > Steering Gear: Removal
REMOVAL CAUTION / NOTICE / HINT The necessary procedures (adjustment, calibration, initialization, or registration) that must be performed after parts are removed and installed, or replaced during steering gear assembly removal/installation are shown below. Necessary Procedures After Parts Removed/I ...
Lexus RX (RX 350L, RX450h) 2016-2026 Repair Manual > Front Speed Sensor: Components
COMPONENTS ILLUSTRATION *A w/o AVS - - *1 FRONT FENDER SPLASH SHIELD SUB-ASSEMBLY *2 FRONT SPEED SENSOR *3 FRONT FLEXIBLE HOSE - - N*m (kgf*cm, ft.*lbf): Specified torque - - ILLUSTRATION *A w/ AVS - - *1 FRONT FENDER SPLASH SHIELD SUB-ASSE ...
Lexus RX (RX 350L, RX450h) 2016-{YEAR} Owners Manual
- For your information
- Pictorial index
- For safety and security
- Instrument cluster
- Operation of each component
- Driving
- Lexus Display Audio system
- Interior features
- Maintenance and care
- When trouble arises
- Vehicle specifications
- For owners
Lexus RX (RX 350L, RX450h) 2016-{YEAR} Repair Manual

0.0109