Lexus RX (RX 350L, RX450h) 2016-2026 Repair Manual: Transmission Wire
Components
COMPONENTS
ILLUSTRATION
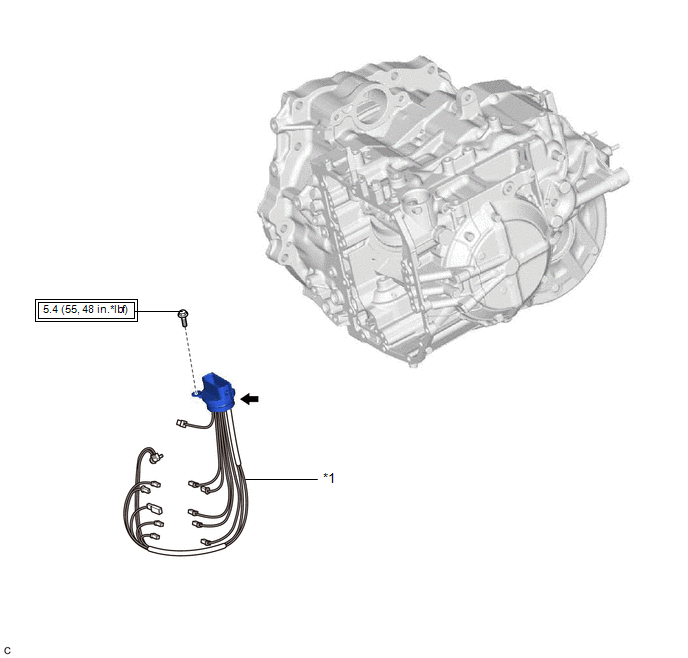
| *1 | TRANSMISSION WIRE | - | - |
.png) | Tightening torque for "Major areas involving basic vehicle performance such as moving/turning/stopping": N*m (kgf*cm, ft.*lbf) | .png) | ATF WS |
Removal
REMOVAL
PROCEDURE
1. REMOVE TRANSMISSION VALVE BODY ASSEMBLY
Click here .gif)
2. REMOVE TRANSMISSION WIRE
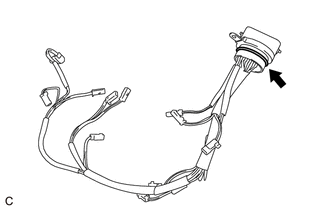
| (a) Disconnect the transmission revolution sensor (NC3) connector. |
|
.png)
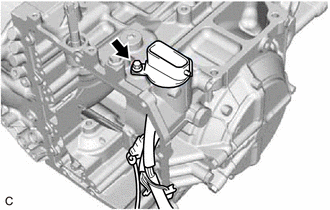
| (b) Remove the bolt and transmission wire from the automatic transmission case sub-assembly. |
|
Installation
INSTALLATION
PROCEDURE
1. INSTALL TRANSMISSION WIRE
| (a) Apply a light coat of ATF to the O-ring of the transmission wire. |
|
(b) Install the transmission wire to the automatic transaxle case sub-assembly with the bolt.
Torque:
5.4 N·m {55 kgf·cm, 48 in·lbf}
(c) Connect the transmission revolution sensor (NC3) connector.
2. INSTALL TRANSMISSION VALVE BODY ASSEMBLY
Click here .gif)
 Removal
REMOVAL CAUTION / NOTICE / HINT The necessary procedures (adjustment, calibration, initialization or registration) that must be performed after parts are removed and installed, or replaced during tran ...

Other materials:
Lexus RX (RX 350L, RX450h) 2016-2026 Repair Manual > Front Camera System: Lost Communication with ECM/PCM "A" Missing Message (U010087,U012587,U012687,U012987,U014087)
DESCRIPTION When a malfunction is detected between various ECUs and sensors, these DTCs are stored. DTC No. Detection Item DTC Detection Condition Trouble Area U010087 Lost Communication with ECM/PCM "A" Missing Message While the vehicle is being driven at 1 km/h or 1 mph or more, a ...
Lexus RX (RX 350L, RX450h) 2016-2026 Repair Manual > Airbag System: Check Mode Procedure
CHECK MODE PROCEDURE CHECK MODE (SIGNAL CHECK): DTC CHECK (a) Turn the engine switch off. (b) Connect the Techstream to the DLC3. (c) Turn the engine switch on (IG). (d) Turn the Techstream on. (e) Enter the following menus: Body Electrical / SRS Airbag / Utility / Signal Check. Body Electrical > ...
Lexus RX (RX 350L, RX450h) 2016-{YEAR} Owners Manual
- For your information
- Pictorial index
- For safety and security
- Instrument cluster
- Operation of each component
- Driving
- Lexus Display Audio system
- Interior features
- Maintenance and care
- When trouble arises
- Vehicle specifications
- For owners
Lexus RX (RX 350L, RX450h) 2016-{YEAR} Repair Manual

0.0156