Lexus RX (RX 350L, RX450h) 2016-2026 Repair Manual: Front Door Outside Moulding
Components
COMPONENTS
ILLUSTRATION
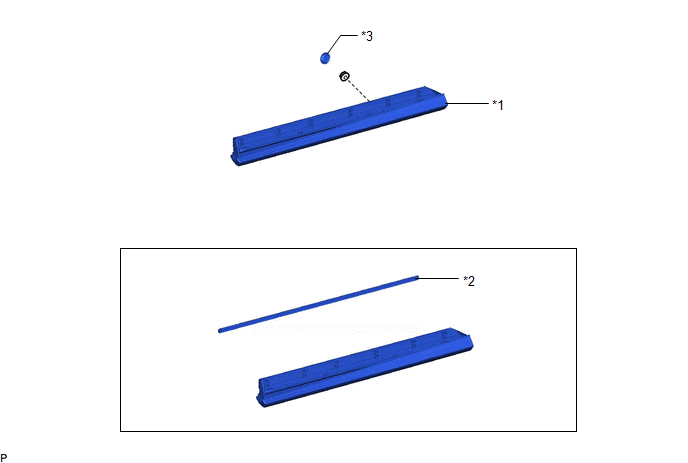
| *1 | FRONT DOOR OUTSIDE MOULDING SUB-ASSEMBLY | *2 | NO. 3 FRONT DOOR WEATHERSTRIP |
| *3 | HOLE PLUG | - | - |
Installation
INSTALLATION
CAUTION / NOTICE / HINT
HINT:
- Use the same procedure for the RH side and LH side.
- The following procedure is for the LH side.
PROCEDURE
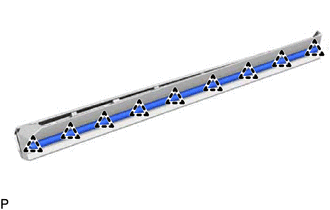
1. INSTALL NO. 3 FRONT DOOR WEATHERSTRIP
(a) Engage the 9 clips to install the No. 3 front door weatherstrip.
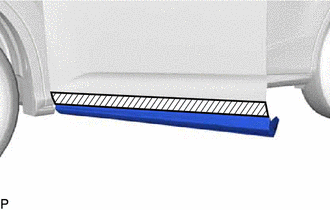
2. INSTALL FRONT DOOR OUTSIDE MOULDING SUB-ASSEMBLY
(a) Engage the 7 clips.

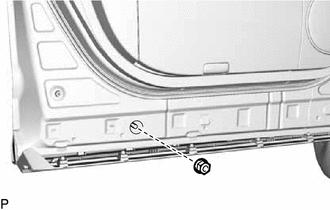
(b) Install the nut.
(c) Install the hole plug.
(d) Engage the 6 claws as shown in the illustration to install the front door outside moulding sub-assembly.
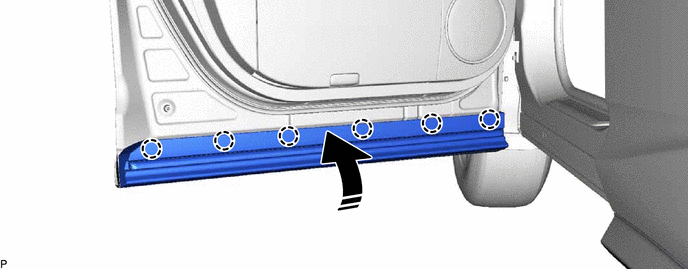
.png) | Install in this Direction | - | - |
Removal
REMOVAL
CAUTION / NOTICE / HINT
HINT:
- Use the same procedure for the RH side and LH side.
- The following procedure is for the LH side.
PROCEDURE
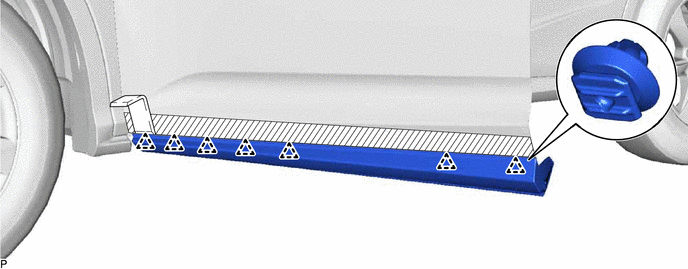
1. REMOVE FRONT DOOR OUTSIDE MOULDING SUB-ASSEMBLY
(a) Disengage the 6 clips and turn back the front door outside moulding sub-assembly as shown in the illustration.
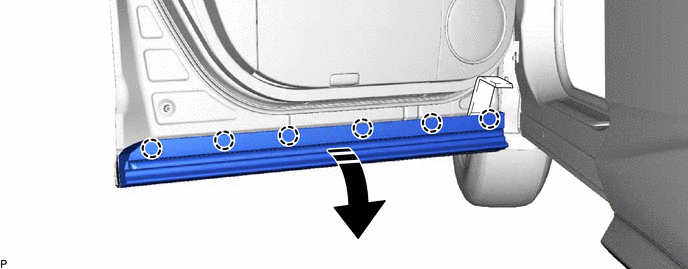
.png) | Remove in this Direction | - | - |
| (b) Remove the hole plug. |
|
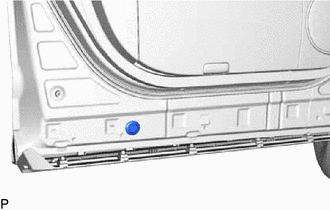
| (c) Remove the nut. |
|
(d) Apply protective tape around the front door outside moulding sub-assembly as shown in the illustration.
.png) | Protective Tape |
(e) Using a moulding remover, disengage the 7 clips to remove the front door outside moulding sub-assembly.
2. REMOVE NO. 3 FRONT DOOR WEATHERSTRIP
| (a) Disengage the 9 clips to remove the No. 3 front door weatherstrip. |
|
 Installation
INSTALLATION CAUTION / NOTICE / HINT HINT:
Use the same procedure for the RH side and LH side.
The following procedure is for the LH side.
PROCEDURE 1. INSTALL FRONT DOOR BELT MOULDING ASSEMBL ...

Other materials:
Lexus RX (RX 350L, RX450h) 2016-2026 Repair Manual > Rear Wiper Motor: Removal
REMOVAL PROCEDURE 1. REMOVE REAR SPOILER SUB-ASSEMBLY (w/o Rear No. 2 Seat) Click here 2. REMOVE BACK WINDOW UPPER PANEL TRIM (w/ Rear No. 2 Seat) Click here 3. REMOVE BACK DOOR TRIM COVER LH (w/ Rear No. 2 Seat) Click here 4. REMOVE BACK DOOR TRIM COVER RH (w/ Rear No. 2 Seat) HINT: Use the ...
Lexus RX (RX 350L, RX450h) 2016-2026 Repair Manual > Audio And Visual System (for 12.3 Inch Display): Air Conditioner ECU Vehicle Information Reading/Writing Processor Malfunction (B15F5)
DESCRIPTION This DTC is stored when items controlled by the air conditioning amplifier assembly cannot be customized via the audio and visual system vehicle customization screen. HINT: The air conditioning amplifier assembly controls the air conditioning system related items that are customizable vi ...
Lexus RX (RX 350L, RX450h) 2016-{YEAR} Owners Manual
- For your information
- Pictorial index
- For safety and security
- Instrument cluster
- Operation of each component
- Driving
- Lexus Display Audio system
- Interior features
- Maintenance and care
- When trouble arises
- Vehicle specifications
- For owners
Lexus RX (RX 350L, RX450h) 2016-{YEAR} Repair Manual

0.0107