Lexus RX (RX 350L, RX450h) 2016-2026 Repair Manual: Removal
REMOVAL
CAUTION / NOTICE / HINT
HINT:
- Use the same procedures for the RH side and LH side.
- The following procedure is for the LH side.
PROCEDURE
1. REMOVE REAR DOOR OUTSIDE MOULDING SUB-ASSEMBLY
| (a) Disengage the clip. |
|
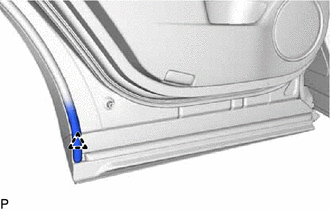
(b) Using a moulding remover, disengage the 5 claws and turn back the rear door outside moulding sub-assembly as shown in the illustration.
.png) | Remove in this Direction |
| (c) Remove the hole plug. |
|
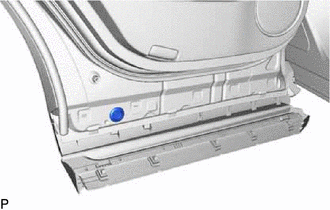
| (d) Remove the nut. |
|
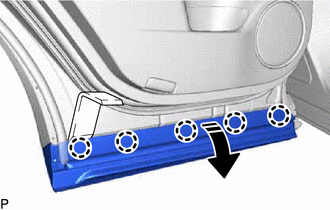
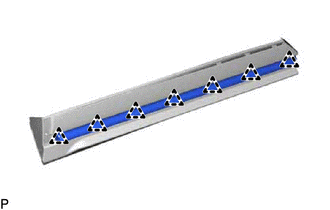
(e) Apply protective tape around the rear door outside moulding sub-assembly as shown in the illustration.
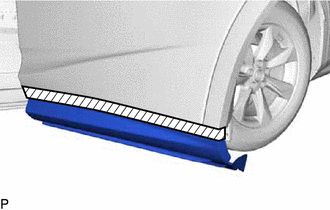
.png) | Protective Tape |
| (f) Using a moulding remover, disengage the 6 clips to remove the rear door outside moulding sub-assembly. |
|
2. REMOVE REAR DOOR LOWER OUTSIDE MOULDING SUB-ASSEMBLY
(a) Remove the screw and turn back the rear door lower outside moulding sub-assembly as shown in the illustration.

| | Remove in this Direction |
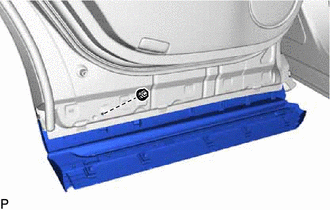
(b) Apply protective tape around the rear door lower outside moulding sub-assembly as shown in the illustration.
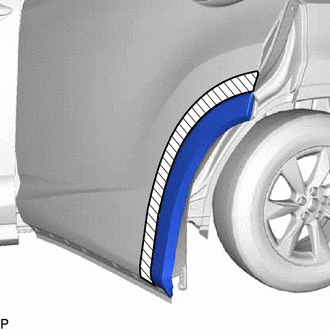
| | Protective Tape |
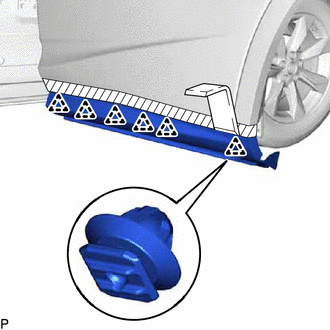
(c) Disengage the 5 clips as shown in the illustration to remove the rear door lower outside moulding sub-assembly.
| | Remove in this Direction |
3. REMOVE NO. 3 REAR DOOR WEATHERSTRIP
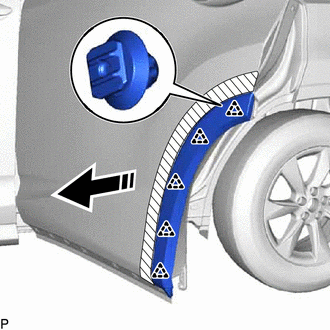
| (a) Disengage the 7 clips and remove the No. 3 rear door weatherstrip. |
|
 Installation
INSTALLATION CAUTION / NOTICE / HINT HINT:
Use the same procedure for the RH side and LH side.
The following procedure is for the LH side.
PROCEDURE 1. INSTALL NO. 3 REAR DOOR WEATHERSTRIP (a) ...

Other materials:
Lexus RX (RX 350L, RX450h) 2016-2026 Repair Manual > Outer Mirror Control Ecu: Components
COMPONENTS ILLUSTRATION *A for Driver Side *B for Front Passenger Side *1 COURTESY LIGHT ASSEMBLY *2 DOOR ARMREST COVER *3 FRONT DOOR INSIDE HANDLE BEZEL PLUG *4 FRONT DOOR NO. 1 STIFFENER CUSHION *5 FRONT DOOR TRIM BOARD SUB-ASSEMBLY *6 MULTIPLEX NETWORK MAST ...
Lexus RX (RX 350L, RX450h) 2016-2026 Repair Manual > Cylinder Head Gasket: Components
COMPONENTS ILLUSTRATION *A Type A *B Type B *C w/ Oil Cooler - - *1 IGNITION COIL ASSEMBLY *2 VACUUM PUMP ASSEMBLY *3 V-RIBBED BELT *4 GENERATOR ASSEMBLY *5 COMPRESSOR AND MAGNETIC CLUTCH *6 V-RIBBED BELT TENSIONER ASSEMBLY *7 WATER PUMP PULLEY ...
Lexus RX (RX 350L, RX450h) 2016-{YEAR} Owners Manual
- For your information
- Pictorial index
- For safety and security
- Instrument cluster
- Operation of each component
- Driving
- Lexus Display Audio system
- Interior features
- Maintenance and care
- When trouble arises
- Vehicle specifications
- For owners
Lexus RX (RX 350L, RX450h) 2016-{YEAR} Repair Manual

0.0108