
Lexus RX (RX 350L, RX450h) 2016-2026 Repair Manual: On-vehicle Inspection
ON-VEHICLE INSPECTION
PROCEDURE
1. INSPECT AUTOMATIC LIGHT CONTROL SENSOR
| (a) Disconnect the K3 automatic light control sensor connector. |
|
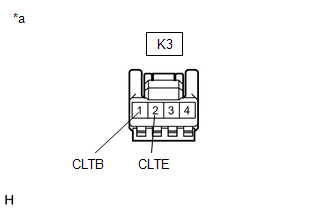
(b) Measure the voltage and resistance on the wire harness side connector according to the value(s) in the table below.
Standard Voltage:
| Tester Connection | Condition | Specified Condition |
|---|---|---|
| K3-1 (CLTB) - K3-2 (CLTE) | Engine switch off | Below 1 V |
| Engine switch on (IG) | 11 to 14 V |
Standard Resistance:
| Tester Connection | Condition | Specified Condition |
|---|---|---|
| K3-2 (CLTE) - Body ground | Always | Below 1 Ω |
If the result is not as specified, there may be a malfunction on the wire harness side.
| (c) Reconnect the K3 automatic light control sensor connector. |
|
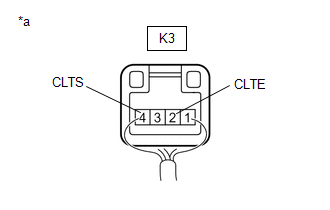
(d) Connect an oscilloscope to the automatic light control sensor connector.
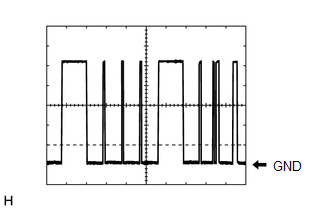
| (e) Check the waveform. OK:
HINT: The communication waveform changes according to the surrounding brightness. If the result is not as specified, the automatic light control sensor may be malfunctioning. |
|
 Components
COMPONENTS ILLUSTRATION *1 AUTOMATIC LIGHT CONTROL SENSOR - - ...
 Removal
REMOVAL CAUTION / NOTICE / HINT The necessary procedures (adjustment, calibration, initialization or registration) that must be performed after parts are removed and installed, or replaced during auto ...
Other materials:
Lexus RX (RX 350L, RX450h) 2016-2026 Repair Manual > Glove Box Light: Inspection
INSPECTION PROCEDURE 1. INSPECT GLOVE BOX LIGHT ASSEMBLY (a) Inspect the glove box light. (1) Apply battery voltage to each terminal of glove box light assembly connector and check the operation of the glove box light. Result: Connection Specified Condition Battery positive (+) → 2 Ba ...
Lexus RX (RX 350L, RX450h) 2016-2026 Repair Manual > Refrigerant (for Hfo-1234yf(r1234yf)): On-vehicle Inspection
ON-VEHICLE INSPECTION PROCEDURE 1. INSPECT REFRIGERANT PRESSURE WITH MANIFOLD GAUGE SET HINT: The following examples show the readings of a manifold gauge set and the corresponding air conditioning system problems. (a) Read the manifold gauge pressure when the following conditions are met:
Doors ...
Lexus RX (RX 350L, RX450h) 2016-{YEAR} Owners Manual
- For your information
- Pictorial index
- For safety and security
- Instrument cluster
- Operation of each component
- Driving
- Lexus Display Audio system
- Interior features
- Maintenance and care
- When trouble arises
- Vehicle specifications
- For owners
Lexus RX (RX 350L, RX450h) 2016-{YEAR} Repair Manual

0.011