Lexus RX (RX 350L, RX450h) 2016-2026 Repair Manual: Removal
REMOVAL
CAUTION / NOTICE / HINT
The necessary procedures (adjustment, calibration, initialization or registration) that must be performed after parts are removed and installed, or replaced during windshield glass sub-assembly removal/installation are shown below.
Necessary Procedures After Parts Removed/Installed/Replaced| Replaced Part or Performed Procedure | Necessary Procedure | Effect/Inoperative Function when Necessary Procedure not Performed | Link |
|---|---|---|---|
| Adjust forward recognition camera HINT: Forward recognition camera adjustment can be performed by using either One Time Recognition or Sequential Recognition. |
| or |
NOTICE:
When replacing the windshield glass of a vehicle equipped with a forward recognition camera, make sure to use a Lexus genuine part. If a non-Lexus genuine part is used, the forward recognition camera may not be able to be installed due to a missing bracket. Also, the dynamic radar cruise control system, lane control system, road sign assist system, pre-collision system, front camera system or automatic high beam system may not operate properly due to a difference in the transmissivity or black ceramic border.
PROCEDURE
1. REMOVE COOL AIR INTAKE DUCT SEAL
Click here .gif)
2. REMOVE FRONT FENDER REINFORCEMENT SUB-ASSEMBLY TOP LH
Click here
3. REMOVE FRONT FENDER REINFORCEMENT SUB-ASSEMBLY TOP RH
HINT:
Use the same procedure as for the LH side.
4. REMOVE FRONT WIPER ARM HEAD CAP
Click here
5. REMOVE FRONT WIPER ARM AND BLADE ASSEMBLY LH
Click here
6. REMOVE FRONT WIPER ARM AND BLADE ASSEMBLY RH
Click here
7. REMOVE WINDSHIELD OUTSIDE MOULDING LH
Click here
8. REMOVE WINDSHIELD OUTSIDE MOULDING RH
HINT:
Use the same procedure as for the LH side.
9. REMOVE COWL TOP VENTILATOR LOUVER SUB-ASSEMBLY
Click here
10. REMOVE INNER REAR VIEW MIRROR ASSEMBLY
Click here
11. REMOVE RAIN SENSOR (w/ Rain Sensor)
Click here
12. REMOVE FORWARD RECOGNITION CAMERA
Click here
13. REMOVE MAP LIGHT ASSEMBLY
Click here
14. REMOVE FRONT PILLAR GARNISH LH
Click here
15. REMOVE FRONT PILLAR GARNISH RH
HINT:
Use the same procedure as for the LH side.
16. REMOVE ASSIST GRIP ASSEMBLY
w/o Rear No. 2 Seat:
Click here
w/ Rear No. 2 Seat:
Click here
17. REMOVE VISOR BRACKET COVER (for LH Side)
Click here
18. REMOVE VISOR ASSEMBLY LH
Click here
19. REMOVE VISOR HOLDER (for LH Side)
Click here
20. REMOVE VISOR BRACKET COVER (for RH Side)
HINT:
Use the same procedure as for the LH side.
21. REMOVE VISOR ASSEMBLY RH
HINT:
Use the same procedure as for the LH side.
22. REMOVE VISOR HOLDER (for RH Side)
HINT:
Use the same procedure as for the LH side.
23. SEPARATE ROOF HEADLINING ASSEMBLY
(a) Disconnect the connector.
(b) Slightly lower the front section of the roof headlining assembly so that the windshield glass can be removed.
NOTICE:
Do not damage the roof headlining assembly or vehicle interior.
HINT:
It is not necessary to completely remove the roof headlining assembly.
24. REMOVE WINDSHIELD GLASS SUB-ASSEMBLY
(a) w/ Windshield Deicer System:
(1) Disconnect the connector.
(b) Apply protective tape to the area around the installation position of the windshield glass sub-assembly on the vehicle body to prevent it from being scratched.
.png) | Protective Tape |
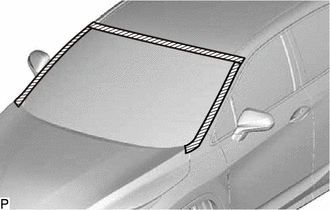
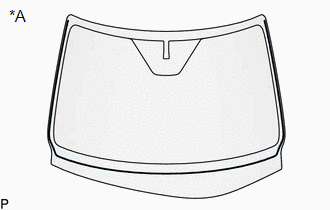
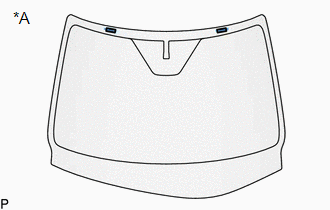
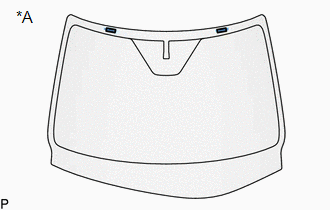
(c) Using a knife, cut off the windshield outside moulding as shown in the illustration.
| *A | except Panoramic Moon Roof | *B | for Panoramic Moon Roof |
| *1 | Windshield Glass | *2 | Windshield Outside Moulding |
| *a | Cut | - | - |
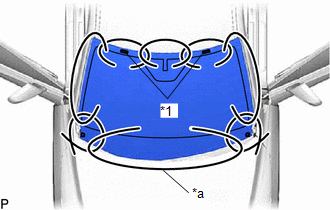
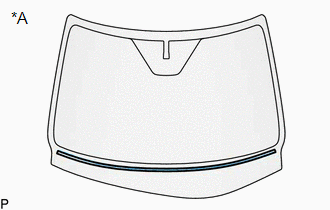
| (d) Place matchmarks on the windshield glass sub-assembly and vehicle body at the locations indicated in the illustration. HINT: Matchmarks are not necessary if the windshield glass sub-assembly is not going to be reused. |
|
.png)
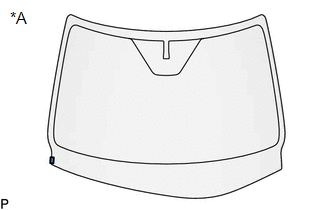
| (e) Pass a piano wire between the vehicle body and windshield glass sub-assembly from the interior. |
|
(f) Tie both wire ends to wooden blocks or similar objects that can serve as handles.
(g) Cut the adhesive by pulling the piano wire around the windshield glass sub-assembly.
NOTICE:
- When separating the windshield glass sub-assembly, be careful not to damage the paint or interior and exterior ornaments.
- To prevent the safety pad from being scratched when removing the windshield glass sub-assembly, place a plastic sheet between the piano wire and safety pad.
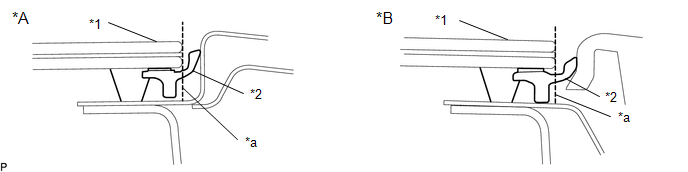
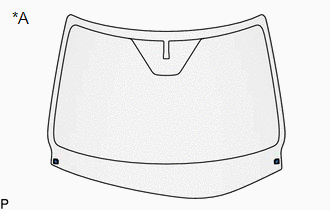
(h) Disengage the windshield glass stoppers.
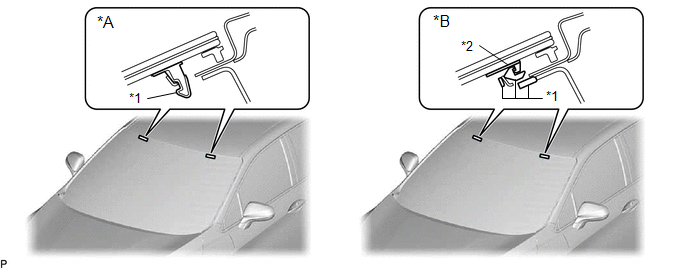
| *A | for 1-piece Type | *B | for 2-piece Type |
| *1 | No. 1 Windshield Glass Stopper | *2 | No. 2 Windshield Glass Stopper |
NOTICE:
- The No. 1 windshield glass stoppers and No. 2 windshield glass stoppers are installed to the windshield glass sub-assembly as shown in the illustration. Be careful not to damage the windshield glass sub-assembly when cutting the adhesive.
- To prevent the windshield glass sub-assembly from falling when performing this operation, be sure to hold the windshield glass sub-assembly using suction cups.
HINT:
Depending on the vehicle, either 1-piece type or 2-piece type stoppers may be present.
(i) Using suction cups, remove the windshield glass sub-assembly.
NOTICE:
- Be careful not to drop the windshield glass sub-assembly.
- Leave as much adhesive on the vehicle body as possible when removing the windshield glass sub-assembly.
25. REMOVE WINDSHIELD GLASS ADHESIVE DAM
(a) When reusing the windshield glass:
| (1) Using a scraper, remove the windshield glass adhesive dam. NOTICE:
|
|
26. REMOVE WINDSHIELD GLASS SEAL
(a) When reusing the windshield glass:
| (1) Using a scraper, remove the windshield glass seal. NOTICE:
|
|
27. REMOVE WINDSHIELD OUTSIDE MOULDING
(a) When reusing the windshield glass:
| (1) Using a scraper, remove the windshield outside moulding. NOTICE:
|
|

28. REMOVE NO. 1 WINDSHIELD GLASS SPACER
(a) When reusing the windshield glass:
| (1) Using a scraper, remove the No. 1 windshield glass spacer. NOTICE:
|
|
29. REMOVE NO. 2 WINDSHIELD GLASS SPACER
HINT:
Use the same procedure as for the No. 1 windshield glass spacer.
30. REMOVE WINDSHIELD GLASS RETAINER
(a) When reusing the windshield glass:
| (1) Using a scraper, remove the 2 windshield glass retainers. NOTICE:
|
|
31. REMOVE NO. 1 WINDSHIELD GLASS STOPPER (for 1-piece Type)
(a) When reusing the windshield glass:
| (1) Using a scraper, remove the 2 No. 1 windshield glass stoppers. NOTICE:
|
|
32. REMOVE NO. 2 WINDSHIELD GLASS STOPPER (for 2-piece Type)
(a) When reusing the windshield glass:
| (1) Using a scraper, remove the 2 No. 2 windshield glass stoppers. NOTICE:
|
|
33. REMOVE NO. 1 WINDSHIELD GLASS STOPPER (for 2-piece Type)
| (a) Remove the 2 No. 1 windshield glass stoppers from the vehicle body. NOTICE: Be sure to replace the No. 1 windshield glass stoppers with new ones. |
|
.png)
34. CLEAN WINDSHIELD GLASS
(a) When reusing the windshield glass:
| (1) Using a scraper, remove any remaining adhesive dam and adhesive residue from the windshield glass. NOTICE: Be careful not to damage the windshield glass. |
|
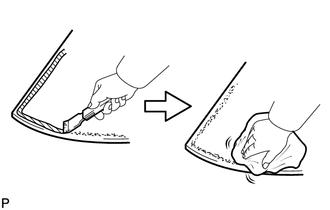
(2) Clean the outer circumference of the windshield glass with a non-residue solvent.
NOTICE:
- Do not touch the windshield glass surface after cleaning it.
- Even if using a new windshield glass, clean it with a non-residue solvent.
35. CLEAN VEHICLE BODY
(a) Clean and shape the contact surface of the vehicle body.
(1) Using a knife, cut off any excess adhesive on the contact surface of the vehicle body as shown in the illustration.

| *a | Vehicle Body |
| | Adhesive |
Standard Dimension:
| Area | Dimension |
|---|---|
| a | 1.0 mm (0.0394 in.) or more |
NOTICE:
Be careful not to damage the vehicle body.
HINT:
Leave approximately 1.0 mm (0.0394 in.) of adhesive on the vehicle body.
(2) Clean the contact surface of the vehicle body with a piece of cloth saturated with non-residue solvent.
HINT:
Even if all of the adhesive has been removed, clean the vehicle body.
 Installation
INSTALLATION CAUTION / NOTICE / HINT NOTICE: When replacing the windshield glass of a vehicle equipped with a forward recognition camera, make sure to use a Lexus genuine part. If a non-Lexus genuine ...
 Wiper / Washer
...
Other materials:
Lexus RX (RX 350L, RX450h) 2016-2026 Repair Manual > Blind Spot Monitor System: Operation Check
OPERATION CHECK HINT: The blind spot monitor beam axis confirmation is performed to confirm whether the sensor's beam axis is correct, and perform adjustment of the beam axis by using reflector. BLIND SPOT MONITOR BEAM AXIS CONFIRMATION (a) When performing the blind spot monitor beam axis confirmati ...
Lexus RX (RX 350L, RX450h) 2016-2026 Repair Manual > Hazard Warning Switch: Inspection
INSPECTION PROCEDURE 1. INSPECT HAZARD WARNING SWITCH (RADIO RECEIVER ASSEMBLY) (a) Measure the resistance according to the value(s) in the table below. *a Component without harness connected (Hazard Warning Signal Switch (Radio Receiver Assembly)) - - Standard Resistance: Tester Co ...
Lexus RX (RX 350L, RX450h) 2016-{YEAR} Owners Manual
- For your information
- Pictorial index
- For safety and security
- Instrument cluster
- Operation of each component
- Driving
- Lexus Display Audio system
- Interior features
- Maintenance and care
- When trouble arises
- Vehicle specifications
- For owners
Lexus RX (RX 350L, RX450h) 2016-{YEAR} Repair Manual

0.0109