Lexus RX (RX 350L, RX450h) 2016-2026 Repair Manual: Replacement
REPLACEMENT
PROCEDURE
1. REMOVE REAR WIPER BLADE (w/o Rear No. 2 Seat)
(a) Turn the engine switch on (IG).
| (b) Operate the rear wiper and when the rear wiper arm and blade assembly reach the point at which they reverse, turn the engine switch off. |
|

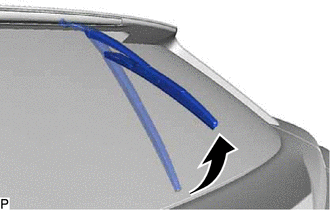
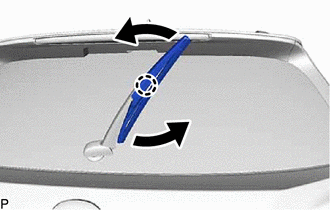
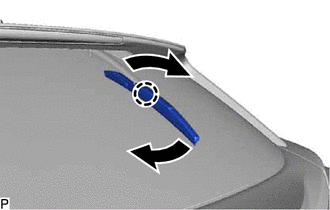
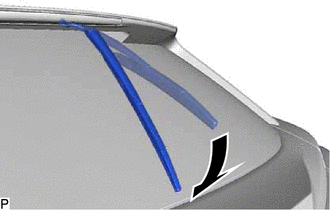
(c) Apply protective tape to the rear spoiler sub-assembly as shown in the illustration.

.png) | Protective Tape |
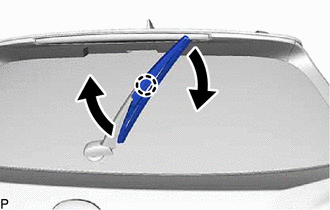
| (d) Lift the rear wiper arm and blade assembly as shown in the illustration. |
|
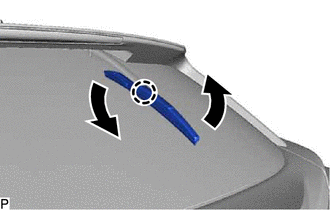
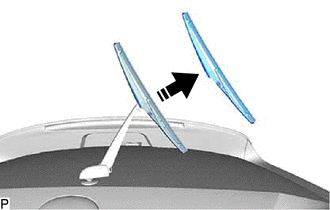
| (e) Raise the rear wiper blade to the position where the claw disengages with a click sound as shown in the illustration. NOTICE: Be careful not to damage the claw. |
|
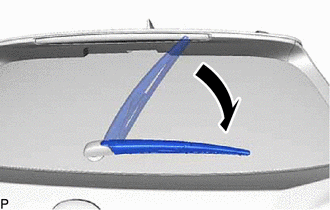
(f) Pull the rear wiper blade down to remove it from the rear wiper arm.
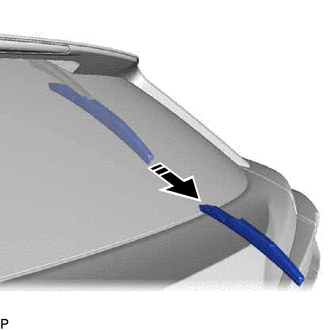
.png) | Remove in this Direction |
NOTICE:
Place a piece of cloth between the rear wiper arm and back door glass to avoid damaging the back door glass.
2. REMOVE REAR WIPER BLADE (w/ Rear No. 2 Seat)
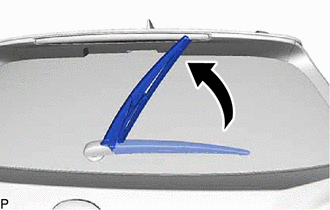
| (a) Lift the rear wiper arm and blade assembly as shown in the illustration. |
|
| (b) Raise the rear wiper blade to the position where the claw disengages with a click sound as shown in the illustration. NOTICE: Be careful not to damage the claw. |
|
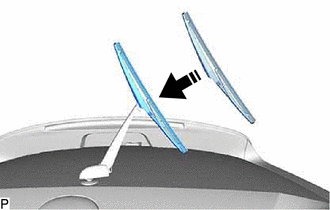
(c) Pull the rear wiper blade as shown in the illustration to remove it from the rear wiper arm.
| | Remove in this Direction |
NOTICE:
Place a piece of cloth between the rear wiper arm and back door glass to avoid damaging the back door glass.
3. REMOVE REAR WIPER RUBBER
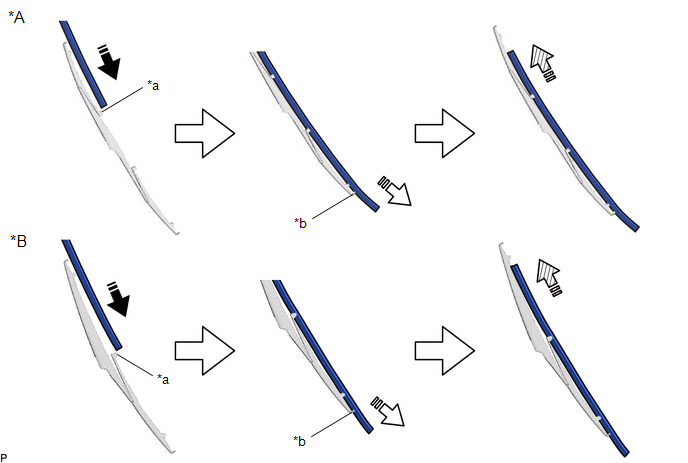
(a) Lift and pull the end of the rear wiper rubber over the blade stopper as shown in the illustration.
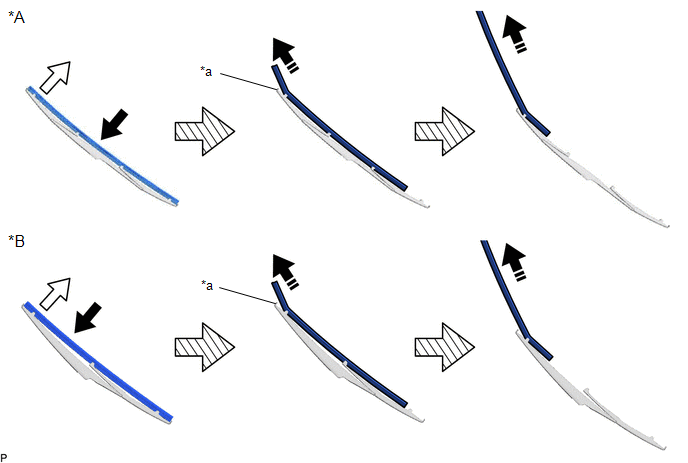
| *A | w/o Rear No. 2 Seat | *B | w/ Rear No. 2 Seat |
| *a | Stopper | - | - |
.png) | Push | .png) | Pull Out |
| | Remove in this Direction | - | - |
NOTICE:
Do not forcibly pull out the rear wiper rubber as the rear wiper rubber backing plates may be deformed or the claws of the rear wiper blade may be damaged.
HINT:
Lightly pushing the middle of the rear wiper rubber will allow it to be removed more easily.
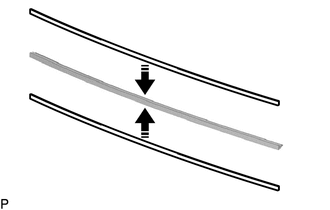
(b) Remove the rear wiper rubber with the 2 rear wiper rubber backing plates from the rear wiper blade.
(c) Remove the 2 rear wiper rubber backing plates from the rear wiper rubber.
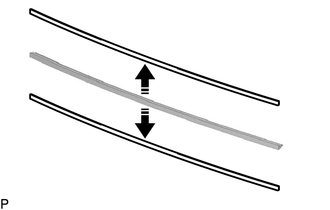
| | Remove in this Direction |
4. INSTALL REAR WIPER RUBBER
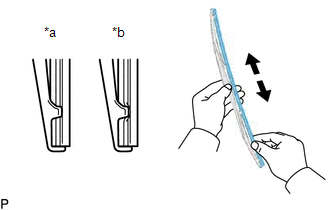
(a) Install the 2 rear wiper rubber backing plates to the rear wiper rubber.
| | Install in this Direction |
NOTICE:
Install the backing plates facing the correct direction.
(b) Insert the rear wiper rubber with the 2 rear wiper rubber backing plates through the second claw from the front of the rear wiper blade and then push it through each claw until the rear claw.
| *A | w/o Rear No. 2 Seat | *B | w/ Rear No. 2 Seat |
| *a | Second Claw | *b | Stopper |
| | Install in this Direction (1) | .png) | Install in this Direction (2) |
.png) | Install in this Direction (3) | - | - |
(c) After pushing the rear wiper rubber through the rear claw, pull it slightly over the rear stopper.
(d) Slide the rear wiper rubber through the front claw.
| (e) Securely engage the rear wiper blade claw to the rear wiper rubber groove as shown in the illustration. HINT:
|
|
5. INSTALL REAR WIPER BLADE (w/o Rear No. 2 Seat)
(a) Push the rear wiper blade up to install it to the rear wiper arm.

| | Install in this Direction |
| (b) Engage the claw to install the rear wiper blade as shown in the illustration. NOTICE: Be careful not to damage the claw. |
|
| (c) Lower the rear wiper arm and blade assembly as shown in the illustration. |
|
| (d) Turn the engine switch on (IG) to return the rear wiper arm and blade assembly to the automatic stop (park) position. |
|

(e) Turn the engine switch off.
6. INSTALL REAR WIPER BLADE (w/ Rear No. 2 Seat)
(a) Push the rear wiper blade as shown in the illustration to install it to the rear wiper arm.
| | Install in this Direction |
| (b) Engage the claw to install the rear wiper blade as shown in the illustration. NOTICE: Be careful not to damage the claw. |
|
| (c) Lower the rear wiper arm and blade assembly as shown in the illustration. |
|
 Components
COMPONENTS ILLUSTRATION *A w/o Rear No. 2 Seat - - *1 REAR WIPER BLADE *2 REAR WIPER RUBBER *3 REAR WIPER RUBBER BACKING PLATE - - ILLUSTRATION *A w/ Rear No. 2 ...
 Relay
Relay
On-vehicle InspectionON-VEHICLE INSPECTION PROCEDURE 1. INSPECT WIPER RELAY (a) Measure the resistance according to the value(s) in the table below. Standard Resistance: Tester Connection Con ...
Other materials:
Lexus RX (RX 350L, RX450h) 2016-2026 Repair Manual > Ambient Light(for Rear Door): Inspection
INSPECTION PROCEDURE 1. INSPECT REAR DOOR TRIM BOARD SUB-ASSEMBLY LH (REAR DOOR AMBIENT ILLUMINATION LIGHT LH) (a) Apply battery voltage to the connector and check that the rear door ambient illumination light LH comes on. OK: Measurement Condition Condition Specified Condition Batter ...
Lexus RX (RX 350L, RX450h) 2016-2026 Owners Manual > Before driving: Driving the vehicle
The following procedures should be observed to ensure safe driving:
Driving
1. With the brake pedal depressed, shift the shift lever to D.
2. Release the parking brake.
If the parking brake is in automatic mode, the parking brake is released
automatically
when shifting the shift lever to an ...
Lexus RX (RX 350L, RX450h) 2016-{YEAR} Owners Manual
- For your information
- Pictorial index
- For safety and security
- Instrument cluster
- Operation of each component
- Driving
- Lexus Display Audio system
- Interior features
- Maintenance and care
- When trouble arises
- Vehicle specifications
- For owners
Lexus RX (RX 350L, RX450h) 2016-{YEAR} Repair Manual

0.0163