Lexus RX (RX 350L, RX450h) 2016-2026 Repair Manual: Transmitter Battery
Replacement
REPLACEMENT
PROCEDURE
1. REMOVE TRANSMITTER BATTERY
NOTICE:
Take extra care when handling these precision electronic components.
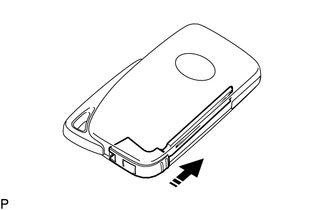
(a) Push the release hook knob and remove the mechanical key as shown in the illustration.
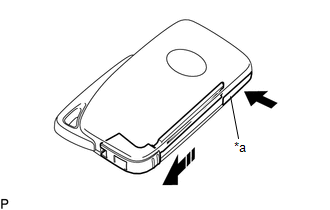
| *a | Release Hook Knob |
.png) | Push |
.png) | Remove in this Direction |
| (b) Insert a screwdriver into the gap, and turn the screwdriver to remove the transmitter housing cover. HINT: Tape the screwdriver tip before use. |
|
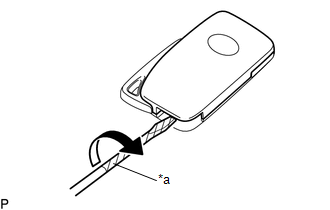
(c) Insert a precision screwdriver into the gap and gently remove the transmitter battery (lithium battery: CR2032) as shown in the illustration.
NOTICE:
- Do not push the terminals with your finger.
- Do not forcibly pry up the transmitter battery as the terminals may be damaged.
- Do not touch the transmitter battery with wet hands. Moisture may cause rust.
- Do not touch or move any components inside the transmitter housing case. It may interfere with proper operation.
- When replacing the transmitter battery, before starting work, remove static electricity that has built up in the body by touching, for example, the vehicle to prevent the electrical key transmitter sub-assembly from being damaged.
HINT:
Tape the screwdriver tip before use.

| *a | Protective Tape |
| | Remove in this Direction |
2. INSTALL TRANSMITTER BATTERY
(a) Install a new transmitter battery (lithium battery: CR2032) with the positive (+) side facing upward, as shown in the illustration.
NOTICE:
- Do not bend the transmitter battery electrode during installation.
- Keep the inside of the transmitter housing cover free of dust and oil.
- When replacing the transmitter battery, before starting work, remove static electricity that has built up in the body by touching, for example, the vehicle to prevent the electrical key transmitter sub-assembly from being damaged.
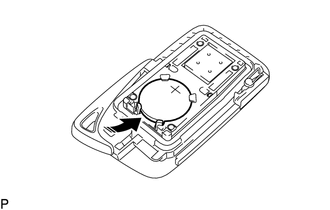
| | Install in this Direction |
(b) Install the transmitter housing cover by pressing down on it as shown in the illustration.
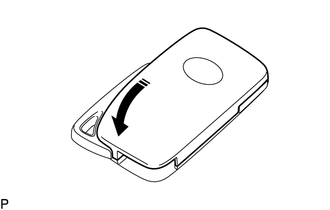
| | Install in this Direction |
(c) Insert the mechanical key into the transmitter as shown in the illustration.
| | Install in this Direction |
(d) Press one of the transmitter switches and check that the LED illuminates.
OK:
Transmitter LED illuminates when a switch is pressed.
 Removal
REMOVAL CAUTION / NOTICE / HINT The necessary procedures (adjustment, calibration, initialization or registration) that must be performed after parts are removed, installed or replaced during the rear ...
 Wireless Door Lock Buzzer
ComponentsCOMPONENTS ILLUSTRATION *A for TMMC Made - - *1 FRONT FENDER SPLASH SHIELD SUB-ASSEMBLY LH *2 FRONT WHEEL OPENING EXTENSION PAD LH *3 WIRELESS DOOR LOCK BUZZER - ...
Other materials:
Lexus RX (RX 350L, RX450h) 2016-2026 Repair Manual > Power Steering System: Diagnostic Trouble Code Chart
DIAGNOSTIC TROUBLE CODE CHART Power Steering System DTC No. Detection Item DTC Detection Condition Warning Indicate Return-to-normal Condition Note Link C1511 Torque Sensor1 Torque sensor malfunction EPS warning light: Comes on The ECU judges the system has returned to nor ...
Lexus RX (RX 350L, RX450h) 2016-2026 Repair Manual > Power Steering System: Problem Symptoms Table
PROBLEM SYMPTOMS TABLE HINT:
Use the table below to help determine the cause of problem symptoms. If multiple suspected areas are listed, the potential causes of the symptoms are listed in order of probability in the "Suspected Area" column of the table.
Check each symptom by checking the suspe ...
Lexus RX (RX 350L, RX450h) 2016-{YEAR} Owners Manual
- For your information
- Pictorial index
- For safety and security
- Instrument cluster
- Operation of each component
- Driving
- Lexus Display Audio system
- Interior features
- Maintenance and care
- When trouble arises
- Vehicle specifications
- For owners
Lexus RX (RX 350L, RX450h) 2016-{YEAR} Repair Manual

0.0104