Lexus RX (RX 350L, RX450h) 2016-2026 Repair Manual: Reassembly
REASSEMBLY
PROCEDURE
1. INSTALL REAR CONSOLE BOX WIRE
| (a) Engage the 9 clamps to install the rear console box wire. |
|
.png)
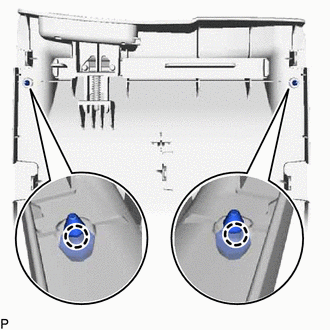
2. INSTALL NO. 1 INTERIOR ILLUMINATION LIGHT ASSEMBLY (for Rear Side)
Click here .gif)
3. INSTALL NO. 1 INTERIOR ILLUMINATION LIGHT ASSEMBLY (for Front Side)
Click here
4. INSTALL NO. 1 BOX PLATE UPPER
(a) Engage the 2 claws to install the No. 1 box plate upper as shown in the illustration.
.png) | Install in this Direction |
HINT:
Use the same procedure for the RH side and LH side.
5. INSTALL NO. 2 CONSOLE BOX DUCT
| (a) Engage the 6 claws. |
|
.png)
(b) Install the No. 2 console box duct with the 2 screws.
| (c) Install the No. 9 console box retainer with the 4 screws. |
|
.png)
| (d) Engage the clamp. |
|
.png)
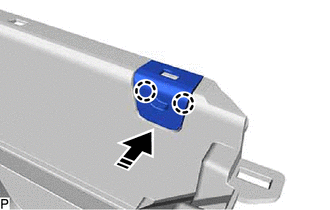
6. INSTALL GLOVE COMPARTMENT BOX BAND
(a) Using pliers, install the 2 glove compartment box bands as indicated by the arrows, in the order shown in the illustration.
| | Install in this Direction (1) |
.png) | Install in this Direction (2) |
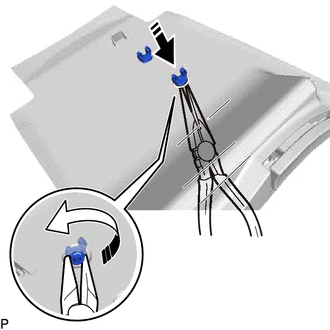
7. INSTALL CONSOLE COMPARTMENT DOOR CUSHION
| (a) Engage the 2 claws to install the 2 console compartment door cushions. |
|
8. INSTALL CONSOLE COMPARTMENT DOOR LOCK SUB-ASSEMBLY
| (a) Engage the 10 claws to install the console compartment door lock sub-assembly. |
|
9. INSTALL REAR CONSOLE ARMREST ASSEMBLY
| (a) Install the rear console armrest assembly with the 4 screws. |
|
.png)
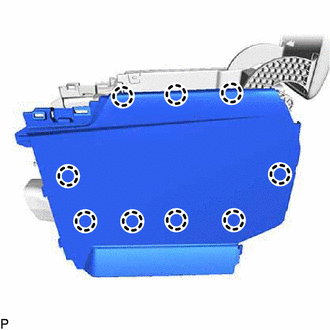
10. INSTALL NO. 2 BOX SIDE PANEL
| (a) Engage the 9 claws to install the No. 2 box side panel. |
|
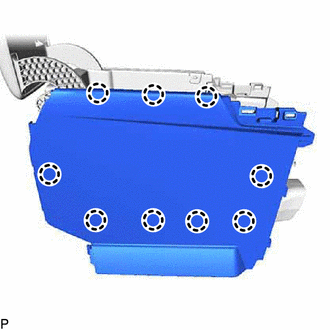
11. INSTALL NO. 1 BOX SIDE PANEL
| (a) Engage the 9 claws to install the No. 1 box side panel. |
|
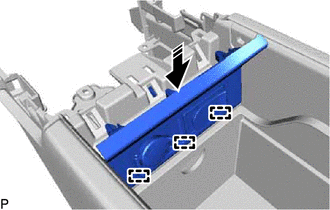
12. INSTALL LOWER CONSOLE BOX POCKET (for TMMC Made)
(a) Install the lower console box pocket as shown in the illustration.
| | Install in this Direction |
13. INSTALL NO. 1 STEREO JACK ADAPTER ASSEMBLY
Click here
14. INSTALL NO. 2 POWER OUTLET SOCKET COVER
Click here
15. INSTALL NO. 2 POWER OUTLET SOCKET ASSEMBLY
Click here
16. INSTALL REAR CONSOLE BOX GARNISH
(a) Engage the 3 guides as shown in the illustration.
| | Install in this Direction |
(b) Engage the 3 clips to install the rear console box garnish as shown in the illustration.
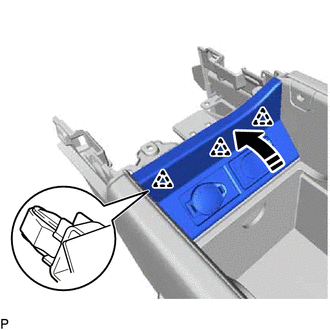
| | Install in this Direction |
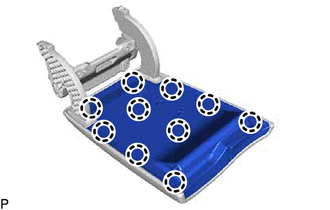
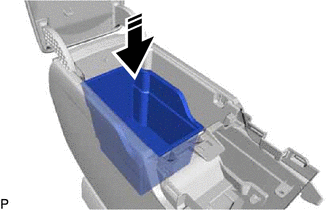
17. INSTALL CONSOLE COIN BOX (w/ Console Coin Box)
| (a) Install the console coin box. |
|
.png)
 Installation
INSTALLATION PROCEDURE 1. INSTALL CONSOLE BOX ASSEMBLY (a) Engage the 6 guides as shown in the illustration. Install in this Direction (b) Connect each connector. (c) Install the console box ...

Other materials:
Lexus RX (RX 350L, RX450h) 2016-2026 Owners Manual > Operating the lights and
wipers: Automatic High Beam
The Automatic High Beam uses a camera sensor located behind the upper
portion of the windshield to assess the brightness of the lights of vehicles
ahead, streetlights, etc., and automatically turns the high beams on or off as
necessary.
WARNING
■ Limitations of the Automatic High Beam
Do not ...
Lexus RX (RX 350L, RX450h) 2016-2026 Repair Manual > Fuel Pump (for High Pressure): Components
COMPONENTS ILLUSTRATION *A for TMC Made *B for TMMC Made *1 NO. 2 ENGINE UNDER COVER - - ILLUSTRATION *1 FUEL PUMP ASSEMBLY *2 FUEL PUMP PROTECTOR *3 NO. 1 FUEL PIPE SUB-ASSEMBLY *4 NO. 2 FUEL TUBE SUB-ASSEMBLY *5 FUEL PUMP LIFTER ASSEMBLY *6 FUEL ...
Lexus RX (RX 350L, RX450h) 2016-{YEAR} Owners Manual
- For your information
- Pictorial index
- For safety and security
- Instrument cluster
- Operation of each component
- Driving
- Lexus Display Audio system
- Interior features
- Maintenance and care
- When trouble arises
- Vehicle specifications
- For owners
Lexus RX (RX 350L, RX450h) 2016-{YEAR} Repair Manual

0.01