Lexus RX (RX 350L, RX450h) 2016-2026 Repair Manual: Vanity Light
Components
COMPONENTS
ILLUSTRATION

| *1 | VANITY LIGHT ASSEMBLY | *2 | VANITY LIGHT BULB |
Removal
REMOVAL
CAUTION / NOTICE / HINT
HINT:
- Use the same procedure for the RH side and LH side.
- The following procedure is for the LH side.
PROCEDURE
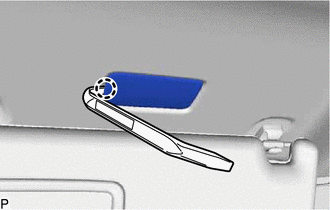
1. REMOVE VANITY LIGHT ASSEMBLY
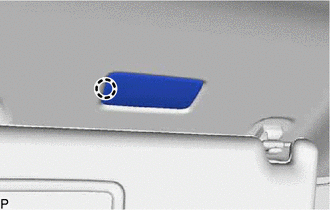
| (a) Using a moulding remover, disengage the claw. |
|
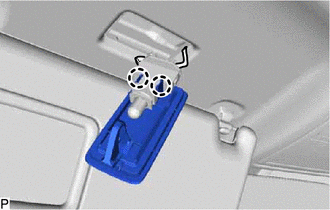
| (b) Disengage the 2 claws to remove the vanity light assembly from the bulb holder. |
|
2. REMOVE VANITY LIGHT BULB
(a) Remove the vanity light bulb from the bulb holder as shown in the illustration.
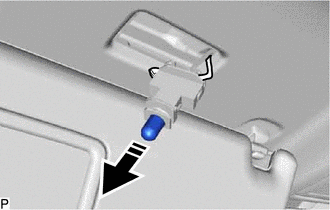
.png) | Remove in this Direction |
Installation
INSTALLATION
CAUTION / NOTICE / HINT
HINT:
- Use the same procedure for the RH side and LH side.
- The following procedure is for the LH side.
PROCEDURE
1. INSTALL VANITY LIGHT BULB
(a) Install the vanity light bulb to the bulb holder as shown in the illustration.
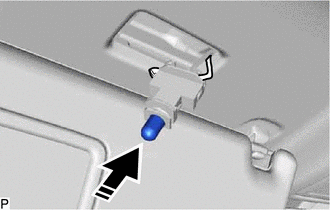
.png) | Install in this Direction |
2. INSTALL VANITY LIGHT ASSEMBLY
| (a) Engage the 2 claws to install the vanity light assembly to the bulb holder. |
|
.png)
| (b) Engage the claw to install the vanity light assembly. |
|
 Scuff Plate Light
ComponentsCOMPONENTS ILLUSTRATION *1 FRONT DOOR SCUFF PLATE LH *2 FRONT DOOR SCUFF PLATE RH RemovalREMOVAL PROCEDURE 1. REMOVE FRONT DOOR SCUFF PLATE LH Click here 2. REMOVE FRONT DO ...
 Vanity Light Bulb
ReplacementREPLACEMENT CAUTION / NOTICE / HINT HINT:
Use the same procedure for the RH side and LH side.
The following procedure is for the LH side.
PROCEDURE 1. SEPARATE VANITY LIGHT ASSEMBLY ...
Other materials:
Lexus RX (RX 350L, RX450h) 2016-2026 Repair Manual > Seat Belt: Rear No. 2 Seat Inner Belt Assembly
ComponentsCOMPONENTS ILLUSTRATION *1 REAR NO. 2 SEAT INNER BELT ASSEMBLY LH *2 REAR NO. 2 SEAT INNER BELT ASSEMBLY RH Tightening torque for "Major areas involving basic vehicle performance such as moving/turning/stopping": N*m (kgf*cm, ft.*lbf) - - RemovalREMOVAL PROCEDURE 1. ...
Lexus RX (RX 350L, RX450h) 2016-2026 Owners Manual > Using the other interior
features: Compass
The compass on the inside rear view mirror indicates the direction in
which
the vehicle is heading.
Operation
To turn the compass on or off, press and
hold the switch for 3 seconds.
Displays and directions
Calibrating the compass
The direction display deviates from the true direction ...
Lexus RX (RX 350L, RX450h) 2016-{YEAR} Owners Manual
- For your information
- Pictorial index
- For safety and security
- Instrument cluster
- Operation of each component
- Driving
- Lexus Display Audio system
- Interior features
- Maintenance and care
- When trouble arises
- Vehicle specifications
- For owners
Lexus RX (RX 350L, RX450h) 2016-{YEAR} Repair Manual

0.0113