Lexus RX (RX 350L, RX450h) 2016-2026 Repair Manual: Inspection
INSPECTION
PROCEDURE
1. INSPECT FRONT SEAT ADJUSTER ASSEMBLY LH
| (a) Check the operation of the slide motor. (1) Check that the seat cushion moves smoothly when the battery is connected to the slide motor connector terminals. OK: w/ Memory
If the result is not as specified, replace the front seat adjuster assembly LH. |
|
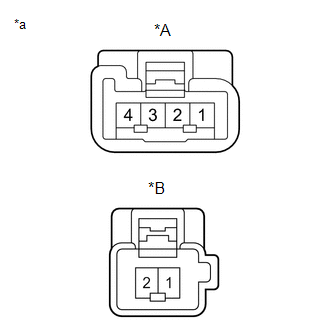
| (b) Check the operation of the front vertical motor. (1) Check that the seat cushion moves smoothly when the battery is connected to the front vertical motor connector terminals. OK:
If the result is not as specified, replace the front seat adjuster assembly LH. |
|
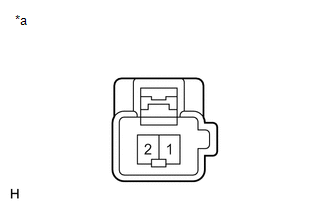
| (c) Check the operation of the lifter motor. (1) Check that the seat cushion moves smoothly when the battery is connected to the lifter motor connector terminals. OK:
If the result is not as specified, replace the front seat adjuster assembly LH. |
|
2. INSPECT FRONT SEATBACK FRAME SUB-ASSEMBLY LH
| (a) Check the operation of the reclining motor. (1) Check that the seatback moves smoothly when the battery is connected to the reclining motor connector terminals. OK:
If the result is not as specified, replace the front seatback frame sub-assembly LH. |
|
3. INSTALL FRONT SEAT VERTICAL ADJUSTER ASSEMBLY LH
| (a) Check the operation of the cushion length motor. (1) Check that the seatback moves smoothly when the battery is connected to the cushion length motor connector terminals. OK:
If the result is not as specified, replace the front seat vertical adjuster assembly LH. |
|
4. INSPECT FRONT SEAT ADJUSTER ASSEMBLY RH
| (a) Check the operation of the slide motor. (1) Check that the front seat cushion moves smoothly when the battery is connected to the slide motor connector terminals. OK:
If the result is not as specified, replace the front seat adjuster assembly RH. |
|
| (b) Check the operation of the front vertical motor. (1) Check that the seat cushion moves smoothly when the battery is connected to the front vertical motor connector terminals. OK:
If the result is not as specified, replace the front seat adjuster assembly RH. |
|
| (c) Check the operation of the lifter motor. (1) Check that the seat cushion moves smoothly when the battery is connected to the lifter motor connector terminals. OK:
If the result is not as specified, replace the front seat adjuster assembly RH. |
|
5. INSPECT FRONT SEATBACK FRAME SUB-ASSEMBLY RH
| (a) Check the operation of the reclining motor. (1) Check that the front seatback moves smoothly when the battery is connected to the reclining motor connector terminals. OK:
If the result is not as specified, replace the front seatback frame sub-assembly RH. |
|
6. INSTALL FRONT SEAT VERTICAL ADJUSTER ASSEMBLY RH
| (a) Check the operation of the cushion length motor. (1) Check that the seatback moves smoothly when the battery is connected to the cushion length motor connector terminals. OK:
If the result is not as specified, replace the front seat vertical adjuster assembly RH. |
|
 Components
COMPONENTS ILLUSTRATION *1 FRONT INNER SEAT TRACK BRACKET COVER *2 FRONT OUTER SEAT TRACK BRACKET COVER *3 FRONT SEAT ASSEMBLY *4 FRONT SEAT HEADREST ASSEMBLY *5 REAR INNER S ...
 Precaution
PRECAUTION HINT:
The following procedures are used to prevent wrinkles from forming when installing the seat cover. Make sure to follow the procedures correctly.
The shape of the seat shown i ...
Other materials:
Lexus RX (RX 350L, RX450h) 2016-2026 Repair Manual > Quarter Trim Speaker (w/ Rear No. 2 Seat): Inspection
INSPECTION PROCEDURE 1. INSPECT QUARTER SIDE SPEAKER ASSEMBLY (a) With the speaker installed, check that there is no looseness or other abnormalities. (b) Check that there is no foreign matter in the speaker, no tears on the speaker cone or other abnormalities. (c) Measure the resistance of the s ...
Lexus RX (RX 350L, RX450h) 2016-2026 Repair Manual > Power Mirror Control System (w/ Memory): Lost Communication with Main Body ECU (U0142)
DESCRIPTION DTC No. Detection Item DTC Detection Condition Trouble Area U0142 Lost Communication with Main Body ECU No communication with main body ECU (multiplex network body ECU)
CAN communication system
Main body ECU (multiplex network body ECU)
CAUTION / NOTICE / HI ...
Lexus RX (RX 350L, RX450h) 2016-{YEAR} Owners Manual
- For your information
- Pictorial index
- For safety and security
- Instrument cluster
- Operation of each component
- Driving
- Lexus Display Audio system
- Interior features
- Maintenance and care
- When trouble arises
- Vehicle specifications
- For owners
Lexus RX (RX 350L, RX450h) 2016-{YEAR} Repair Manual

0.0099