Lexus RX (RX 350L, RX450h) 2016-2026 Repair Manual: Inspection
INSPECTION
PROCEDURE
1. INSPECT LUMBAR SUPPORT ADJUSTER ASSEMBLY LH (w/ Seat Variable Cushion Switch)
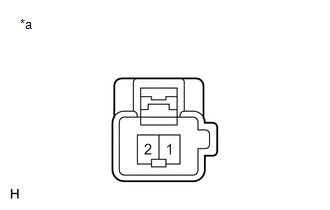
| (a) Check the operation of the lumbar support adjuster assembly LH. (1) Check that the front seatback moves smoothly when the battery is connected to the lumbar support adjuster assembly LH (forward and backward operation) connector terminals. OK:
If the result is not as specified, replace the lumbar support adjuster assembly LH. |
|
| (b) Check the operation of the lumbar support adjuster assembly LH. (1) Check that the front seatback moves smoothly when the battery is connected to the lumbar support adjuster assembly LH (upward and downward operation) connector terminals. OK:
If the result is not as specified, replace the lumbar support adjuster assembly LH. |
|
2. INSPECT LUMBAR SUPPORT ADJUSTER ASSEMBLY LH (w/o Seat Variable Cushion Switch)
| (a) Check the operation of the lumbar support adjuster assembly LH. (1) Check that the front seatback moves smoothly when the battery is connected to the lumbar support adjuster assembly LH connector terminals. OK:
If the result is not as specified, replace the lumbar support adjuster assembly LH. |
|
3. INSPECT LUMBAR SUPPORT ADJUSTER ASSEMBLY RH (w/ Seat Variable Cushion Switch)
| (a) Check the operation of the lumbar support adjuster assembly RH. (1) Check that the front seatback moves smoothly when the battery is connected to the lumbar support adjuster assembly RH (forward and backward operation) connector terminals. OK:
If the result is not as specified, replace the lumbar support adjuster assembly RH. |
|
| (b) Check the operation of the lumbar support adjuster assembly RH. (1) Check that the front seatback moves smoothly when the battery is connected to the lumbar support adjuster assembly RH (upward and downward operation) connector terminals. OK:
If the result is not as specified, replace the lumbar support adjuster assembly RH. |
|
4. INSPECT LUMBAR SUPPORT ADJUSTER ASSEMBLY RH (w/o Seat Variable Cushion Switch)
| (a) Check the operation of the lumbar support adjuster assembly RH. (1) Check that the front seatback moves smoothly when the battery is connected to the lumbar support adjuster assembly RH connector terminals. OK:
If the result is not as specified, replace the lumbar support adjuster assembly RH. |
|
 Components
COMPONENTS ILLUSTRATION *A for Standard Seat Type *B for Sports Seat Type *1 FRONT SEAT CUSHION SHIELD *2 FRONT SEAT INNER CUSHION SHIELD *3 INNER NO. 1 FRONT SEAT CUSHION SH ...
 Removal
REMOVAL CAUTION / NOTICE / HINT The necessary procedures (adjustment, calibration, initialization or registration) that must be performed after parts are removed and installed, or replaced during lumb ...
Other materials:
Lexus RX (RX 350L, RX450h) 2016-2026 Repair Manual > Seat Heater System: Problem Symptoms Table
PROBLEM SYMPTOMS TABLE NOTICE:
If the battery voltage is low, the seat heater system may not operate. When "Operation of Electrical Items Restricted." is displayed on the multi-information display in the combination meter assembly, inspect the battery, referring to On-vehicle Inspection for the c ...
Lexus RX (RX 350L, RX450h) 2016-2026 Repair Manual > Occupant Classification Ecu: On-vehicle Inspection
ON-VEHICLE INSPECTION CAUTION / NOTICE / HINT CAUTION: Be sure to correctly follow the removal and installation procedures for the occupant detection ECU. PROCEDURE 1. INSPECT OCCUPANT DETECTION ECU (for Vehicle not Involved in Collision) (a) Perform a diagnostic system check. Click here 2. INSPEC ...
Lexus RX (RX 350L, RX450h) 2016-{YEAR} Owners Manual
- For your information
- Pictorial index
- For safety and security
- Instrument cluster
- Operation of each component
- Driving
- Lexus Display Audio system
- Interior features
- Maintenance and care
- When trouble arises
- Vehicle specifications
- For owners
Lexus RX (RX 350L, RX450h) 2016-{YEAR} Repair Manual

0.0099