Lexus RX (RX 350L, RX450h) 2016-2026 Repair Manual: Rear No. 2 Seat Inner Belt Assembly
Components
COMPONENTS
ILLUSTRATION

| *1 | REAR NO. 2 SEAT INNER BELT ASSEMBLY LH | *2 | REAR NO. 2 SEAT INNER BELT ASSEMBLY RH |
.png) | Tightening torque for "Major areas involving basic vehicle performance such as moving/turning/stopping": N*m (kgf*cm, ft.*lbf) | - | - |
Removal
REMOVAL
PROCEDURE
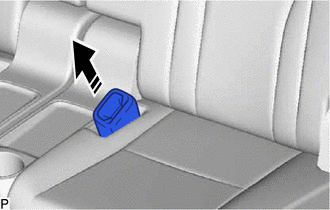
1. REMOVE REAR NO. 2 SEAT ASSEMBLY
Click here .gif)
2. REMOVE REAR NO. 2 SEAT INNER BELT ASSEMBLY LH
| (a) Disconnect the connector. |
|
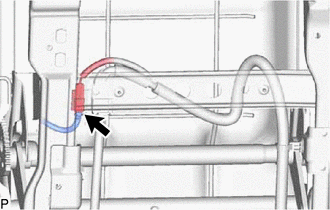
(b) Disengage each clamp.
| (c) Remove the bolt. |
|
(d) Remove the rear No. 2 seat inner belt assembly LH from the rear No. 2 seat cushion assembly LH as shown in the illustration.
.png) | Remove in this Direction |
3. REMOVE REAR NO. 2 SEAT INNER BELT ASSEMBLY RH
HINT:
Use the same procedure as for the LH side.
Inspection
INSPECTION
PROCEDURE
1. INSPECT REAR NO. 2 SEAT INNER BELT ASSEMBLY RH
| (a) Measure the resistance according to the value(s) in the table below. Standard Resistance:
If the result is not as specified, replace the rear No. 2 seat inner belt assembly RH. |
|
.png)
2. INSPECT REAR NO. 2 SEAT INNER BELT ASSEMBLY LH
| (a) Measure the resistance according to the value(s) in the table below. Standard Resistance:
If the result is not as specified, replace the rear No. 2 seat inner belt assembly LH. |
|
Installation
INSTALLATION
PROCEDURE
1. INSTALL REAR NO. 2 SEAT INNER BELT ASSEMBLY LH
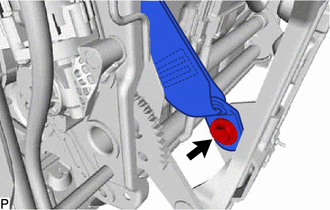
(a) Pass the rear No. 2 seat inner belt assembly LH through the rear No. 2 seat cushion assembly LH as shown in the illustration.
.png) | Insert in this Direction |
(b) Install the rear No. 2 seat inner belt assembly LH with the bolt.
Torque:
42 N·m {428 kgf·cm, 31 ft·lbf}
(c) Engage each clamp.
(d) Connect the connector.
2. INSTALL REAR NO. 2 SEAT INNER BELT ASSEMBLY RH
HINT:
Use the same procedure as for the LH side.
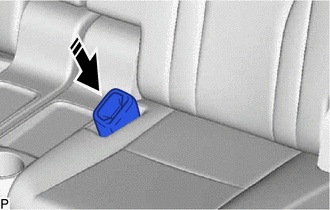
3. INSTALL REAR NO. 2 SEAT ASSEMBLY
Click here .gif)
 Installation
INSTALLATION CAUTION / NOTICE / HINT HINT:
Use the same procedure for the RH side and LH side.
The following procedure is for the LH side.
PROCEDURE 1. INSPECT REAR NO. 1 SEAT OUTER BELT ASSEM ...

Other materials:
Lexus RX (RX 350L, RX450h) 2016-2026 Repair Manual > Airbag System: Front Door Pressure Sensor RH (B166C,B166F)
DESCRIPTION The side collision sensor RH circuit (bus 1) consists of the airbag sensor assembly, door side airbag sensor RH and rear airbag sensor RH. The door side airbag sensor RH and rear airbag sensor RH detect impacts to the vehicle and send signals to the airbag sensor assembly to determine if ...
Lexus RX (RX 350L, RX450h) 2016-2026 Repair Manual > Front Seat Assembly: Installation
INSTALLATION CAUTION / NOTICE / HINT CAUTION:
Be sure to read Precaution thoroughly before servicing.
Click here
Wear protective gloves. Sharp areas on the parts may injure your hands.
HINT:
Use the same procedure for the RH side and LH side.
The following procedure is for the LH sid ...
Lexus RX (RX 350L, RX450h) 2016-{YEAR} Owners Manual
- For your information
- Pictorial index
- For safety and security
- Instrument cluster
- Operation of each component
- Driving
- Lexus Display Audio system
- Interior features
- Maintenance and care
- When trouble arises
- Vehicle specifications
- For owners
Lexus RX (RX 350L, RX450h) 2016-{YEAR} Repair Manual

0.0095