Lexus RX (RX 350L, RX450h) 2016-2026 Owners Manual: Folding the second-row seat seatbacks (RX450h)
■ Before folding the rear seatbacks
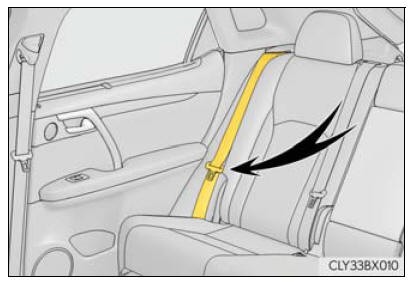
1. Stow the center seat seat belt buckle.
2. Lower the rear seat head restraints to the lowest position.
■ Folding the rear seatbacks (manual seat)
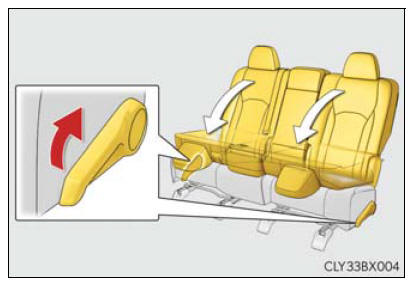
Using the seatback angle adjustment lever
Pull the lever and fold the rear seatback.
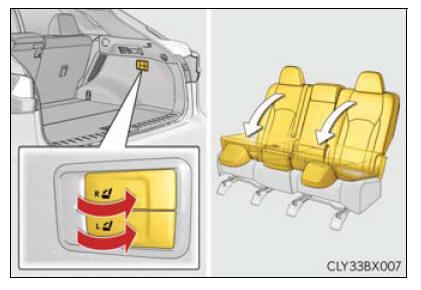
Using the lever in the luggage compartment
Pull the lever and fold the rear seatback.
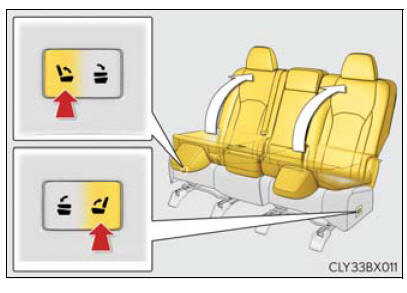
■ Folding the rear seatbacks (power seat) Press and hold the fold switch until the rear seatback begins to operate.
A buzzer will sound and then the operation will start. When the operation is completed, the buzzer will sound again.
To stop the operation partway, press either side of the switch for the operating seat.
Any rear seat operation switch for the operating seat, regardless of location, can be used to stop the operation. (A buzzer may sound depending on the position that the rear seatback is stopped.)
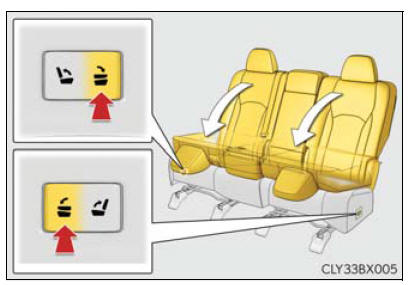
Using the seatback angle adjustment switch
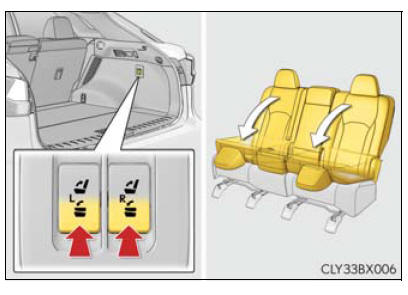
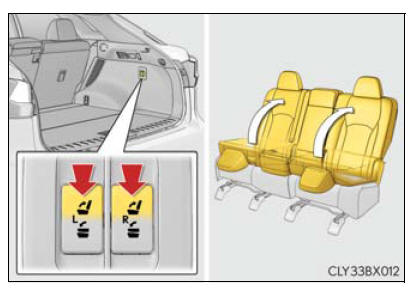
Using the switch in the luggage compartment
When using the seatback angle adjustment switch: If the rear seatback is reclined, adjust it to the most upright position and then press the switch again.
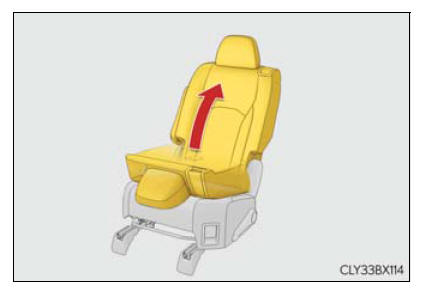
■ Returning the rear seatbacks (manual seat)
1. Lift the rear seatback until it locks in position.
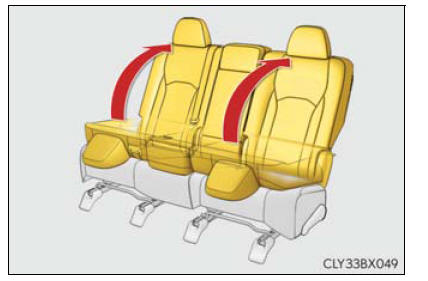
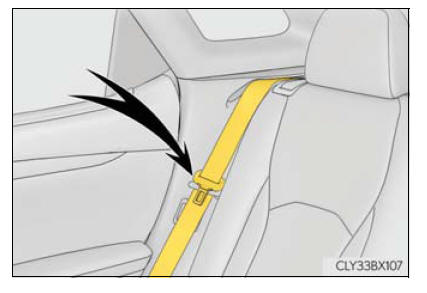
2. Check that the plate of the seat belt is on the front side of the seatback.
■ Returning the rear seatbacks (power seat)
1. Press and hold the return switch until the rear seatback begins to operate.
A buzzer will sound and then the operation will start. When the operation is completed, the buzzer will sound twice again.
To stop the operation partway, press either side of the switch for the operating seat.
Any rear seat operation switch for the operating seat, regardless of location, can be used to stop the operation. (A buzzer may sound depending on the position that the rear seatback is stopped.)
Using the seatback angle adjustment switch
Using the switch in the luggage compartment
2. Check that the plate of the seat belt is on the front side of the seatback.
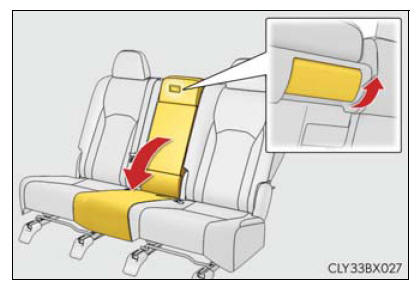
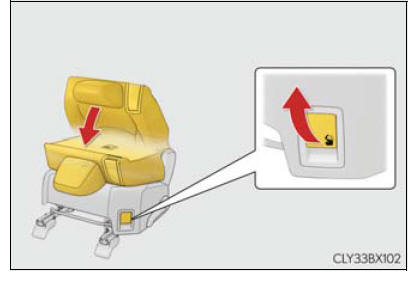
■ Folding the rear center seatback only Pull the lock release lever on the back side of the seatback and fold the center seatback.
To return the rear center seatback to its original position, lift it until it locks in position.
Folding the second-row seat seatbacks (RX450hL)
■ Before folding the second-row seat seatbacks
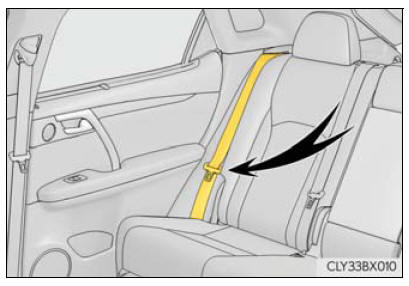
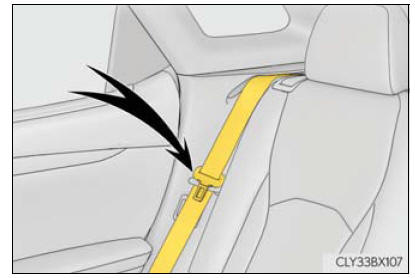
1. To prevent the seat belt from being damaged, hook it to the seat belt hanger.
2. Stow the center seat seat belt buckle.
3. Lower the second-row seat head restraints to the lowest position.
■ Folding the second-row seat seatbacks
1. Pull the seatback angle adjustment lever and tilt the seatback forward.
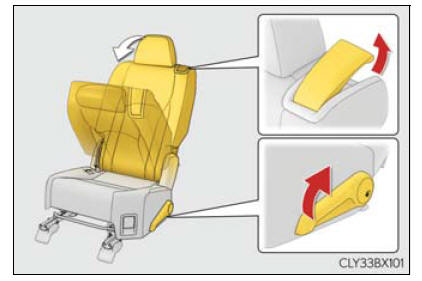
2. Pull the seatback folding lever and fold the seatback.
■ Returning the second-row seat seatbacks Lift the second-row seat seatback until it locks in position.
Moving the second-row seat for third-row seat access (RX450hL)
■ Before moving the second-row seat To prevent the seat belt from being damaged, hook it to the seat belt hanger.
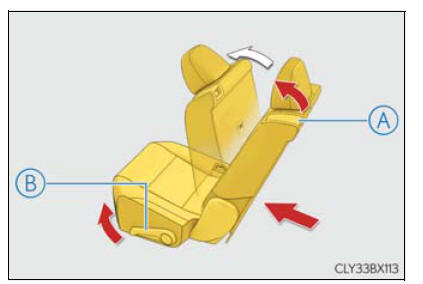
■ When entering/exiting the vehicle Pull the seatback angle adjustment lever A or B to tilt the seatback forward and then slide the seat forward.
Make sure that the second-row seat is free of passengers and obstructions before operating the seatback tilt lever.
■ After passengers have entered/exited the vehicle Tilt back and slide the second-row seat until it locks in position.
 Second-row seats (RX450h)
Manual seat
Seatback angle adjustment lever
Seat position adjustment lever
Power seat
Seatback angle adjustment switch
Seat position adjustment lever
Second-row seats (RX450hL)
...
 Folding the third-row seat seatbacks (RX450hL)
■ Before folding the third-row seat seatbacks
1. To prevent the seat belt from
being damaged, hook it to the
seat belt hanger.
2. Lower the third-row seat head restraints to the lowest positio ...
Other materials:
Lexus RX (RX 350L, RX450h) 2016-2026 Repair Manual > Wireless Charging System: Status Signal Circuit
DESCRIPTION This circuit sends a charging suspension signal from the certification ECU (smart key ECU assembly) to the mobile wireless charger cradle assembly. Based on this signal, the mobile wireless charger cradle assembly suspends or resumes wireless charging. HINT: The wireless charging system ...
Lexus RX (RX 350L, RX450h) 2016-2026 Repair Manual > Charging System: Noise Occurs from V-ribbed Belt or Generator Assembly
PROCEDURE 1. CONFIRM PROBLEM SYMPTOM (a) Confirm the problem symptom. Symptom Proceed to Noise occurs from V-ribbed belt A Noise occurs from generator assembly B B GO TO STEP 6
A 2. CHECK V-RIBBED BELT FOR WEAR (a) Check the V-ribbed ...
Lexus RX (RX 350L, RX450h) 2016-{YEAR} Owners Manual
- For your information
- Pictorial index
- For safety and security
- Instrument cluster
- Operation of each component
- Driving
- Lexus Display Audio system
- Interior features
- Maintenance and care
- When trouble arises
- Vehicle specifications
- For owners
Lexus RX (RX 350L, RX450h) 2016-{YEAR} Repair Manual

0.0105