Lexus RX (RX 350L, RX450h) 2016-2026 Repair Manual: Reassembly
REASSEMBLY
CAUTION / NOTICE / HINT
HINT:
Perform the removal and installation of the front disc brake piston, cylinder boot and piston seal one side at a time.
PROCEDURE
1. TEMPORARILY TIGHTEN FRONT DISC BRAKE BLEEDER PLUG
HINT:
Fully tighten the front disc brake bleeder plug after bleeding the system.
2. INSTALL FRONT DISC BRAKE BLEEDER PLUG CAP
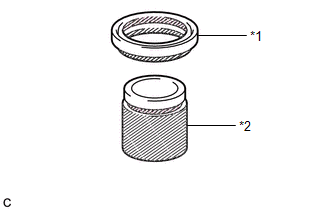
3. INSTALL PISTON SEAL
(a) Apply lithium soap base glycol grease to the entire circumference of a new piston seal.
 | Lithium Soap Base Glycol Grease |
(b) Install the piston seal to the front disc brake cylinder.
NOTICE:
Securely install the piston seal into the groove of the front disc brake cylinder.
4. INSTALL FRONT DISC BRAKE PISTON (for TMC Made)
(a) Apply a light layer of lithium soap base glycol grease to the entire circumference of a new cylinder boot.
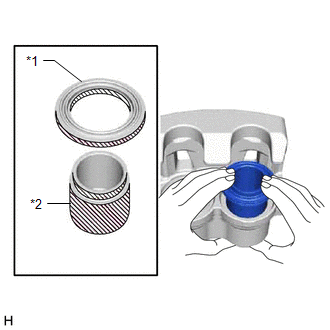
| *1 | Cylinder Boot |
| *2 | Front Disc Brake Piston |
| | Lithium Soap Base Glycol Grease |
(b) Install the cylinder boot to the front disc brake piston.
NOTICE:
Securely install the cylinder boot into the groove of the front disc brake piston.
(c) Apply a light layer of lithium soap base glycol grease to the contact surfaces of the front disc brake piston, and install it to the front disc brake cylinder.
NOTICE:
Do not forcibly install the front disc brake piston into the front disc brake cylinder.
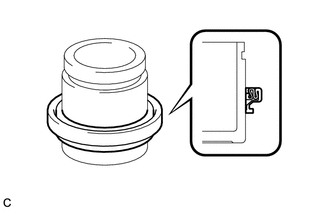
5. INSTALL CYLINDER BOOT (for TMC Made)
| (a) Install the cylinder boot to the front disc brake cylinder as shown in the illustration. NOTICE:
|
|
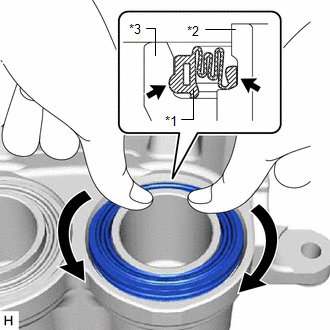
6. INSTALL CYLINDER BOOT (for TMMC Made)
(a) Apply a light layer of lithium soap base glycol grease to the entire circumference of a new cylinder boot and front disc brake piston.
| *1 | Cylinder Boot |
| *2 | Front Disc Brake Piston |
| | Lithium Soap Base Glycol Grease |
| (b) Install the cylinder boot to the front disc brake piston as shown in the illustration. NOTICE: Do not damage the cylinder boot. |
|
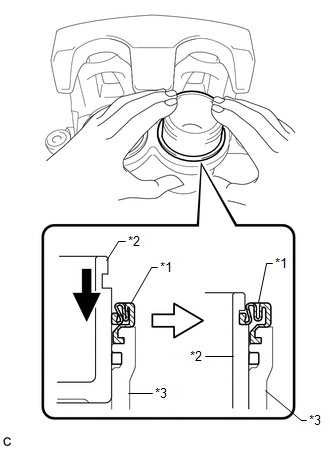
7. INSTALL FRONT DISC BRAKE PISTON (for TMMC Made)
| (a) Install the front disc brake piston and cylinder boot to the front disc brake cylinder as shown in the illustration. NOTICE:
|
|
 Inspection
INSPECTION PROCEDURE 1. INSPECT BRAKE CYLINDER AND PISTON (a) Check the front disc brake cylinder bore and front disc brake piston for rust and scoring. If necessary, replace the front disc brake cyli ...
 Installation
INSTALLATION CAUTION / NOTICE / HINT HINT:
Use the same procedure for the RH side and LH side.
The following procedure is for the LH side.
PROCEDURE 1. INSTALL FRONT DISC (a) Align the matc ...
Other materials:
Lexus RX (RX 350L, RX450h) 2016-2026 Repair Manual > Cylinder Head: Replacement
REPLACEMENT CAUTION / NOTICE / HINT HINT:
Use the same procedure for bank 1 and bank 2.
The following procedure is for bank 2.
PROCEDURE 1. REPLACE INTAKE VALVE GUIDE BUSH (a) Heat the cylinder head LH to between 80 and 100°C (176 and 212°F). (b) Place the cylinder head LH on wooden blocks ...
Lexus RX (RX 350L, RX450h) 2016-2026 Repair Manual > Power Window Control System: Diagnosis System
DIAGNOSIS SYSTEM DESCRIPTION (a) Power window control system data and Diagnostic Trouble Codes (DTCs) can be read through the vehicle Data Link Connector 3 (DLC3). When the system seems to be malfunctioning, use the Techstream to check for malfunctions and perform repairs. CHECK DLC3 (a) Check the D ...
Lexus RX (RX 350L, RX450h) 2016-{YEAR} Owners Manual
- For your information
- Pictorial index
- For safety and security
- Instrument cluster
- Operation of each component
- Driving
- Lexus Display Audio system
- Interior features
- Maintenance and care
- When trouble arises
- Vehicle specifications
- For owners
Lexus RX (RX 350L, RX450h) 2016-{YEAR} Repair Manual

0.0116