
Lexus RX (RX 350L, RX450h) 2016-2026 Repair Manual: Removal
REMOVAL
CAUTION / NOTICE / HINT
HINT:
The rear speed sensor rotor is a component of the rear axle hub and bearing assembly. If the rear speed sensor rotor is malfunctioning, replace the rear axle hub and bearing assembly.
PROCEDURE
1. REMOVE REAR WHEEL
Click here .gif)
2. REMOVE NO. 2 PARKING BRAKE WIRE ASSEMBLY (for LH Side)
| (a) Disconnect the connector. |
|
.png)
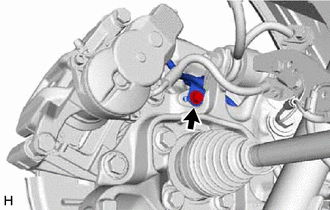
| (b) Remove the bolt and separate the No. 2 parking brake wire assembly from the rear axle carrier sub-assembly LH. |
|
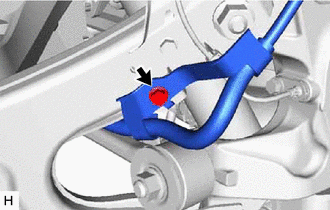
| (c) Remove the bolt and separate the No. 2 parking brake wire assembly from the sensor clamp. |
|
3. REMOVE NO. 1 PARKING BRAKE WIRE ASSEMBLY (for RH Side)
HINT:
Use the same procedure for the No. 2 parking brake wire assembly.
4. REMOVE REAR SPEED SENSOR LH (w/o AVS)
| (a) Disconnect the rear speed sensor connector. |
|
.png)
(b) Remove the nut and separate the sensor clamp from the rear suspension member sub-assembly.
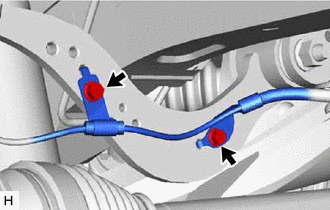
| (c) Remove the 2 bolts and separate the 2 sensor clamps from the rear upper control arm assembly LH. |
|
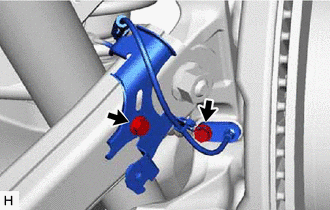
| (d) Remove the 2 bolts, sensor clamp and rear speed sensor LH from the rear axle carrier sub-assembly LH and rear trailing arm assembly LH. NOTICE:
|
|
5. REMOVE REAR SPEED SENSOR LH (w/ AVS)
| (a) Disconnect the rear speed sensor connector. |
|
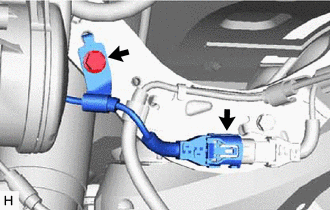
(b) Remove the bolt and separate the sensor clamp from the rear upper control arm assembly LH.
| (c) Remove the 2 bolts, sensor clamp and rear speed sensor LH from the rear axle carrier sub-assembly LH and rear trailing arm assembly LH. NOTICE:
|
|
6. REMOVE REAR SPEED SENSOR RH (w/o AVS)
| (a) Disengage the clamp and separate the wire harness from the sensor clamp. |
|
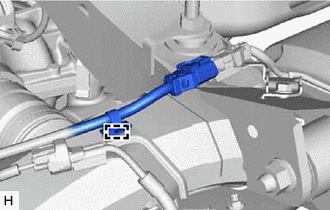
| (b) Disconnect the rear speed sensor connector. |
|
.png)
(c) Remove the nut and separate the sensor clamp from the rear suspension member sub-assembly.
| (d) Remove the 2 bolts and separate the 2 sensor clamps from the rear upper control arm assembly RH. |
|
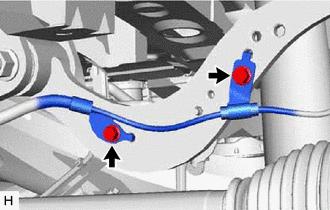
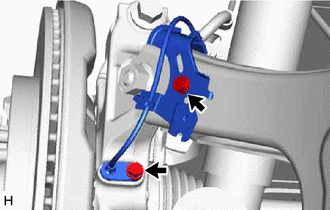
| (e) Remove the 2 bolts, sensor clamp and rear speed sensor RH from the rear axle carrier sub-assembly RH and rear trailing arm assembly RH. NOTICE:
|
|
7. REMOVE REAR SPEED SENSOR RH (w/ AVS)
| (a) Disconnect the rear speed sensor connector. |
|
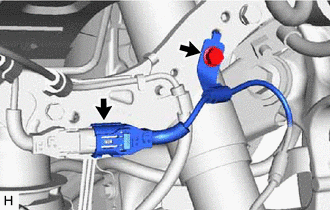
(b) Remove the bolt and separate the sensor clamp from the rear upper control arm assembly RH.
| (c) Remove the 2 bolts, sensor clamp and rear speed sensor RH from the rear axle carrier sub-assembly RH and rear trailing arm assembly RH. NOTICE:
|
|
 Installation
INSTALLATION CAUTION / NOTICE / HINT HINT: The rear speed sensor rotor is a component of the rear axle hub and bearing assembly. If the rear speed sensor rotor is malfunctioning, replace the rear axle ...

Other materials:
Lexus RX (RX 350L, RX450h) 2016-2026 Repair Manual > Navigation / Multi Info Display: Multi-display
ComponentsCOMPONENTS ILLUSTRATION *A for 8 Inch Display *B for 12.3 Inch Display *1 INSTRUMENT PANEL FINISH PANEL SUB-ASSEMBLY *2 MULTI-DISPLAY ASSEMBLY *3 MULTI-DISPLAY CONTROLLER BRACKET A - - RemovalREMOVAL PROCEDURE 1. REMOVE INSTRUMENT PANEL FINISH PANEL SUB-ASS ...
Lexus RX (RX 350L, RX450h) 2016-2026 Repair Manual > Pre-collision System Warning Buzzer: Installation
INSTALLATION PROCEDURE 1. INSTALL SKID CONTROL BUZZER ASSEMBLY (a) Connect the connector. HINT: Make sure to install the skid control buzzer assembly in the correct direction. (b) Engage the clamp to install the skid control buzzer assembly. NOTICE: If the skid control buzzer assembly ...
Lexus RX (RX 350L, RX450h) 2016-{YEAR} Owners Manual
- For your information
- Pictorial index
- For safety and security
- Instrument cluster
- Operation of each component
- Driving
- Lexus Display Audio system
- Interior features
- Maintenance and care
- When trouble arises
- Vehicle specifications
- For owners
Lexus RX (RX 350L, RX450h) 2016-{YEAR} Repair Manual

0.0123