
Lexus RX (RX 350L, RX450h) 2016-2026 Repair Manual: Inspection
INSPECTION
PROCEDURE
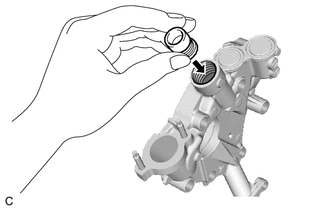
1. INSPECT OIL PUMP RELIEF VALVE
| (a) Coat the oil pump relief valve with engine oil and check that it falls smoothly into the valve hole by its own weight. HINT: If the oil pump relief valve does not fall smoothly, replace the timing chain cover assembly. |
|
2. INSPECT OIL PUMP ROTOR SET
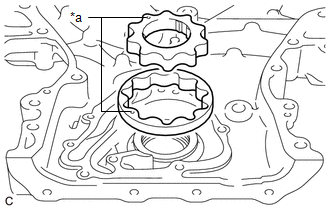
(a) Apply engine oil to the drive rotor and driven rotor.
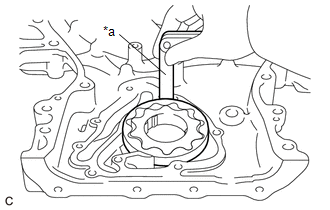
| (b) Install the drive rotor and driven rotor to the timing chain cover assembly with the rotor marks facing up. Check that the rotors rotate smoothly. HINT: If the rotors do not rotate smoothly, replace the timing chain cover assembly. |
|
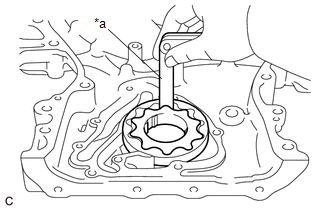
| (c) Check the tip clearance. (1) Using a feeler gauge, measure the clearance between the drive rotor and driven rotor tips as shown in the illustration. Standard Tip Clearance: 0.040 to 0.150 mm (0.00157 to 0.00591 in.) Maximum Tip Clearance: 0.150 mm (0.00591 in.) HINT: If the tip clearance is more than the maximum, replace the timing chain cover assembly. |
|
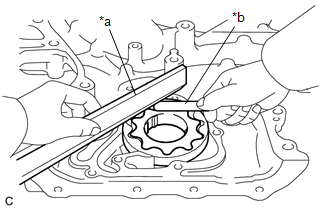
| (d) Check the side clearance. (1) Using a feeler gauge and precision straightedge, measure the clearance between the drive rotor and driven rotor and precision straightedge as shown in the illustration. Standard Side Clearance: 0.030 to 0.070 mm (0.00118 to 0.00276 in.) Maximum Side Clearance: 0.070 mm (0.00276 in.) HINT: If the side clearance is more than the maximum, replace the timing chain cover assembly. |
|
| (e) Check the body clearance. (1) Using a feeler gauge, measure the clearance between the timing chain cover assembly and driven rotor as shown in the illustration. Standard Body Clearance: 0.250 to 0.325 mm (0.00984 to 0.0128 in.) Maximum Body Clearance: 0.325 mm (0.0128 in.) HINT: If the body clearance is more than the maximum, replace the timing chain cover assembly. |
|
 Disassembly
DISASSEMBLY PROCEDURE 1. REMOVE OIL PUMP RELIEF VALVE (a) Using a 27 mm socket wrench, remove the oil pump relief valve plug from the oil pump cover. (b) Remove the oil pump relief valv ...
 Reassembly
REASSEMBLY PROCEDURE 1. INSTALL OIL PUMP ROTOR SET (a) Coat the drive rotor and driven rotor with engine oil and place them into the timing chain cover assembly with the rotor marks facing up. Chec ...
Other materials:
Lexus RX (RX 350L, RX450h) 2016-2026 Repair Manual > Can Communication System: Terminals Of Ecu
TERMINALS OF ECU NOTICE:
After turning the engine switch off, waiting time may be required before disconnecting the cable from the negative (-) battery terminal. Therefore, make sure to read the disconnecting the cable from the negative (-) battery terminal notices before proceeding with work.
Cl ...
Lexus RX (RX 350L, RX450h) 2016-2026 Repair Manual > Front Seatback Heater: Inspection
INSPECTION PROCEDURE 1. INSPECT FRONT SEATBACK HEATER ASSEMBLY (for LH Side) (a) Measure the resistance according to the value(s) in the table below. Standard Resistance: Tester Connection Condition Specified Condition 1 - 2 Seat heater temperature 20 °C (68 °F) 1.89 to 2.27 Ω ...
Lexus RX (RX 350L, RX450h) 2016-{YEAR} Owners Manual
- For your information
- Pictorial index
- For safety and security
- Instrument cluster
- Operation of each component
- Driving
- Lexus Display Audio system
- Interior features
- Maintenance and care
- When trouble arises
- Vehicle specifications
- For owners
Lexus RX (RX 350L, RX450h) 2016-{YEAR} Repair Manual

0.0115