Lexus RX (RX 350L, RX450h) 2016-2026 Repair Manual: Installation
INSTALLATION
PROCEDURE
1. INSTALL NO. 1 AMPLIFIER ANTENNA ASSEMBLY
(a) Engage the 2 guides.
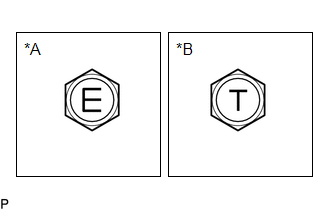
| (b) Install the No. 1 amplifier antenna assembly with the bolt. Torque: for Type A : 7.0 N·m {71 kgf·cm, 62 in·lbf} for Type B : 10 N·m {102 kgf·cm, 7 ft·lbf} NOTICE: There are two types of bolts and the tightening torque depends on the type of bolt used as shown in the illustration. Therefore, confirm the tightening torque before installing the bolt. |
|
(c) Connect 2 connectors.
2. INSTALL BACK DOOR TRIM PANEL ASSEMBLY
Click here .gif)
3. INSTALL NO. 1 LUGGAGE COMPARTMENT LIGHT ASSEMBLY
Click here
4. INSTALL DOOR PULL HANDLE
Click here
5. INSTALL BACK DOOR TRIM BASE
Click here
6. INSTALL BACK DOOR LOCK COVER
Click here
7. INSTALL BACK DOOR TRIM COVER LH
Click here
8. INSTALL BACK DOOR TRIM COVER RH
HINT:
Use the same procedure as for the LH side.
9. INSTALL BACK WINDOW UPPER PANEL TRIM
Click here
 Removal
REMOVAL PROCEDURE 1. REMOVE BACK WINDOW UPPER PANEL TRIM Click here 2. REMOVE BACK DOOR TRIM COVER LH Click here 3. REMOVE BACK DOOR TRIM COVER RH HINT: Use the same procedure as for the LH side ...

Other materials:
Lexus RX (RX 350L, RX450h) 2016-2026 Repair Manual > Power Steering System: Torque Sensor1 (C1511-C1514,C1517)
DESCRIPTION The torque sensor converts the rotational torque received from the steering wheel into electric signals and sends them to the power steering ECU assembly. DTC No. Detection Item DTC Detection Condition Trouble Area Warning Indicate Return-to-normal Condition Note C1511 ...
Lexus RX (RX 350L, RX450h) 2016-2026 Repair Manual > Intelligent Clearance Sonar System: Problem Symptoms Table
PROBLEM SYMPTOMS TABLE HINT:
Use the table below to help determine the cause of problem symptoms. If multiple suspected areas are listed, the potential causes of the symptoms are listed in order of probability in the "Suspected Area" column of the table. Check each symptom by checking the suspect ...
Lexus RX (RX 350L, RX450h) 2016-{YEAR} Owners Manual
- For your information
- Pictorial index
- For safety and security
- Instrument cluster
- Operation of each component
- Driving
- Lexus Display Audio system
- Interior features
- Maintenance and care
- When trouble arises
- Vehicle specifications
- For owners
Lexus RX (RX 350L, RX450h) 2016-{YEAR} Repair Manual

0.0091