Lexus RX (RX 350L, RX450h) 2016-2026 Repair Manual: Reassembly
REASSEMBLY
PROCEDURE
1. INSTALL NO. 2 STEERING RACK BOOT
(a) Apply lithium soap base glycol grease to the inside of the small opening of a new No. 2 steering rack boot.
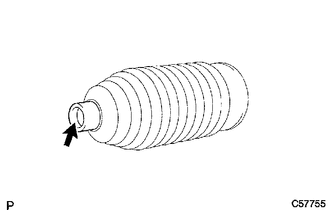
.png) | Lithium Soap Base Glycol Grease |
(b) Install the No. 2 steering rack boot to the groove on the rack housing.
NOTICE:
- Be careful not to damage or twist the No. 2 steering rack boot.
- Make sure that the No. 2 steering rack boot is free of rust and foreign matter.
2. INSTALL NO. 1 STEERING RACK BOOT
HINT:
Perform the same procedure as for the No. 2 steering rack boot.
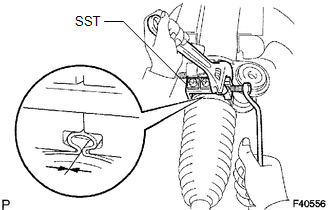
3. INSTALL NO. 2 STEERING RACK BOOT CLAMP (for LH Side)
| (a) Using SST, install a new No. 2 steering rack boot clamp as shown in the illustration. SST: 09521-24010 Clearance: 3.0 mm (0.118 in.) or less NOTICE: Be careful not to damage the No. 2 steering rack boot. |
|
4. INSTALL NO. 2 STEERING RACK BOOT CLAMP (for RH Side)
HINT:
Perform the same procedure as for the LH side.
5. INSTALL STEERING RACK BOOT CLIP (for LH Side)
(a) Using pliers, install the steering rack boot clip.
6. INSTALL STEERING RACK BOOT CLIP (for RH Side)
HINT:
Perform the same procedure as for the LH side.
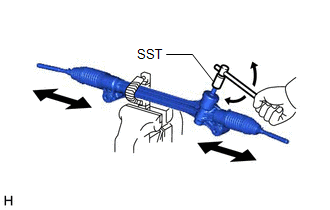
7. INSPECT STEERING GEAR ASSEMBLY
| (a) Using SST, rotate the pinion shaft to see if both the left and right steering rack boots expand and contract smoothly. SST: 09616-00020 If both the left and right steering rack boots do not expand and contract smoothly, use new No. 2 steering rack boot clamps and reinstall the steering rack boots. |
|
 Installation
INSTALLATION PROCEDURE 1. INSTALL TIE ROD ASSEMBLY LH (a) Install the lock nut and tie rod assembly LH to the steering gear assembly until the matchmarks are aligned. HINT: After adjusting the toe- ...
 Removal
REMOVAL CAUTION / NOTICE / HINT The necessary procedures (adjustment, calibration, initialization, or registration) that must be performed after parts are removed and installed, or replaced during ste ...
Other materials:
Lexus RX (RX 350L, RX450h) 2016-2026 Repair Manual > Vacuum Pump: Removal
REMOVAL CAUTION / NOTICE / HINT The necessary procedures (adjustment, calibration, initialization, or registration) that must be performed after parts are removed, installed, or replaced during vacuum pump assembly removal/installation are shown below. Necessary Procedure After Parts Removed/Install ...
Lexus RX (RX 350L, RX450h) 2016-2026 Repair Manual > Seat Belt Warning System: On-vehicle Inspection
ON-VEHICLE INSPECTION PROCEDURE 1. INSPECT DRIVER SEAT BELT WARNING LIGHT HINT: The seat belt warning light on the combination meter assembly is used for both the driver seat and front passenger seat. (a) Turn the engine switch on (IG). (b) When the driver seat belt is not fastened, check that the s ...
Lexus RX (RX 350L, RX450h) 2016-{YEAR} Owners Manual
- For your information
- Pictorial index
- For safety and security
- Instrument cluster
- Operation of each component
- Driving
- Lexus Display Audio system
- Interior features
- Maintenance and care
- When trouble arises
- Vehicle specifications
- For owners
Lexus RX (RX 350L, RX450h) 2016-{YEAR} Repair Manual

0.0096