Lexus RX (RX 350L, RX450h) 2016-2026 Repair Manual: Outer Rear View Mirror Cover
Components
COMPONENTS
ILLUSTRATION
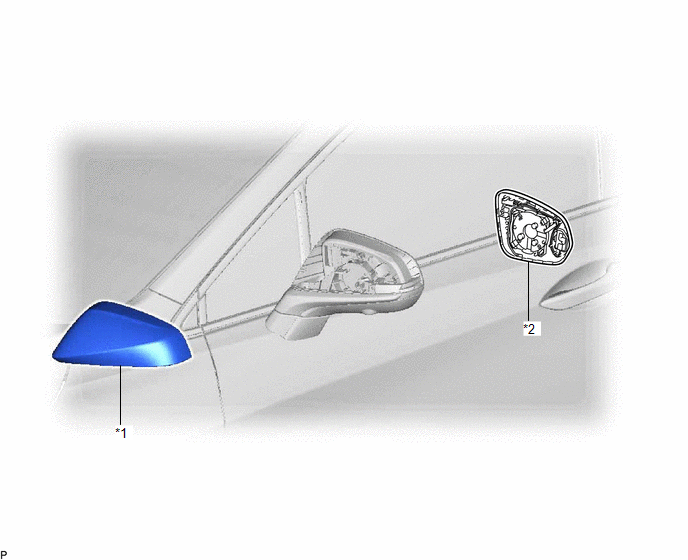
| *1 | NO. 1 OUTER MIRROR COVER | *2 | OUTER MIRROR |
Removal
REMOVAL
CAUTION / NOTICE / HINT
HINT:
- Use the same procedure for the RH side and LH side.
- The following procedure is for the LH side.
PROCEDURE
1. REMOVE OUTER MIRROR
Click here .gif)
2. REMOVE NO. 1 OUTER MIRROR COVER
(a) Disengage the 6 claws and 2 guides to remove the No. 1 outer mirror cover as shown in the illustration.
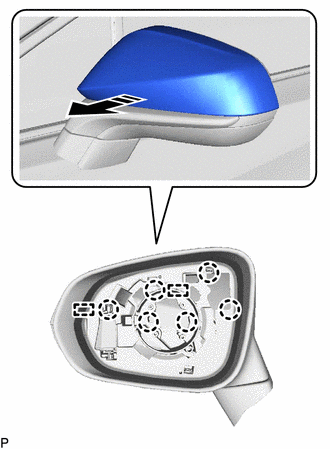
.png) | Remove in this Direction |
Installation
INSTALLATION
CAUTION / NOTICE / HINT
HINT:
- Use the same procedure for the RH side and LH side.
- The following procedure is for the LH side.
PROCEDURE
1. INSTALL NO. 1 OUTER MIRROR COVER
(a) Engage the 2 guides and 6 claws to install the No. 1 outer mirror cover as shown in the illustration.
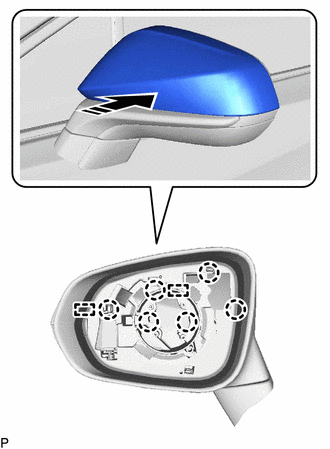
.png) | Install in this Direction |
2. INSTALL OUTER MIRROR
Click here .gif)
 Reassembly
REASSEMBLY CAUTION / NOTICE / HINT HINT:
Use the same procedure for the RH side and LH side.
The following procedure is for the LH side.
PROCEDURE 1. INSTALL OUTER MIRROR RETRACTOR LH (w/ Powe ...

Other materials:
Lexus RX (RX 350L, RX450h) 2016-2026 Repair Manual > Front Camera: Adjustment (one Time Recognition)
ADJUSTMENT (ONE TIME RECOGNITION) CAUTION / NOTICE / HINT NOTICE: Make sure to read Before Starting Adjustment before proceeding with work. Click here PROCEDURE 1. SECURE APPROPRIATE AREA FOR PERFORMING LEARNING (a) Park the vehicle on a level surface. HINT:
Make sure that the target recogni ...
Lexus RX (RX 350L, RX450h) 2016-2026 Repair Manual > Dynamic Torque Control Awd System: Fail-safe Chart
FAIL-SAFE CHART FAIL-SAFE FUNCTION
If a malfunction is detected in the 4WD ECU assembly, the 4WD ECU assembly may stop AWD control and transfer all torque to the front wheels, or function in a such a way as to prevent damage to the system.
If a malfunction is detected in the sensor or actuator, ...
Lexus RX (RX 350L, RX450h) 2016-{YEAR} Owners Manual
- For your information
- Pictorial index
- For safety and security
- Instrument cluster
- Operation of each component
- Driving
- Lexus Display Audio system
- Interior features
- Maintenance and care
- When trouble arises
- Vehicle specifications
- For owners
Lexus RX (RX 350L, RX450h) 2016-{YEAR} Repair Manual

0.0102