Lexus RX (RX 350L, RX450h) 2016-2026 Repair Manual: Reassembly
REASSEMBLY
PROCEDURE
1. INSTALL SLIDING ROOF DRIVE CABLE SUB-ASSEMBLY
(a) Hold down the roof wind deflector panel sub-assembly.
.png)
.png) | Hold Position |
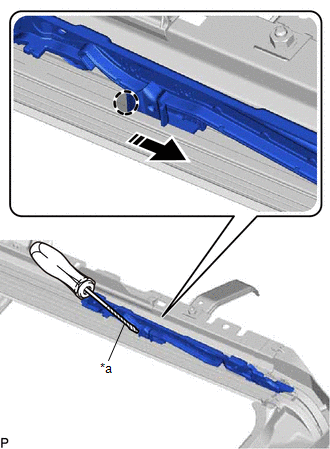
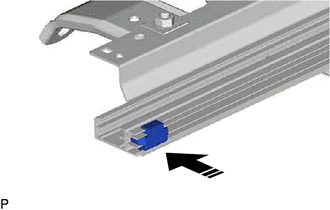
(b) Using a screwdriver, slide the sliding roof drive cable LH as shown in the illustration to install it.
| *a | Protective Tape |
| | Push Position |
.png) | Install in this Direction |
HINT:
- Tape the screwdriver tip before use.
- Use the same procedure for the RH side.
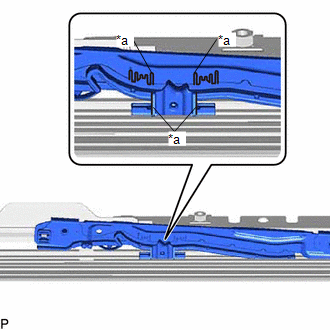
| (c) Adjust Fully Closed Position: (1) Using a screwdriver, slide the sliding roof drive cable LH in either direction and align the alignment marks as shown in the illustration. HINT: Use the same procedure for the RH side. |
|
(d) Insert the rear roof drip channel into the sliding roof housing sub-assembly as shown in the illustration.
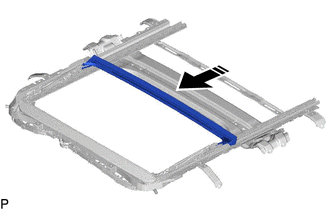
| | Install in this Direction |
(e) Engage the 2 claws as shown in the illustration to install the rear roof drip channel.
2. INSTALL SUNSHADE TRIM SUB-ASSEMBLY
(a) Insert the sunshade trim sub-assembly into the sliding roof housing sub-assembly as shown in the illustration.
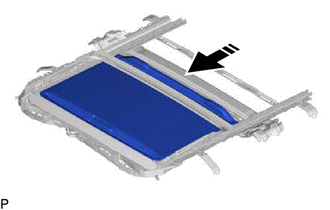
| | Install in this Direction |
(b) Install the rear sliding roof sunshade stopper as shown in the illustration.
| | Install in this Direction |
HINT:
Use the same procedure for the RH side.
(c) Engage the 2 guides (A) in the direction indicated by the arrow (1) shown in the illustration.
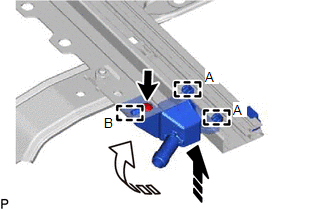
| | Install in this Direction (1) |
.png) | Install in this Direction (2) |
(d) Engage the guide (B) in the direction indicated by the arrow (2) shown in the illustration.
(e) Install the sliding roof piece sub-assembly LH with the screw.
HINT:
Use the same procedure for the RH side.
3. INSTALL SLIDING ROOF DRIVE GEAR SUB-ASSEMBLY
(a) Apply MP grease to the gear of the sliding roof drive gear sub-assembly.
| (b) Install the sliding roof drive gear sub-assembly with the 2 bolts. Torque: 5.4 N·m {55 kgf·cm, 48 in·lbf} |
|
.png)
(c) Engage the 2 guides as shown in the illustration.

| | Install in this Direction |
(d) Install the map light bracket with the bolt.
Torque:
5.4 N·m {55 kgf·cm, 48 in·lbf}
 Installation
INSTALLATION PROCEDURE 1. INSTALL SLIDING ROOF HOUSING ASSEMBLY (a) Loosen the 10 bolts of the brackets of the sliding roof housing assembly. (b) Temporarily install the sliding roof housing assembly ...
 Sliding Roof Switch Assembly
ComponentsCOMPONENTS ILLUSTRATION *1 MAP LIGHT ASSEMBLY - - InspectionINSPECTION PROCEDURE 1. INSPECT SLIDING ROOF SWITCH (MAP LIGHT ASSEMBLY) (a) Measure the resistance according to t ...
Other materials:
Lexus RX (RX 350L, RX450h) 2016-2026 Repair Manual > Forced Release: Operation Method
OPERATION METHOD PROCEDURE 1. PRECAUTION Click here 2. PARKING BRAKE FORCED RELEASE CAUTION: Work on a level surface to ensure safety. NOTICE:
To release the parking brake, follow the procedure for when using SST.
If the parking brake cannot be released, follow the procedure for when not usi ...
Lexus RX (RX 350L, RX450h) 2016-2026 Repair Manual > Intuitive Parking Assist System (w/ Intelligent Clearance Sonar System): How To Proceed With Troubleshooting
CAUTION / NOTICE / HINT HINT:
Use the following procedure to troubleshoot the intuitive parking assist system.
*: Use the Techstream.
PROCEDURE 1. VEHICLE BROUGHT TO WORKSHOP
NEXT 2. CUSTOMER PROBLEM ANALYSIS
NEXT 3. INSPECT BATTERY V ...
Lexus RX (RX 350L, RX450h) 2016-{YEAR} Owners Manual
- For your information
- Pictorial index
- For safety and security
- Instrument cluster
- Operation of each component
- Driving
- Lexus Display Audio system
- Interior features
- Maintenance and care
- When trouble arises
- Vehicle specifications
- For owners
Lexus RX (RX 350L, RX450h) 2016-{YEAR} Repair Manual

0.0119