Lexus RX (RX 350L, RX450h) 2016-2026 Repair Manual: Disassembly
DISASSEMBLY
PROCEDURE
1. REMOVE NO. 2 ANTENNA CORD SUB-ASSEMBLY
Click here .gif)
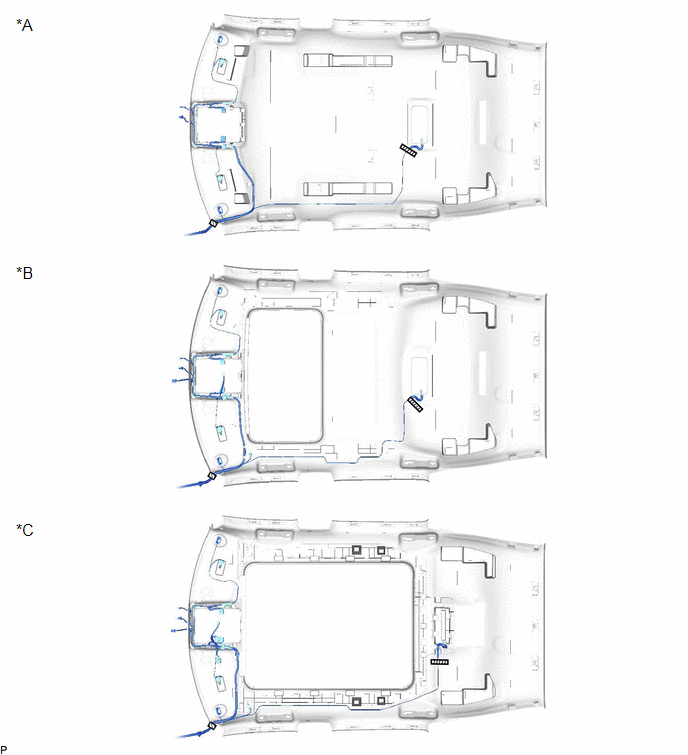
2. REMOVE WASHER HOSE ASSEMBLY
(a) Remove the washer hose assembly.
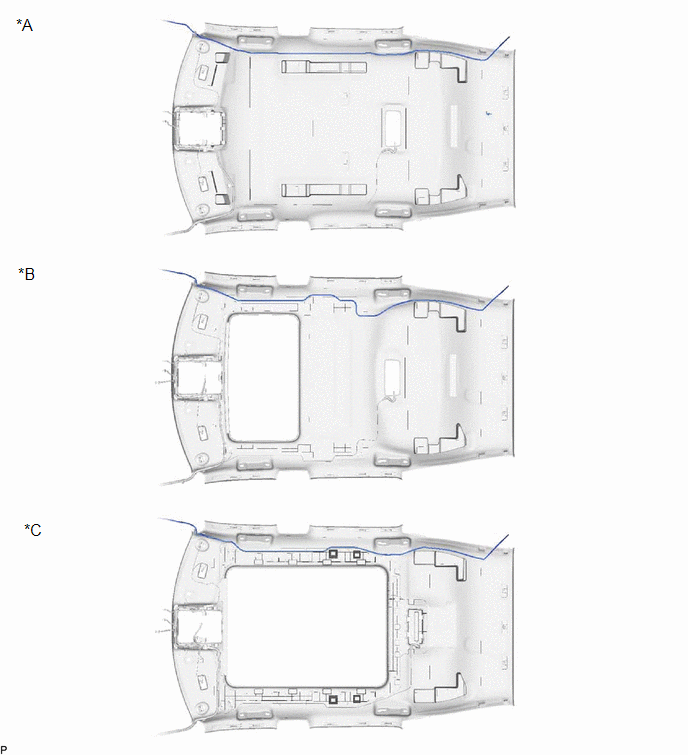
| *A | for Standard Roof | *B | for Sliding Roof |
| *C | for Panoramic Moon Roof | - | - |
3. REMOVE VANITY LIGHT ASSEMBLY
HINT:
Use the same procedure for the RH side and LH side.
| (a) Disengage the 2 claws (A) and separate the bulb holder from the vanity light assembly as shown in the illustration. |
|
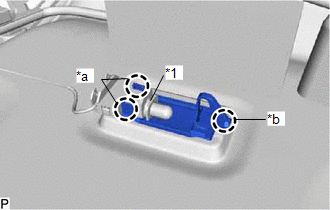
(b) Disengage the claw (B) to remove the vanity light assembly.
4. REMOVE TELEPHONE MICROPHONE ASSEMBLY
Click here
5. REMOVE NO. 1 ROOF WIRE (for TMC Made)
(a) Remove the adhesive tape from the roof headlining assembly.
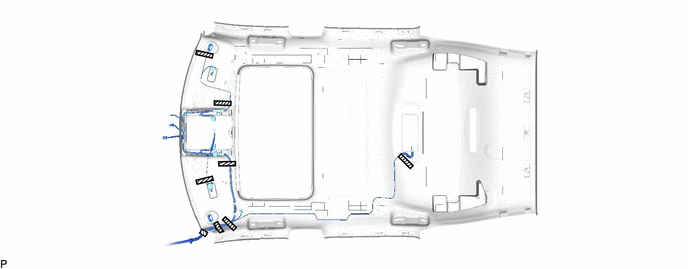
.png) | Adhesive Tape | - | - |
(b) Turn the 2 visor connectors counterclockwise approximately 90° and remove them from the roof headlining assembly.
| *a | 90° | - | - |
.png) | Rotation Direction | - | - |
(c) Disengage the 7 clamps and remove the No. 1 roof wire from the roof headlining assembly.
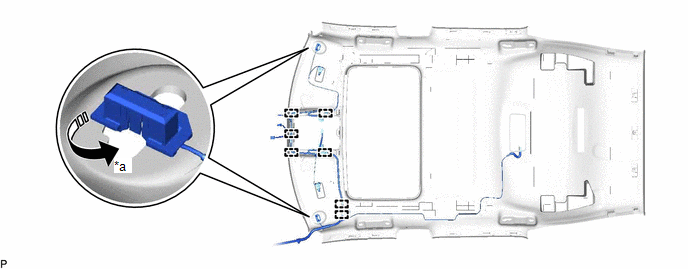
6. REMOVE NO. 1 ROOF WIRE (for TMMC Made)
(a) Remove the adhesive tape from the roof headlining assembly.
| *A | for Standard Roof | *B | for Sliding Roof |
| *C | for Panoramic Moon Roof | - | - |
| | Adhesive Tape | - | - |
(b) Turn the 2 visor connectors counterclockwise approximately 90° and remove them from the roof headlining assembly.

| *A | for Standard Roof | *B | for Sliding Roof |
| *C | for Panoramic Moon Roof | - | - |
| *a | 90° | - | - |
| | Rotation Direction | - | - |
(c) Disengage each clamp and remove the No. 1 roof wire from the roof headlining assembly.
7. REMOVE NO. 1 ROOF SILENCER PAD (for TMC Made)
(a) Remove the 2 No. 1 roof silencer pads.

8. REMOVE NO. 2 ROOF SILENCER PAD (for TMC Made)
(a) Remove the 2 No. 2 roof silencer pads.
 Components
COMPONENTS ILLUSTRATION *A for TMC Made *B for TMMC Made *1 DECK BOARD ASSEMBLY *2 DECK SIDE TRIM BOX RH *3 FRONT DECK FLOOR BOX *4 REAR DECK FLOOR BOX *5 REAR FLOO ...
 Reassembly
REASSEMBLY PROCEDURE 1. INSTALL NO. 2 ROOF SILENCER PAD (for TMC Made) (a) Remove the release paper from 2 new No. 2 roof silencer pads. HINT: After removing the release paper, keep the exposed adhesi ...
Other materials:
Lexus RX (RX 350L, RX450h) 2016-2026 Repair Manual > Lighting System (w/ Automatic Headlight Beam Level Control System): Vehicle Speed Sensor (B2415)
DESCRIPTION The No. 1 headlight ECU sub-assembly LH receives speed signals from the skid control ECU (brake actuator assembly) via CAN communication and performs light control. DTC No. Detection Item DTC Detection Condition Trouble Area DTC Output from B2415 Vehicle Speed Sensor ...
Lexus RX (RX 350L, RX450h) 2016-2026 Repair Manual > Steering Gear: Installation
INSTALLATION PROCEDURE 1. INSTALL TIE ROD ASSEMBLY LH (a) Install the lock nut and tie rod assembly LH to the steering gear assembly until the matchmarks are aligned. HINT: After adjusting the toe-in, tighten the lock nut. *a Matchmark 2. INSTALL TIE ROD ASSEMBLY RH HINT: ...
Lexus RX (RX 350L, RX450h) 2016-{YEAR} Owners Manual
- For your information
- Pictorial index
- For safety and security
- Instrument cluster
- Operation of each component
- Driving
- Lexus Display Audio system
- Interior features
- Maintenance and care
- When trouble arises
- Vehicle specifications
- For owners
Lexus RX (RX 350L, RX450h) 2016-{YEAR} Repair Manual

0.009