Lexus RX (RX 350L, RX450h) 2016-2026 Repair Manual: Removal
REMOVAL
PROCEDURE
1. REMOVE REAR CONSOLE UPPER PANEL
Click here .gif)
2. REMOVE LOWER NO. 2 INSTRUMENT PANEL FINISH PANEL
Click here
3. REMOVE LOWER NO. 1 INSTRUMENT PANEL FINISH PANEL
Click here
4. REMOVE SHIFT LEVER KNOB SUB-ASSEMBLY
Click here
5. REMOVE INSTRUMENT CLUSTER FINISH PANEL ORNAMENT
Click here
6. REMOVE CONSOLE PANEL SUB-ASSEMBLY
Click here
7. REMOVE REAR CONSOLE BOX GARNISH
Click here
8. REMOVE NO. 1 INTERIOR ILLUMINATION LIGHT ASSEMBLY
| (a) Disengage the 2 claws. |
|
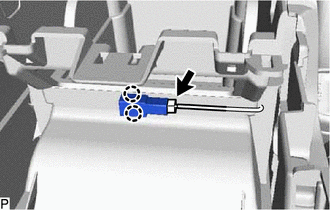
(b) Disconnect the connector to remove the No. 1 interior illumination light assembly.
 Inspection
INSPECTION PROCEDURE 1. INSPECT NO. 1 INTERIOR ILLUMINATION LIGHT ASSEMBLY (a) Inspect the No. 1 interior illumination light. (1) Apply battery voltage to each terminal of No. 1 interior illuminati ...
 Installation
INSTALLATION PROCEDURE 1. INSTALL NO. 1 INTERIOR ILLUMINATION LIGHT ASSEMBLY (a) Connect the connector. (b) Engage the 2 claws to install the No. 1 interior illumination light assembly. 2. INSTALL REA ...
Other materials:
Lexus RX (RX 350L, RX450h) 2016-2026 Repair Manual > Audio And Visual System (for 12.3 Inch Display): MOST Communication Malfunction (B15D0)
DESCRIPTION Audio and visual system components communicate with each other via MOST communication. If a line short or short to ground occurs in a MOST communication line, communication will not be possible and the audio and visual system will not operate normally. After the engine switch is turned o ...
Lexus RX (RX 350L, RX450h) 2016-2026 Repair Manual > Electric Parking Brake System: Left Electric Parking Brake Actuator Control Circuit Short to Ground (C060B11)
DESCRIPTION DTC No. Detection Item DTC Detection Condition Trouble Area Memory Note C060B11 Left Electric Parking Brake Actuator Control Circuit Short to Ground
Diagnosis Condition:
Electric parking brake not operating
Malfunction Status:
The ECU power supply is normal but ...
Lexus RX (RX 350L, RX450h) 2016-{YEAR} Owners Manual
- For your information
- Pictorial index
- For safety and security
- Instrument cluster
- Operation of each component
- Driving
- Lexus Display Audio system
- Interior features
- Maintenance and care
- When trouble arises
- Vehicle specifications
- For owners
Lexus RX (RX 350L, RX450h) 2016-{YEAR} Repair Manual

0.0096