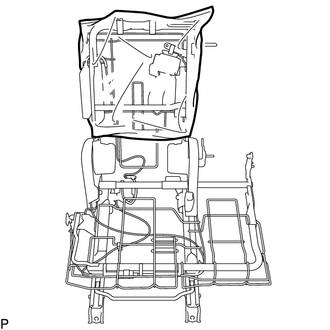
Lexus RX (RX 350L, RX450h) 2016-2026 Repair Manual: Disassembly
DISASSEMBLY
CAUTION / NOTICE / HINT
CAUTION:
Wear protective gloves. Sharp areas on the seat frame may injure your hands.
PROCEDURE
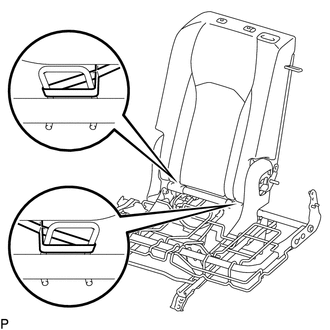
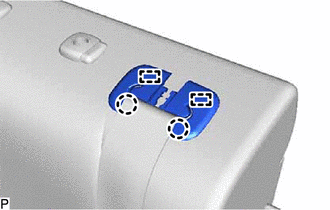
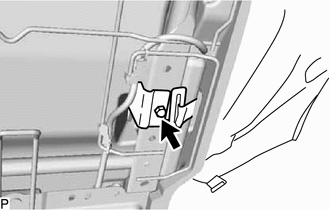
1. REMOVE REAR SEAT COVER CAP RH (for Manual Seat)
(a) Using a screwdriver with its tip wrapped with protective tape, disengage the 2 claws and remove the rear seat cover cap RH as shown in the illustration.
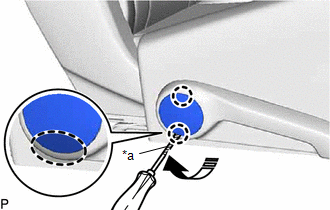
| *a | Protective Tape |
.png) | Insert Screwdriver Here |
.png) | Remove in this Direction |
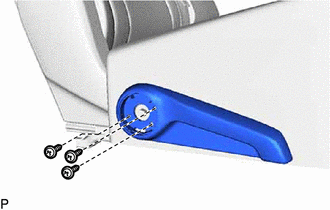
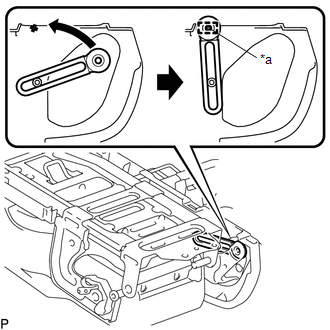
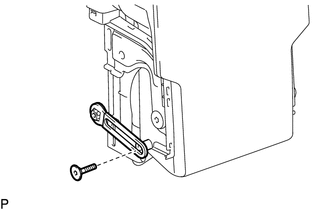
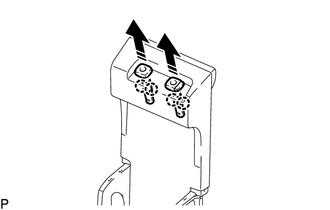
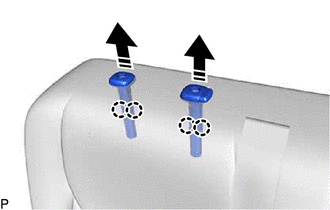
2. REMOVE NO. 1 RECLINING ADJUSTER RELEASE HANDLE RH (for Manual Seat)
| (a) Remove the 3 screws and No. 1 reclining adjuster release handle RH. |
|
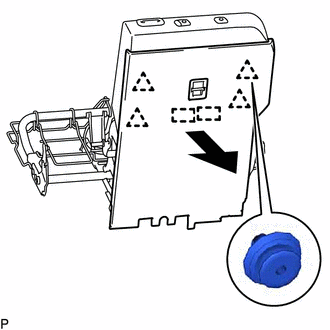
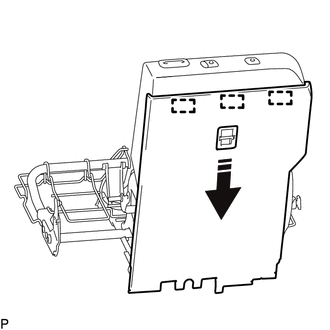
3. REMOVE POWER SEAT SWITCH ASSEMBLY (for Power Seat)
(a) Using a moulding remover A, disengage the 2 claws as shown in the illustration.
.png)
| | Remove in this Direction |
| (b) Disconnect the connector to remove the power seat switch assembly. |
|
.png)
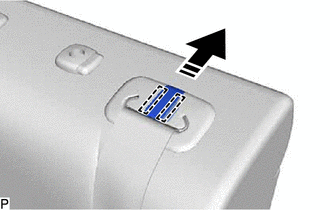
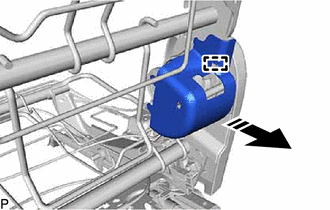
4. REMOVE REAR POWER SEAT SWITCH RH (for Power Seat)
(a) Disengage the 2 claws and remove the rear power seat switch RH as shown in the illustration.
.png)
| | Remove in this Direction |
5. DISCONNECT SEPARATE TYPE REAR SEAT CUSHION COVER WITH PAD
| (a) Disengage the 2 hooks to disconnect the separate type rear seat cushion cover with pad. |
|
6. REMOVE SEAT HEATER CONTROL SUB-ASSEMBLY (w/ Seat Heater System)
| (a) Disconnect the 2 connectors. |
|
(b) Disengage the 2 clamps to remove the seat heater control sub-assembly.
7. REMOVE CONNECTOR BRACKET
(a) Disengage the claw and remove the connector bracket as shown in the illustration.
| | Remove in this Direction |
8. REMOVE CONNECTOR MALE HOUSING (for Manual Seat)
(a) w/o Seat Heater System:
| (1) Disengage the clamp to remove the connector male housing. |
|

9. REMOVE SEPARATE TYPE REAR SEAT CUSHION COVER WITH PAD
| (a) Disconnect the 2 rubber bands. |
|
| (b) Disengage the 3 hooks. |
|
| (c) for Manual Seat: (1) w/ Seat Heater System:
(2) Disengage the clamp. |
|
| (d) for Power Seat: (1) Disengage the 2 clamps. (2) w/ Seat Heater System:
|
|
(e) for Manual Seat:
.png) | Fastener |
(1) Disengage the fastener.
| (f) Disengage each hook and remove the separate type rear seat cushion cover with pad. |
|
10. REMOVE SEPARATE TYPE REAR SEAT CUSHION COVER
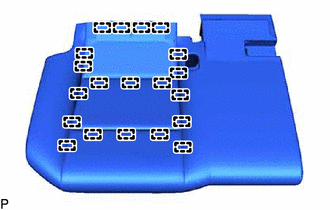
| (a) Remove the 8 hog rings. |
|
| (b) Remove the 20 hog rings and separate type rear seat cushion cover from the separate type rear seat cushion pad. |
|
11. REMOVE SEAT COVER WIRE
| (a) Remove the 6 seat cover wires. |
|
12. REMOVE SEAT HEATER ASSEMBLY (w/ Seat Heater System)
Click here .gif)
13. REMOVE SEAT CUSHION FELT RH (for TMK Made)
| (a) Remove the seat cushion felt RH. |
|
14. REMOVE REAR SEAT 3 POINT TYPE BELT ASSEMBLY RH
Click here
15. REMOVE REAR SEATBACK COVER
| (a) Disengage the 2 claws as shown in the illustration. |
|
.png)
(b) Disengage the 6 claws and remove the rear seatback cover as shown in the illustration.
.png)
| | Remove in this Direction |
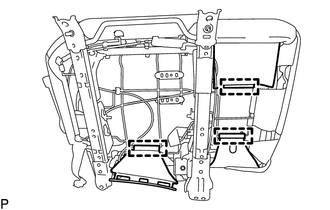
16. REMOVE REAR SEATBACK BOARD SUB-ASSEMBLY
(a) Disengage the 10 claws and 5 clips to remove the rear seatback board sub-assembly as shown in the illustration.

| | Place Hand Here |
| | Remove in this Direction |
17. REMOVE CENTER ARMREST HINGE COVER LH
(a) Disengage the 7 claws and 5 guides to remove the center armrest hinge cover LH as shown in the illustration.
| | Place Hand Here |
| | Remove in this Direction |
18. REMOVE NO. 1 SEAT ARMREST ASSEMBLY
| (a) Remove the 2 bolts. |
|
| (b) Using a clip remover, disengage the 2 clips to remove the No. 1 seat armrest assembly. |
|
19. REMOVE ARMREST ASSEMBLY
| (a) Using a T30 "TORX" socket wrench, remove the bolt. |
|
(b) Remove the 2 nuts and rear seatback center hinge sub-assembly.
| (c) Using a T45 "TORX" socket wrench, remove the 2 bolts and 2 rear seat reclining spacers. |
|
| (d) Engage the rear seatback hinge to the pin of the center armrest hinge cover RH as shown in the illustration. NOTICE: If the rear seatback hinge is not engaged to the pin of the center armrest hinge cover RH, the armrest assembly cannot be removed as it will interfere with the rear seatback frame sub-assembly RH. |
|
(e) Disengage the pin and remove the armrest assembly as shown in the illustration.
(f) Remove the rear seat center armrest plate as shown in the illustration.
| | Remove in this Direction |
20. REMOVE CENTER ARMREST HINGE COVER RH
(a) Disengage the 7 claws and 5 guides to remove the center armrest hinge cover RH as shown in the illustration.
| | Place Hand Here |
| | Remove in this Direction |
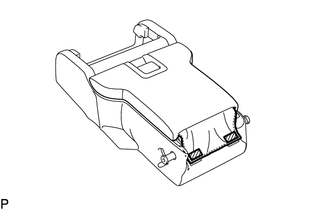
21. REMOVE REAR SEAT CENTER ARMREST ASSEMBLY
| (a) Using a T45 "TORX" socket wrench, remove the bolt and rear seatback hinge. |
|
(b) Pull the rear seat center armrest assembly forward as shown in the illustration.
| (c) Using a T45 "TORX" socket wrench, remove the 2 bolts and 2 No. 2 rear seat reclining spacers. |
|
(d) Disengage the guide and remove the rear seat center armrest assembly as shown in the illustration.
22. REMOVE REAR SEAT CENTER ARMREST COVER
| (a) Remove the 2 rear seat center armrest covers. |
|
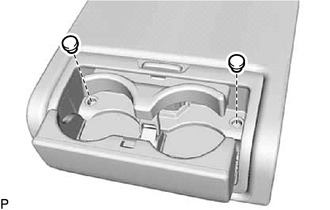
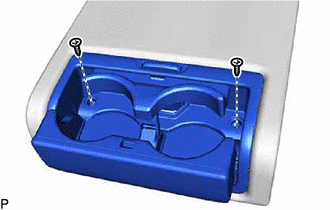
23. REMOVE CUP HOLDER ASSEMBLY
| (a) Remove the 2 screws and cup holder assembly. |
|
24. REMOVE REAR SEAT CENTER ARMREST DOOR SUB-ASSEMBLY (w/ Console Box Lid)
(a) Disengage the 2 fasteners.
| | Fastener |
| (b) Remove the 2 screws and rear seat center armrest door sub-assembly. |
|

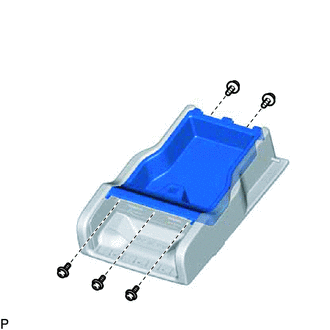
25. REMOVE NO. 2 REAR SEAT CENTER ARMREST BOX (w/ Console Box Lid)
| (a) Remove the 5 screws and No. 2 rear seat center armrest box. |
|
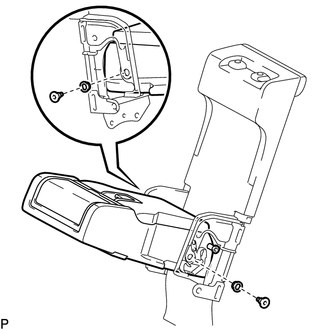
26. REMOVE NO. 1 SEATBACK COVER
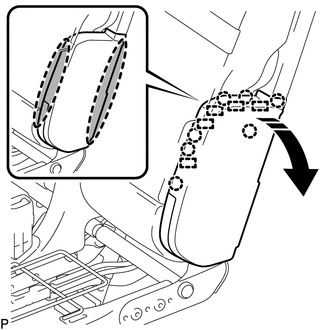
(a) Disengage the 4 claws and remove the 2 rear seat headrest support assemblies as shown in the illustration.
| | Remove in this Direction |
| (b) Disengage the 3 clips and 3 claws, and remove the No. 1 seatback cover. |
|
27. REMOVE REAR SEAT CENTER ARMREST COVER SUB-ASSEMBLY
| (a) Using a clip remover, remove the 2 clips and rear seat center armrest cover sub-assembly. |
|
28. REMOVE REAR SEATBACK LOCK LEVER
| (a) Disengage the retainer as shown in the illustration and remove the fold seatback wire. |
|
.png)
(b) Remove the fold seatback wire as shown in the illustration.
.png)
| | Remove in this Direction |
(c) Disengage the guide and claw to remove the rear seatback lock lever as shown in the illustration.

| | Remove in this Direction | - | - |
29. REMOVE NO. 2 CENTER SEATBACK COVER
| (a) Remove the 3 screws and No. 2 center seatback cover. |
|
.png)
30. REMOVE REAR SEATBACK LOCK ASSEMBLY RH
| (a) Remove the 2 bolts and rear seatback lock assembly RH. |
|
.png)
31. REMOVE REAR SEATBACK COVER RH
| (a) Disengage the 2 claws as shown in the illustration. |
|
(b) Disengage the 6 claws and remove the rear seatback cover RH as shown in the illustration.
| | Remove in this Direction |
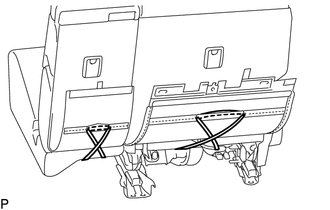
32. REMOVE REAR SEATBACK BOARD CARPET ASSEMBLY RH
| (a) for TMK Made: (1) Disengage the 2 hooks. |
|
| (b) for TMMC Made: (1) Disconnect the 2 rubber bands. |
|
| (c) Disengage the 4 clips and 2 guides as shown in the illustration. |
|
(d) Disengage the 3 guides to remove the rear seatback board carpet assembly RH as shown in the illustration.
| | Remove in this Direction |
33. DISCONNECT REAR CENTER SEAT OUTER BELT ASSEMBLY
Click here
34. REMOVE SEAT BELT ANCHOR COVER CAP
(a) Disengage the 2 guides to remove the seat belt anchor cap as shown in the illustration.
| | Remove in this Direction |
35. REMOVE REAR SEAT SHOULDER BELT COVER
| (a) Disengage the 2 claws and 2 guides and pass the rear center seat outer belt assembly through the rear seat shoulder belt cover to remove the rear seat shoulder belt cover. |
|
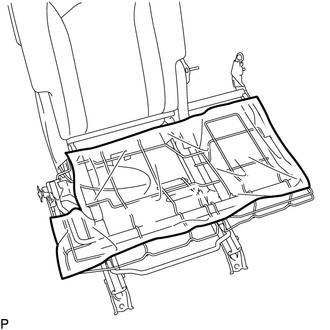
36. REMOVE SEPARATE TYPE REAR SEATBACK COVER WITH PAD
| (a) Disengage each hook. |
|

(b) Disengage the 4 claws and remove the 2 rear No. 1 seat headrest supports as shown in the illustration.
| | Remove in this Direction |
(c) for Manual Seat:
(1) Disengage the fastener.
| | Fastener |
| (2) Disengage the 2 hooks. |
|
| (d) Remove the nut and disconnect the 2 rear seatback cover brackets. |
|
(e) Remove the separate type rear seatback cover with pad.
37. REMOVE SEPARATE TYPE REAR SEATBACK COVER
| (a) for Manual Seat: (1) Remove the 11 hog rings and the separate type rear seatback cover from the separate type seatback pad. |
|
(b) for Power Seat:
| (1) Remove the hog ring. |
|
| (2) Remove the 11 hog rings and the separate type rear seatback cover from the separate type seatback pad. |
|
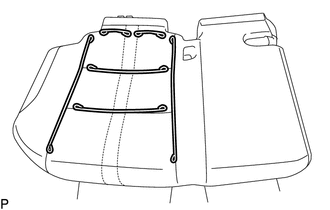
38. REMOVE SEAT COVER WIRE
| (a) Remove the 5 seat cover wires. |
|
39. REMOVE SEAT HEATER ASSEMBLY (w/ Seat Heater System)
Click here
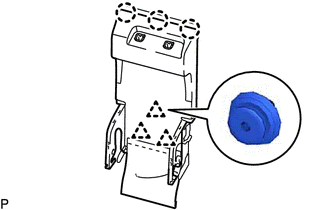
40. REMOVE SEATBACK FELT RH (for TMK Made)
(a) Remove the seatback felt RH.
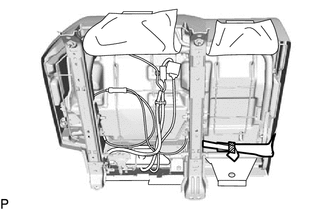
41. REMOVE REAR CENTER SEAT OUTER BELT ASSEMBLY
Click here
42. REMOVE REAR SEAT AIRBAG ASSEMBLY RH
HINT:
Use the same procedure as for the LH side.
Click here
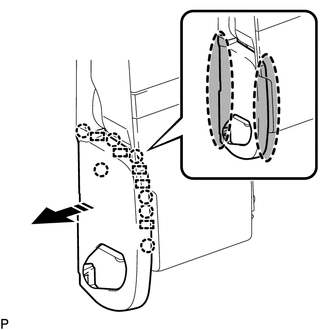
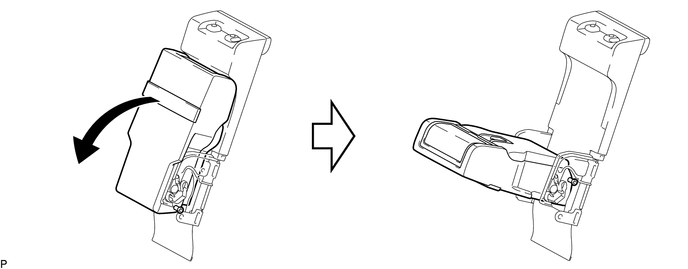
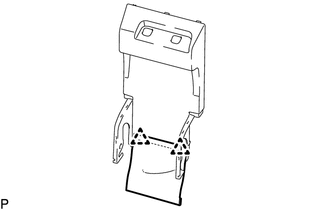
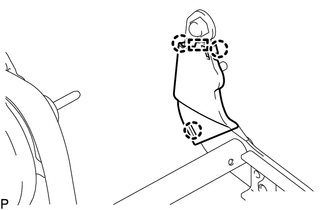
43. REMOVE NO. 1 RECLINING LINK COVER LH (for Manual Seat)
(a) Disengage the 5 claws and guide to remove the No. 1 reclining link cover LH as shown in the illustration.
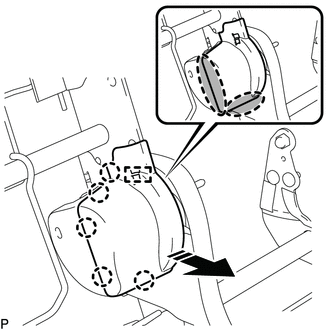
| | Place Hand Here |
| | Remove in this Direction |
44. REMOVE NO. 2 RECLINING LINK COVER LH (for Manual Seat)
(a) Disengage the guide to remove the No. 2 reclining link cover LH as shown in the illustration.
| | Remove in this Direction |
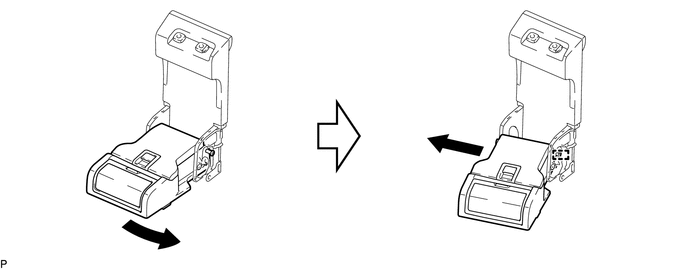
45. REMOVE NO. 1 RECLINING LINK COVER RH (for Manual Seat)
(a) Disengage the 5 claws and guide to remove the No. 1 reclining link cover RH as shown in the illustration.
| | Place Hand Here |
| | Remove in this Direction |
46. REMOVE NO. 2 RECLINING LINK COVER RH (for Manual Seat)
(a) Disengage the guide to remove the No. 2 reclining link cover RH as shown in the illustration.
| | Remove in this Direction |
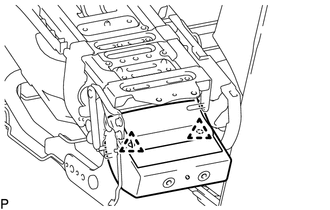
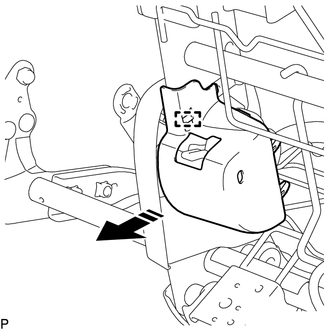
47. REMOVE REAR SEATBACK PROTECTOR (for Power Seat)
| (a) Remove the 2 nuts and rear seatback protector. |
|
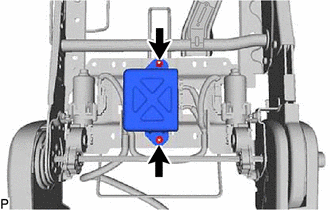
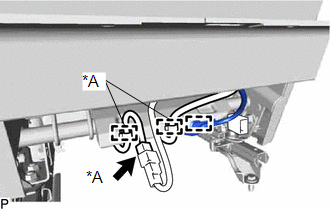
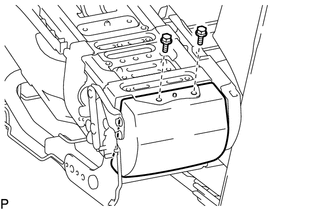
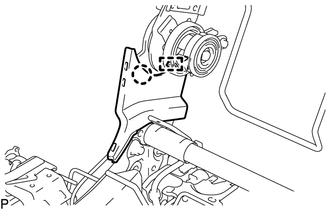
48. REMOVE FOLD SEAT CONTROL ECU (for Power Seat)
(a) Disconnect the 2 connectors and remove the fold seat control ECU as shown in the illustration.
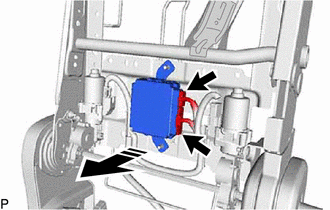
| | Remove in this Direction |
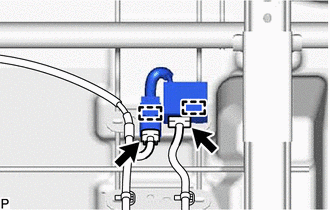
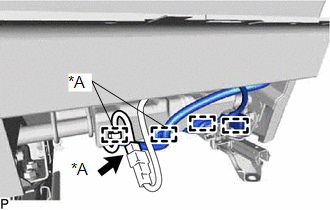
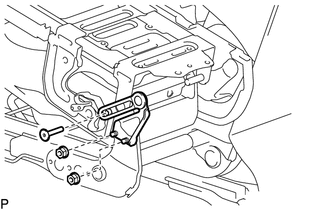
49. REMOVE REAR SEAT WIRE RH (for Power Seat)
| (a) Disconnect the 2 connectors. |
|
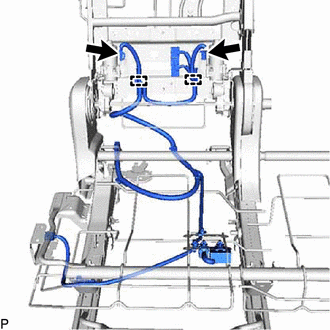
(b) Disengage the 2 clamps and remove the rear seat wire RH.
50. REMOVE RECLINING ADJUSTER INSIDE COVER LH
| (a) Disengage the 3 claws and guide to remove the reclining adjuster inside cover LH. |
|
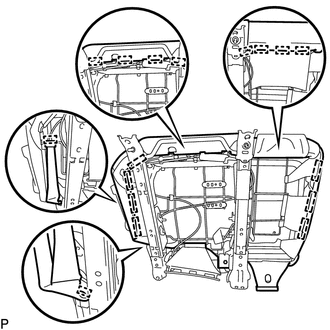
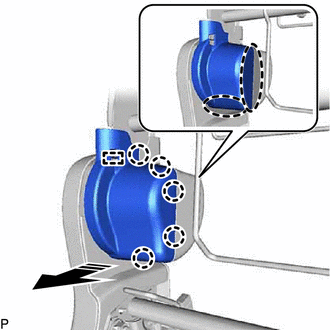
51. REMOVE REAR SEATBACK MOULDING RH
(a) Disengage the 6 claws and 6 guides as indicated by the arrows, in the order shown in the illustration to remove the rear seatback moulding RH.
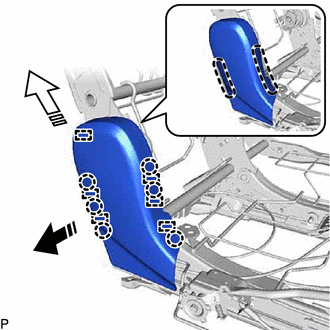
| | Place Hand Here |
| | Remove in this Direction (1) |
.png) | Remove in this Direction (2) |
52. REMOVE RECLINING ADJUSTER INSIDE COVER RH
| (a) Disengage the claw and guide to remove the reclining adjuster inside cover RH. |
|
53. REMOVE REAR SEAT INNER RECLINING COVER RH
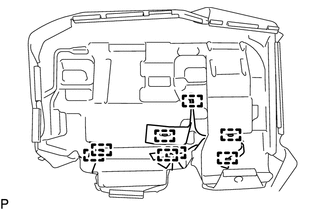
(a) Disengage the 4 claws and 6 guides as indicated by the arrows, in the order shown in the illustration to remove the rear seat inner reclining cover RH.
| | Place Hand Here |
| | Remove in this Direction (1) |
| | Remove in this Direction (2) |
54. REMOVE RECLINING ADJUSTER INSIDE COVER LH (for Power Seat)
(a) Disengage the 3 claws and guide to remove the reclining adjuster inside cover LH as shown in the illustration.

| | Remove in this Direction |
55. REMOVE RECLINING ADJUSTER INSIDE COVER LH (for Power Seat)
| (a) Disengage the claw and guide to remove the reclining adjuster inside cover LH. |
|
56. REMOVE RECLINING ADJUSTER INSIDE COVER LH (for Manual Seat)
| (a) Disengage the 2 claws to remove the reclining adjuster inside cover LH. |
|
57. REMOVE UPPER NO. 2 REAR SEATBACK MOULDING (for Power Seat)
(a) Disengage the 7 claws and guide as indicated by the arrows, in the order shown in the illustration to remove the upper No. 2 rear seatback moulding.
| | Place Hand Here |
| | Remove in this Direction (1) |
| | Remove in this Direction (2) |
58. REMOVE UPPER NO. 1 REAR SEATBACK MOULDING (for Power Seat)
(a) Disengage the guide and remove the upper No. 1 rear seatback moulding as indicated by the arrows, in the order shown in the illustration.
| | Remove in this Direction (1) |
| | Remove in this Direction (2) |
59. REMOVE REAR SEAT RECLINING CONTROL CABLE (for Manual Seat)
| (a) Remove the 5 cable clamps. |
|
(b) Disengage the 6 cable clamps and remove the rear seat reclining control cable.
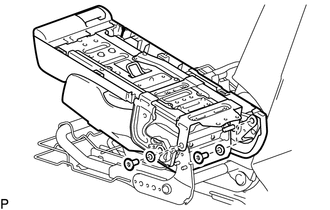
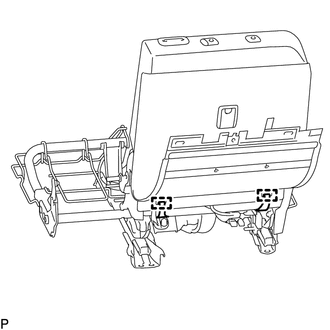
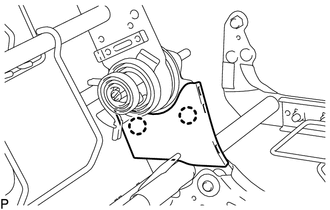
60. REMOVE REAR SEAT LEG PLATE SUB-ASSEMBLY RH
| (a) Remove the nut and rear seat leg plate sub-assembly RH. |
|
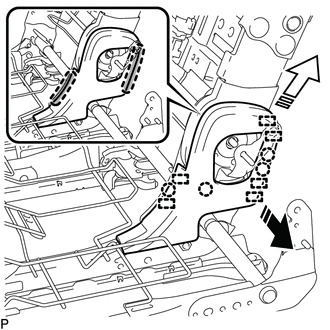
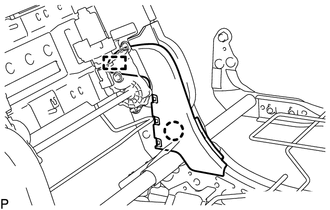
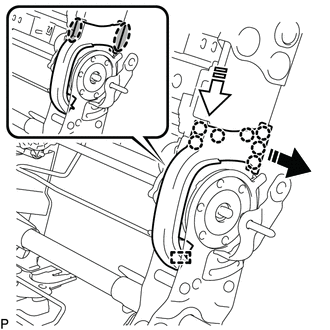
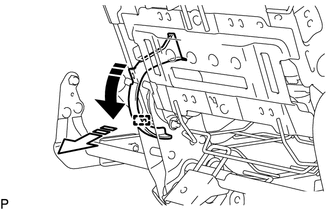
61. REMOVE REAR SEATBACK FRAME SUB-ASSEMBLY RH
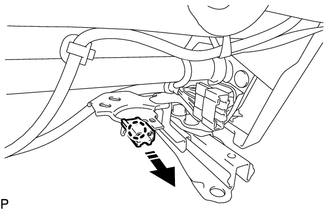
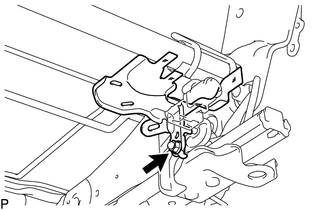
(a) Disengage the clamp to remove the joint case as shown in the illustration.
| | Remove in this Direction |
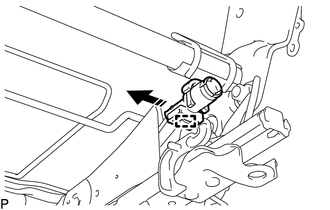
(b) Using a T55 "TORX" socket wrench, remove the 2 bolts (A).
| | Remove in this Direction |
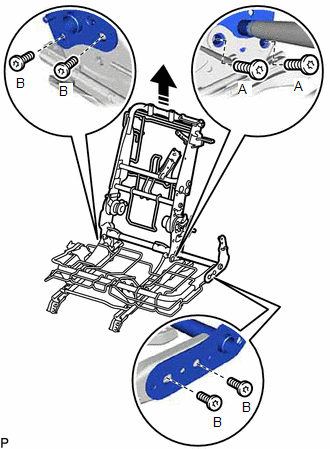
(c) Using a T40 "TORX" socket wrench, remove the 4 bolts (B) and rear seatback frame sub-assembly RH from the rear seat cushion frame sub-assembly RH as shown in the illustration.
 Installation
INSTALLATION CAUTION / NOTICE / HINT CAUTION: Wear protective gloves. Sharp areas on the seat frame may injure your hands. PROCEDURE 1. INSTALL REAR SEAT ASSEMBLY RH (a) Place the rear seat assembly R ...
 Reassembly
REASSEMBLY CAUTION / NOTICE / HINT CAUTION: Wear protective gloves. Sharp areas on the seat frame may injure your hands. PROCEDURE 1. INSTALL REAR SEATBACK FRAME SUB-ASSEMBLY RH (a) Using a T40 "TORX" ...
Other materials:
Lexus RX (RX 350L, RX450h) 2016-2026 Repair Manual > Audio And Visual System (for 12.3 Inch Display): Illumination for Panel Switch does not Come on with Tail Switch ON
CAUTION / NOTICE / HINT NOTICE: Depending on the parts that are replaced during vehicle inspection or maintenance, performing initialization, registration or calibration may be needed. Refer to Precaution for Audio and Visual System. Click here PROCEDURE 1. CHECK VEHICLE SIGNAL (OPERATION CH ...
Lexus RX (RX 350L, RX450h) 2016-2026 Repair Manual > Panoramic View Monitor System: Back Camera Current Malfunction (C1621)
DESCRIPTION DTC C1621 is stored if the parking assist ECU determines that the input/output signal communication with the rear television camera assembly is abnormal. DTC No. Detection Item DTC Detection Condition Trouble Area C1621 Back Camera Current Malfunction Rear television cam ...
Lexus RX (RX 350L, RX450h) 2016-{YEAR} Owners Manual
- For your information
- Pictorial index
- For safety and security
- Instrument cluster
- Operation of each component
- Driving
- Lexus Display Audio system
- Interior features
- Maintenance and care
- When trouble arises
- Vehicle specifications
- For owners
Lexus RX (RX 350L, RX450h) 2016-{YEAR} Repair Manual

0.0116