Lexus RX (RX 350L, RX450h) 2016-2026 Repair Manual: Components
COMPONENTS
ILLUSTRATION
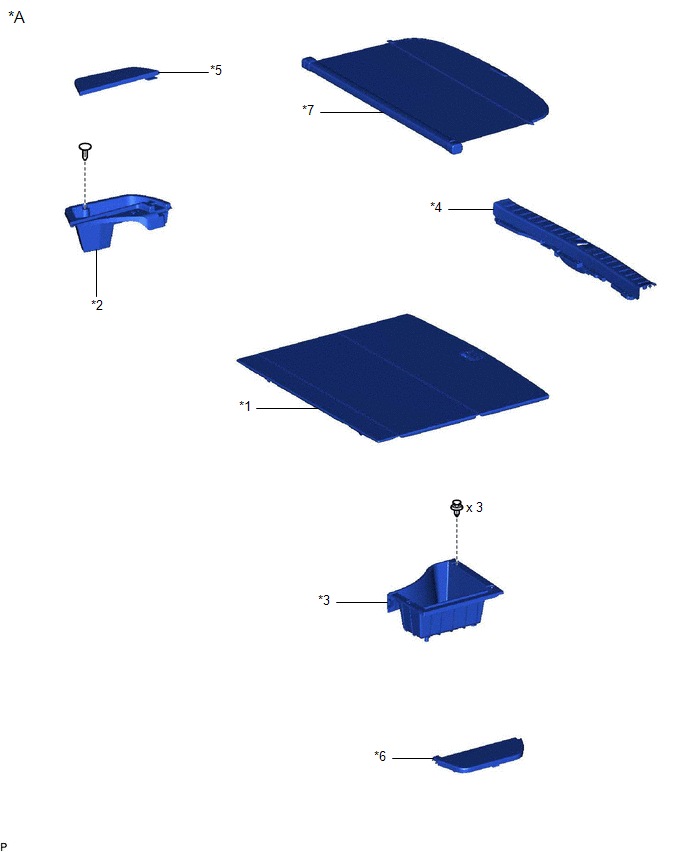
| *A | w/o Rear No. 2 Seat | - | - |
| *1 | DECK BOARD ASSEMBLY | *2 | DECK SIDE TRIM BOX RH |
| *3 | REAR DECK FLOOR BOX | *4 | REAR FLOOR FINISH PLATE |
| *5 | REAR NO. 3 FLOOR BOARD | *6 | REAR NO. 4 FLOOR BOARD |
| *7 | TONNEAU COVER ASSEMBLY | - | - |
ILLUSTRATION
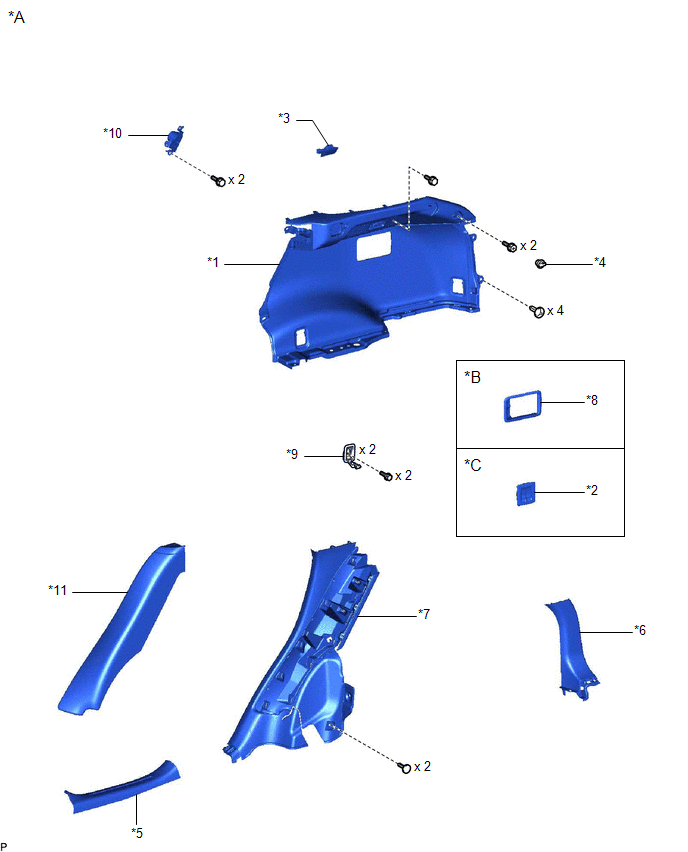
| *A | w/o Rear No. 2 Seat | *B | w/o Rear Power Seat System |
| *C | w/ Rear Power Seat System | - | - |
| *1 | DECK TRIM SIDE PANEL ASSEMBLY RH | *2 | FOLD SEAT SWITCH ASSEMBLY |
| *3 | NO. 1 LUGGAGE COMPARTMENT LIGHT ASSEMBLY | *4 | NO. 1 LUGGAGE COMPARTMENT TRIM HOOK |
| *5 | REAR DOOR SCUFF PLATE RH | *6 | REAR FLOOR FINISH SIDE PLATE RH |
| *7 | REAR SEAT SIDE GARNISH RH | *8 | RECLINING REMOTE CONTROL BEZEL RH |
| *9 | ROPE HOOK ASSEMBLY | *10 | THEFT WARNING SIREN ASSEMBLY |
| *11 | UPPER QUARTER TRIM PAD RH | - | - |
ILLUSTRATION
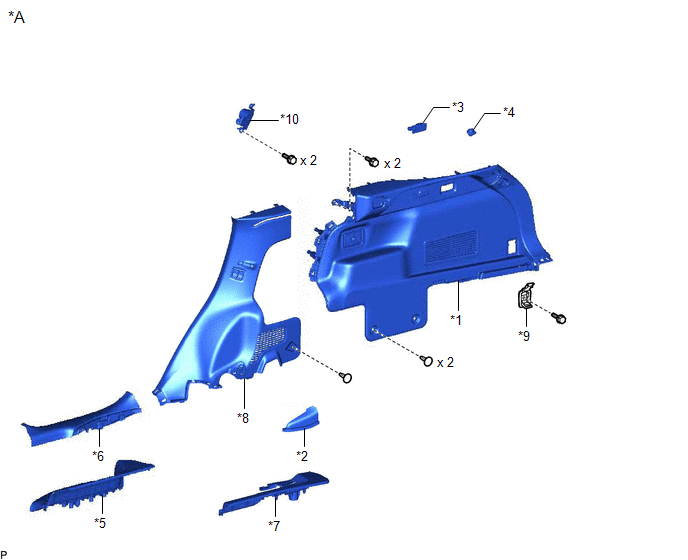
| *A | w/ Rear No. 2 Seat | - | - |
| *1 | DECK TRIM SIDE PANEL ASSEMBLY RH | *2 | FRONT DECK SIDE TRIM COVER RH |
| *3 | NO. 1 LUGGAGE COMPARTMENT LIGHT ASSEMBLY | *4 | NO. 1 LUGGAGE COMPARTMENT TRIM HOOK |
| *5 | REAR DOOR INSIDE SCUFF PLATE RH | *6 | REAR DOOR SCUFF PLATE RH |
| *7 | REAR SEAT OUTER TRACK BRACKET COVER RH | *8 | REAR SEAT SIDE GARNISH RH |
| *9 | ROPE HOOK ASSEMBLY | *10 | THEFT WARNING SIREN ASSEMBLY |

 Removal
REMOVAL CAUTION / NOTICE / HINT The necessary procedures (adjustment, calibration, initialization or registration) that must be performed after parts are removed and installed, or replaced during thef ...
Other materials:
Lexus RX (RX 350L, RX450h) 2016-2026 Repair Manual > Sfi System: Brake Switch "B" Circuit Short to Battery (P070312)
DESCRIPTION The stop light switch assembly is part of a duplex system that transmits two signals: STP and ST1-. These two signals are used by the ECM to monitor whether or not the brake system is working properly. This DTC indicates that the stop light switch assembly is remaining on. When the stop ...
Lexus RX (RX 350L, RX450h) 2016-2026 Repair Manual > Front Power Seat Control System (w/ Memory): Operation Check
OPERATION CHECK CHECK POWER SEAT FUNCTION (a) Check the basic functions. *a Slide Function *b Reclining Function *c Lifter Function *d Front Vertical Function *e Lumbar Support Adjustment Function (up - down) (w/ Seat Variable Cushion Switch) *f Lumbar Support Adj ...
Lexus RX (RX 350L, RX450h) 2016-{YEAR} Owners Manual
- For your information
- Pictorial index
- For safety and security
- Instrument cluster
- Operation of each component
- Driving
- Lexus Display Audio system
- Interior features
- Maintenance and care
- When trouble arises
- Vehicle specifications
- For owners
Lexus RX (RX 350L, RX450h) 2016-{YEAR} Repair Manual

0.0098