Lexus RX (RX 350L, RX450h) 2016-2026 Repair Manual: Components
COMPONENTS
ILLUSTRATION
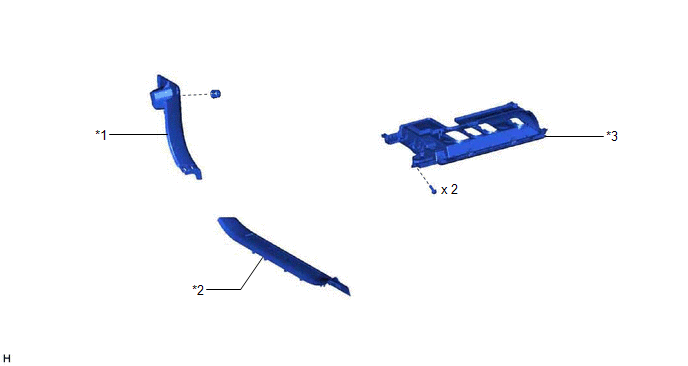
| *1 | COWL SIDE TRIM BOARD LH | *2 | FRONT DOOR SCUFF PLATE LH |
| *3 | NO. 1 INSTRUMENT PANEL UNDER COVER SUB-ASSEMBLY | - | - |
ILLUSTRATION
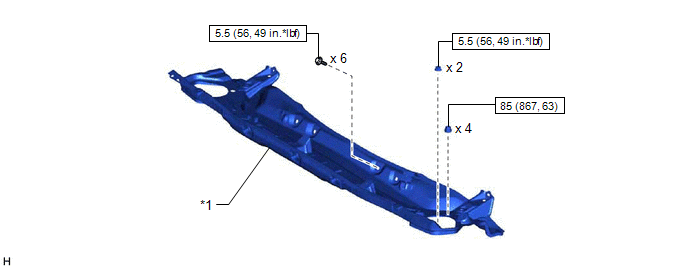
| *1 | OUTER COWL TOP PANEL SUB-ASSEMBLY | - | - |
.png) | N*m (kgf*cm, ft.*lbf): Specified torque | - | - |
ILLUSTRATION
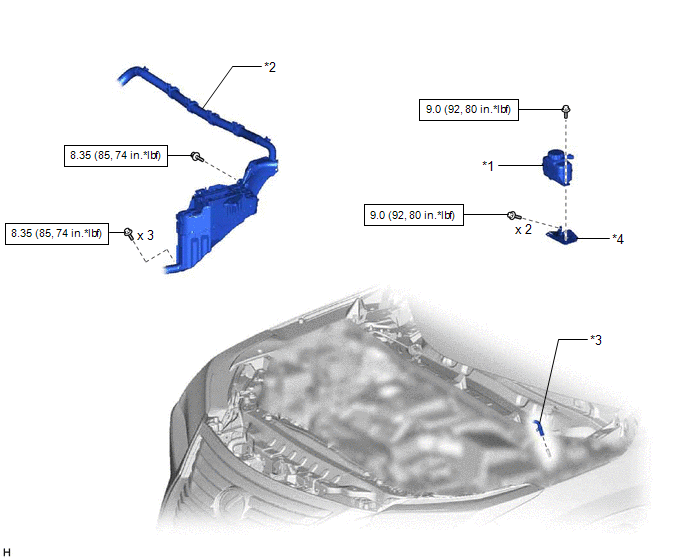
| *1 | BRAKE MASTER CYLINDER RESERVOIR ASSEMBLY | *2 | ENGINE ROOM MAIN WIRE |
| *3 | FUEL VAPOR FEED HOSE ASSEMBLY | *4 | RESERVOIR BRACKET |
| | N*m (kgf*cm, ft.*lbf): Specified torque | - | - |
ILLUSTRATION
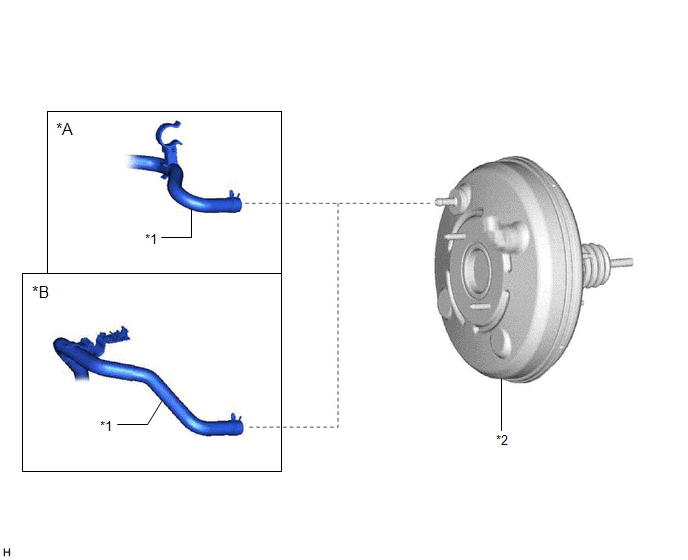
| *A | w/o Rear Air Conditioning System | *B | w/ Rear Air Conditioning System |
| *1 | UNION TO CHECK VALVE HOSE | *2 | BRAKE BOOSTER ASSEMBLY |
ILLUSTRATION
| *A | w/ Rear Air Conditioning System | - | - |
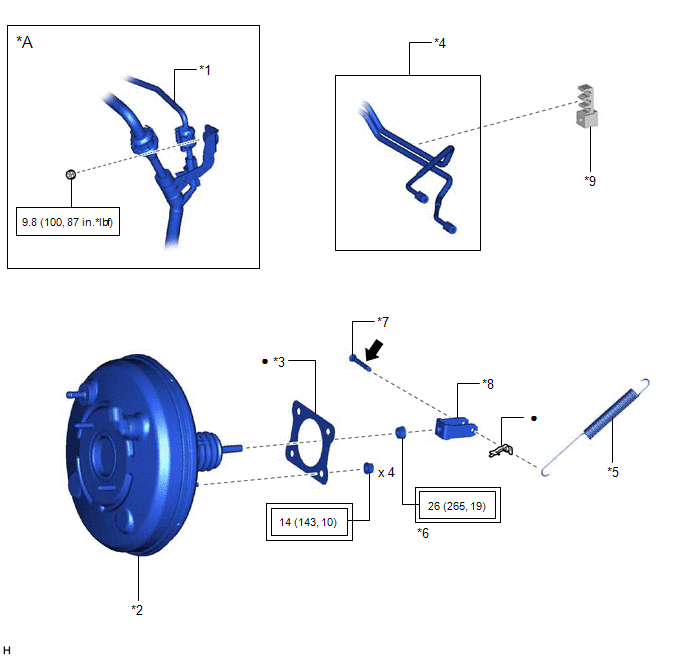
| *1 | AIR CONDITIONING HOSE AND ACCESSORY | *2 | BRAKE BOOSTER ASSEMBLY |
| *3 | BRAKE BOOSTER GASKET | *4 | BRAKE LINE |
| *5 | BRAKE PEDAL RETURN SPRING | *6 | LOCK NUT |
| *7 | PUSH ROD PIN | *8 | BRAKE MASTER CYLINDER PUSH ROD CLEVIS |
| *9 | BRAKE TUBE CLAMP | - | - |
.png) | Tightening torque for "Major areas involving basic vehicle performance such as moving/turning/stopping" : N*m (kgf*cm, ft.*lbf) | | N*m (kgf*cm, ft.*lbf): Specified torque |
| ● | Non-reusable part | .png) | Lithium soap base glycol grease |
ILLUSTRATION
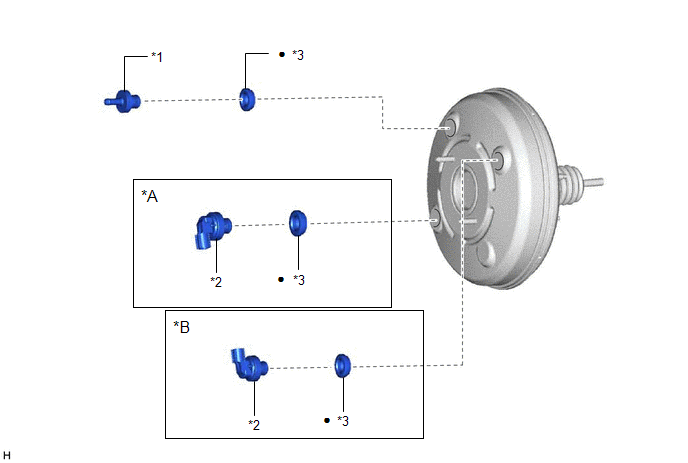
| *A | for TMMC Made | *B | for TMC Made |
| *1 | BRAKE VACUUM CHECK VALVE ASSEMBLY | *2 | VACUUM WARNING SWITCH ASSEMBLY |
| *3 | CHECK VALVE GROMMET | - | - |
| ● | Non-reusable part | - | - |
 Brake Booster
...
 On-vehicle Inspection
ON-VEHICLE INSPECTION PROCEDURE 1. INSPECT BRAKE BOOSTER ASSEMBLY (a) Airtightness check (1) Start the engine and stop it after 1 or 2 minutes. Slowly depress the brake pedal several times. If the ...
Other materials:
Lexus RX (RX 350L, RX450h) 2016-2026 Repair Manual > Engine Unit: Reassembly
REASSEMBLY PROCEDURE 1. INSTALL WATER INLET PIPE (a) Install the water inlet pipe with the 2 bolts. Torque: 10 N·m {102 kgf·cm, 7 ft·lbf} *A w/o Oil Cooler *B w/ Oil Cooler 2. INSTALL NO. 2 CYLINDER HEAD GASKET Click here 3. INSTALL CYLINDER HEAD LH (a) Place ...
Lexus RX (RX 350L, RX450h) 2016-2026 Repair Manual > Immobiliser System: Terminals Of Ecu
TERMINALS OF ECU CHECK ENGINE SWITCH (a) Measure the voltage and resistance according to the value(s) in the table below. Terminal No. (Symbol) Input/Output Wiring Color Terminal Description Condition Specified Condition Related Data List Item/DTC J14-6 (AGND) - Body ground - ...
Lexus RX (RX 350L, RX450h) 2016-{YEAR} Owners Manual
- For your information
- Pictorial index
- For safety and security
- Instrument cluster
- Operation of each component
- Driving
- Lexus Display Audio system
- Interior features
- Maintenance and care
- When trouble arises
- Vehicle specifications
- For owners
Lexus RX (RX 350L, RX450h) 2016-{YEAR} Repair Manual

0.0084