
Lexus RX (RX 350L, RX450h) 2016-2026 Repair Manual: Components
COMPONENTS
ILLUSTRATION
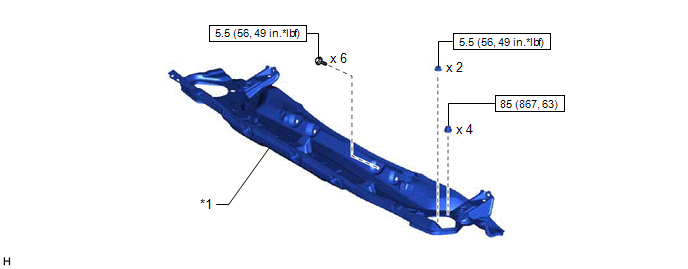
| *1 | OUTER COWL TOP PANEL SUB-ASSEMBLY | - | - |
.png) | N*m (kgf*cm, ft.*lbf): Specified torque | - | - |
ILLUSTRATION
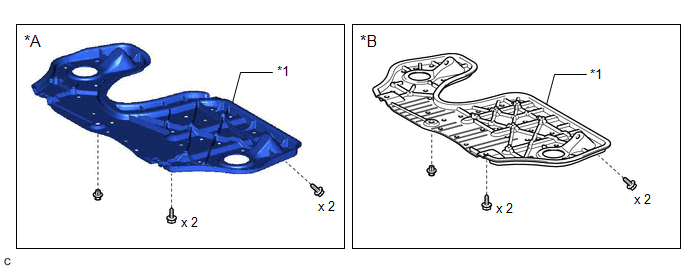
| *A | for TMC Made | *B | for TMMC Made |
| *1 | NO. 2 ENGINE UNDER COVER | - | - |
ILLUSTRATION
.png)
| *1 | BATTERY | *2 | INLET AIR CLEANER ASSEMBLY |
| *3 | BATTERY CLAMP SUB-ASSEMBLY | *4 | BATTERY TRAY |
| *5 | BATTERY CLAMP BOLT | *6 | BATTERY NEGATIVE TERMINAL |
| *7 | BATTERY POSITIVE TERMINAL | *8 | BATTERY INSULATOR |
.png) | Tightening torque for "Major areas involving basic vehicle performance such as moving/turning/stopping": N*m (kgf*cm, ft.*lbf) | | N*m (kgf*cm, ft.*lbf): Specified torque |
ILLUSTRATION
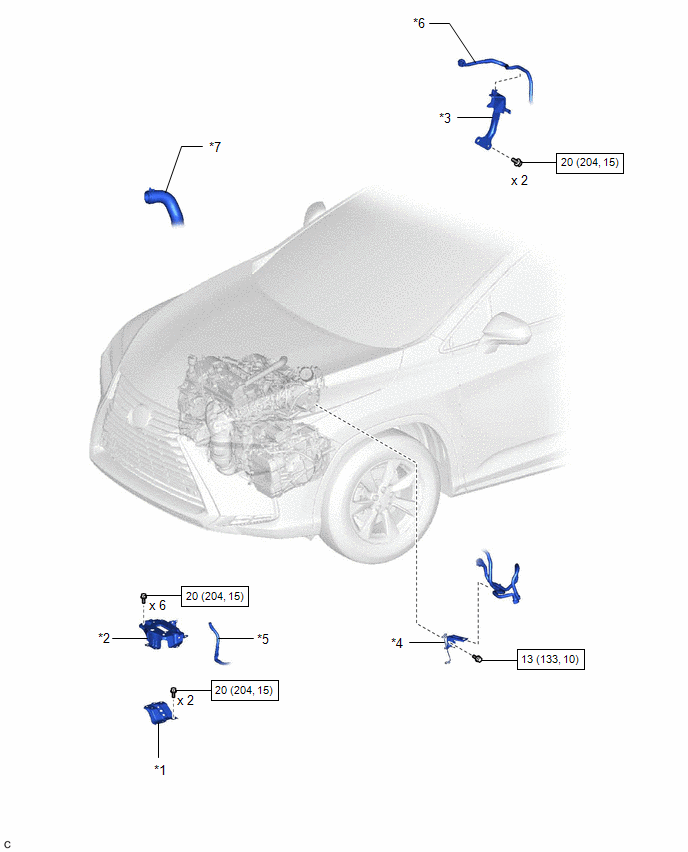
| *1 | BATTERY BRACKET REINFORCEMENT | *2 | BATTERY CARRIER SUB-ASSEMBLY |
| *3 | FUEL PUMP PROTECTOR | *4 | WIRE HARNESS CLAMP BRACKET |
| *5 | ENGINE WIRE | *6 | FUEL TUBE SUB-ASSEMBLY |
| *7 | NO. 1 RADIATOR HOSE | - | - |
| | N*m (kgf*cm, ft.*lbf): Specified torque | - | - |
ILLUSTRATION
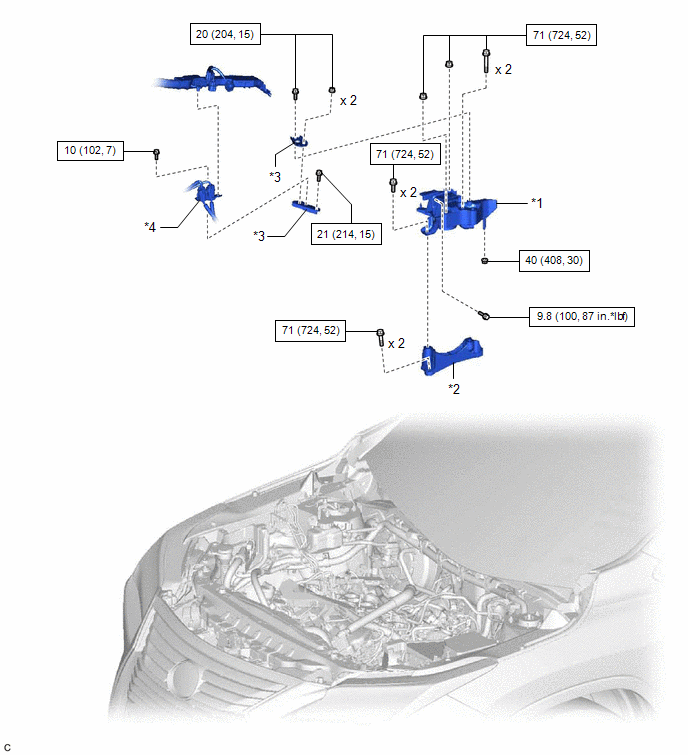
| *1 | ENGINE MOUNTING INSULATOR SUB-ASSEMBLY RH | *2 | ENGINE MOUNTING SPACER |
| *3 | NO. 2 ENGINE MOUNTING STAY RH | *4 | WIRE HARNESS CLAMP BRACKET |
| | N*m (kgf*cm, ft.*lbf): Specified torque | - | - |
ILLUSTRATION
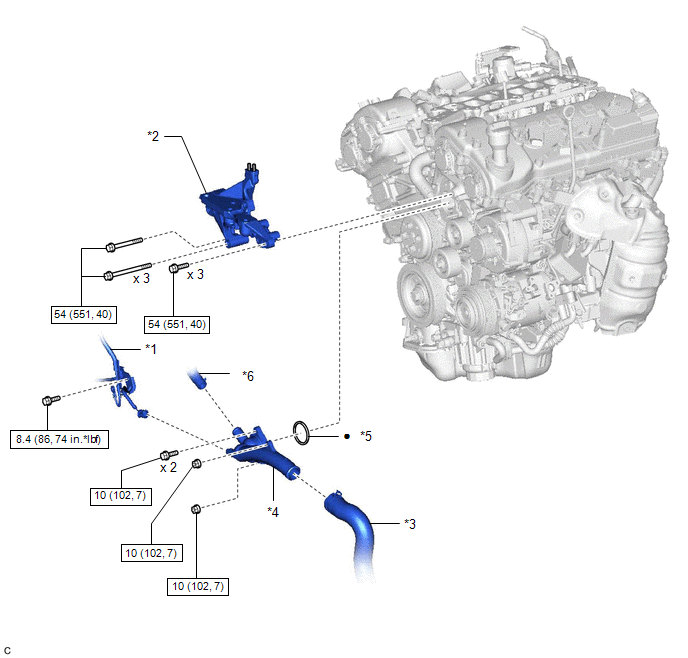
| *1 | ENGINE WIRE | *2 | FRONT NO. 1 ENGINE MOUNTING BRACKET LH |
| *3 | NO. 2 RADIATOR HOSE | *4 | WATER INLET WITH THERMOSTAT SUB-ASSEMBLY |
| *5 | GASKET | *6 | WATER BY-PASS HOSE |
| | N*m (kgf*cm, ft.*lbf): Specified torque | ● | Non-reusable part |
 Thermostat
...
 Inspection
INSPECTION PROCEDURE 1. INSPECT WATER INLET WITH THERMOSTAT SUB-ASSEMBLY (a) Check the valve opening. HINT: The valve opening temperature is inscribed on the water inlet with thermostat sub-assembly. ...
Other materials:
Lexus RX (RX 350L, RX450h) 2016-2026 Repair Manual > Compressor: Removal
REMOVAL CAUTION / NOTICE / HINT The necessary procedures (adjustment, calibration, initialization, or registration) that must be performed after parts are removed and installed, or replaced during compressor removal/installation are shown below. Necessary Procedure After Parts Removed/Installed/Repl ...
Lexus RX (RX 350L, RX450h) 2016-2026 Repair Manual > Name Plate: Installation
INSTALLATION CAUTION / NOTICE / HINT HINT: When installing the name plates, heat the vehicle body and name plates using a heat light. Heating Temperature Item Temperature Vehicle Body 40 to 60°C (104 to 140°F) Name Plate 20 to 30°C (68 to 86°F) CAUTION:
Do not touch the he ...
Lexus RX (RX 350L, RX450h) 2016-{YEAR} Owners Manual
- For your information
- Pictorial index
- For safety and security
- Instrument cluster
- Operation of each component
- Driving
- Lexus Display Audio system
- Interior features
- Maintenance and care
- When trouble arises
- Vehicle specifications
- For owners
Lexus RX (RX 350L, RX450h) 2016-{YEAR} Repair Manual

0.0098