Lexus RX (RX 350L, RX450h) 2016-2026 Repair Manual: Adjustment
ADJUSTMENT
CAUTION / NOTICE / HINT
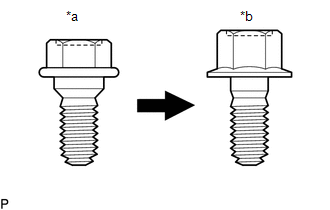
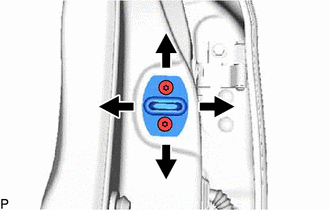
| *a | Centering Bolt |
| *b | Standard Bolt |
HINT:
- Use the same procedure for the RH side and LH side.
- The following procedure is for the LH side.
- Centering bolts are used to install the door hinges to the vehicle body and door. The door cannot be adjusted with the centering bolts installed. Substitute the centering bolts with standard bolts when making adjustments.
-
The specified torque for standard bolts is shown in the standard bolt chart.
Click here
.gif)
PROCEDURE
1. INSPECT FRONT DOOR
(a) Check that the clearance measurements of areas a through l are within each standard range.
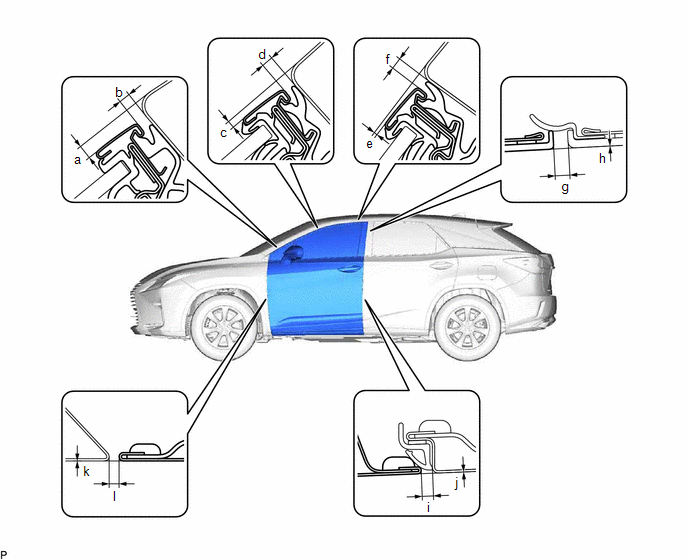 Standard Clearance
 | Area | Measurement | Area | Measurement |
|---|---|---|---|
| a | 3.6 to 6.6 mm (0.142 to 0.26 in.) | b | 4.4 to 7.4 mm (0.173 to 0.291 in.) |
| c | 0.9 to 3.9 mm (0.0354 to 0.154 in.) | d | 3.5 to 6.5 mm (0.138 to 0.256 in.) |
| e | -0.1 to 2.9 mm (-0.00394 to 0.114 in.) | f | 3.5 to 6.5 mm (0.138 to 0.256 in.) |
| g | 2.1 to 6.1 mm (0.0827 to 0.240 in.) | h | -2.0 to 2.0 mm (-0.0787 to 0.0787 in.) |
| i | 2.3 to 4.7 mm (0.0906 to 0.185 in.) | j | -1.2 to 1.2 mm (-0.0472 to 0.0472 in.) |
| k | -1.5 to 1.5 mm (-0.0591 to 0.0591 in.) | l | 2.0 to 5.0 mm (0.0787 to 0.197 in.) |
2. ADJUST FRONT DOOR
NOTICE:
Make sure to turn the ignition switch off when adjusting door lock strikers.
| (a) Using SST, loosen the 2 hinge bolts on the vehicle body and adjust the door position. SST: 09812-00020 |
|
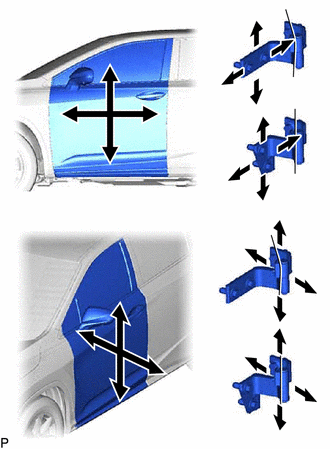
(b) Tighten the 4 hinge bolts on the vehicle body after adjustment.
Torque:
32.5 N·m {331 kgf·cm, 24 ft·lbf}
(c) Loosen the 4 hinge bolts on the door and adjust the door position.
(d) Tighten the 4 hinge bolts on the door after adjustment.
Torque:
32.5 N·m {331 kgf·cm, 24 ft·lbf}
| (e) Disengage the 4 claws and remove the front door lock striker cover. |
|
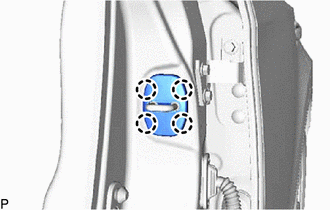
| (f) Using a T40 "TORX" socket wrench, slightly loosen the 2 striker mounting screws. |
|
(g) Using a brass bar and a hammer, hit the striker to adjust its position.
(h) Using a T40 "TORX" socket wrench, tighten the 2 striker mounting screws after adjustment.
Torque:
23 N·m {235 kgf·cm, 17 ft·lbf}
| (i) Engage the 4 claws to install the front door lock striker cover. |
|
 Inspection
INSPECTION PROCEDURE 1. INSPECT FRONT DOOR OUTSIDE HANDLE ASSEMBLY LH (a) Apply 6.0 V (4 dry cell batteries in series) to the front door outside handle assembly LH and check that the light comes on ...
 Disassembly
DISASSEMBLY CAUTION / NOTICE / HINT The necessary procedures (adjustment, calibration, initialization or registration) that must be performed after parts are removed and installed, or replaced during ...
Other materials:
Lexus RX (RX 350L, RX450h) 2016-2026 Repair Manual > Air Conditioning System: Air Mix Damper Control Servo Motor Circuit (Rear) (B1447/47)
DESCRIPTION The Rear No. 2 cooling unit damper servo sub-assembly sends pulse signals to inform the air conditioning amplifier assembly of the damper position. The air conditioning amplifier assembly activates the motor (normal or reverse) based on these signals to move the Rear No. 2 cooling unit d ...
Lexus RX (RX 350L, RX450h) 2016-2026 Repair Manual > Power Back Door System (w/ Outside Door Control Switch): Power Back Door cannot be Operated Using Any Switch
DESCRIPTION If the power back door system cannot be operated using any switch, the multiplex network door ECU may not have been initialized, or there may be a malfunction in the power back door sensor assembly circuit, CAN communication system, back door closer, meter/gauge system, multiplex network ...
Lexus RX (RX 350L, RX450h) 2016-{YEAR} Owners Manual
- For your information
- Pictorial index
- For safety and security
- Instrument cluster
- Operation of each component
- Driving
- Lexus Display Audio system
- Interior features
- Maintenance and care
- When trouble arises
- Vehicle specifications
- For owners
Lexus RX (RX 350L, RX450h) 2016-{YEAR} Repair Manual

0.0102