Lexus RX (RX 350L, RX450h) 2016-2026 Repair Manual: Disassembly
DISASSEMBLY
CAUTION / NOTICE / HINT
HINT:
- Use the same procedure for the RH side and LH side.
- The following procedure is for the LH side.
PROCEDURE
1. REMOVE BACK-UP LIGHT BULB (for Bulb Type Turn Signal Light)
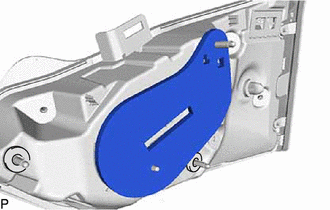
(a) Turn the rear light socket and wire with the back-up light bulb as shown in the illustration to disconnect them as a unit.
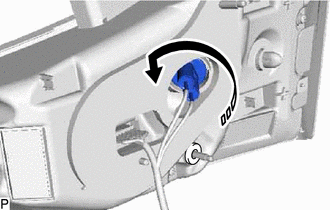
.png) | Remove in this Direction |
(b) Remove the back-up light bulb from the rear light socket and wire.
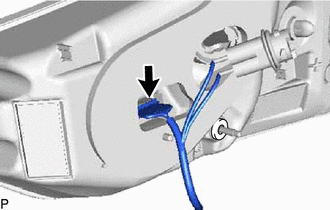
2. REMOVE REAR LIGHT SOCKET AND WIRE
(a) for Bulb Type Turn Signal Light:
| (1) Disconnect the connector to remove the rear light socket and wire. |
|
(b) for LED Type Turn Signal Light:
| (1) Disconnect the connector to remove the rear light socket and wire. |
|
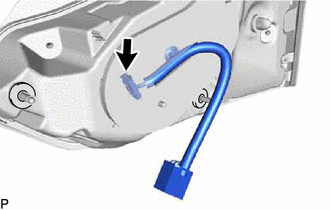
3. REMOVE REAR LIGHT GASKET
(a) for Bulb Type Turn Signal Light:
| (1) Remove the rear light gasket. NOTICE:
|
|
(b) for LED Type Turn Signal Light:
| (1) Remove the rear light gasket. NOTICE:
|
|
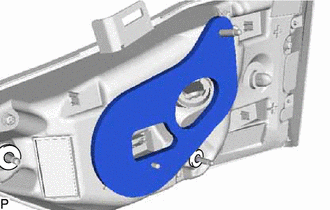
4. REMOVE LICENSE PLATE LIGHT SHADE
(a) for Bulb Type Turn Signal Light:
| (1) Remove the 2 license plate light shades. NOTICE:
|
|
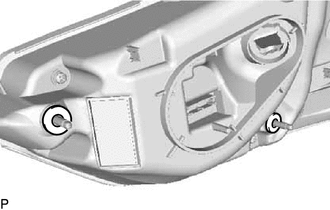
(b) for LED Type Turn Signal Light:
| (1) Remove the 2 license plate light shades. NOTICE:
|
|

5. REMOVE REAR LIGHT LENS AND BODY (for Bulb Type Turn Signal Light)
 Removal
REMOVAL CAUTION / NOTICE / HINT HINT:
Use the same procedure for the RH side and LH side.
The following procedure is for the LH side.
PROCEDURE 1. REMOVE BACK DOOR OUTSIDE GARNISH SUB-ASSEMBLY ...
 Inspection
INSPECTION PROCEDURE 1. INSPECT REAR LIGHT ASSEMBLY LH (a) Apply battery voltage to the rear light assembly LH and check that the lights come on. OK: Condition Specified Condition Battery ...
Other materials:
Lexus RX (RX 350L, RX450h) 2016-2026 Repair Manual > Air Conditioning System: Air Conditioning Control Panel Circuit
DESCRIPTION The radio receiver assembly (A/C control panel) switch signals are sent to the air conditioning amplifier assembly via CAN communication. WIRING DIAGRAM CAUTION / NOTICE / HINT NOTICE: Inspect the fuses for circuits related to this system before performing the following procedure. PROCE ...
Lexus RX (RX 350L, RX450h) 2016-2026 Repair Manual > Navigation System: Microphone Circuit
DESCRIPTION
The radio receiver assembly and telephone microphone assembly are connected to each other using the microphone connection detection signal lines.
Using this circuit, the DCM (telematics transceiver) sends power to the telephone microphone assembly, and the telephone microphone assem ...
Lexus RX (RX 350L, RX450h) 2016-{YEAR} Owners Manual
- For your information
- Pictorial index
- For safety and security
- Instrument cluster
- Operation of each component
- Driving
- Lexus Display Audio system
- Interior features
- Maintenance and care
- When trouble arises
- Vehicle specifications
- For owners
Lexus RX (RX 350L, RX450h) 2016-{YEAR} Repair Manual

0.0104